6 Aruba Instant On AP11D Access Point | Installation Guide
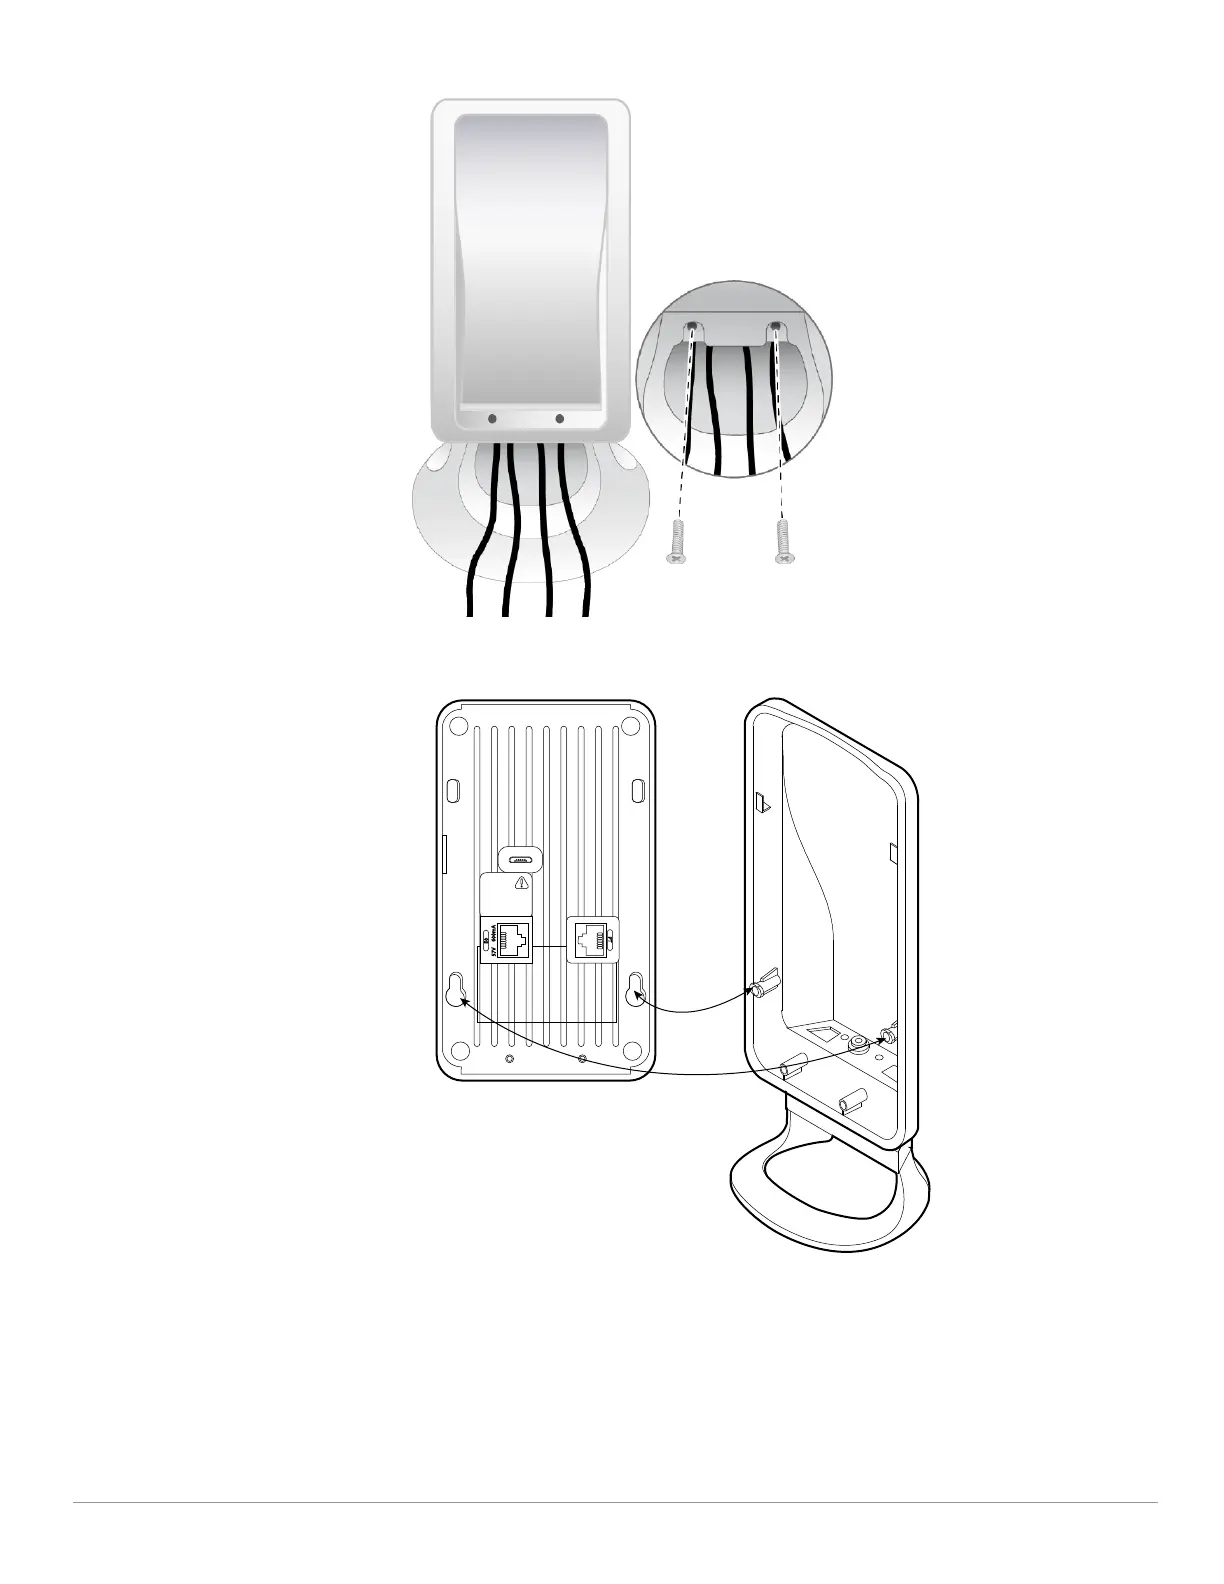
Figure 5 Removing Screws
2. Push the AP11D up to release its slots (See Figure 6) from the posts of the desk mount cover.
Figure 6 Slots on the AP11D Back Panel
3. Remove the Ethernet jumper cable if necessary.
4. Removing the existing data wall plate (if applicable).
5. Remove any existing RJ45 connectors (typically snap-in) or cut the UTP cable.
6. Use the Ethernet cable to connect the E0 port to an RJ45 connector or crimp an RJ45 plug (not supplied) on
the cable and insert in the E0 port.
7. Align the mount bracket’s mounting holes with the mounting holes on the wall box, as shown in Figure 7 and
Figure 8.
The applicable standards for the wall boxes are:
 Loading...