4
Installing the Transceiver Module
Small form factor transceiver modules (including SFP, SFP+, and SFP28 modules) plug into the SFP
cage of a Silver Peak chassis. The installation process is identical for SFP, SFP+ and SFP28 modules.
CAUTION: Observe electrostatic discharge (ESD) precautions when handling transceiver
modules. Always wear a wrist strap that connects to an approved grounding source when
installing or handling the modules.
CAUTION: To prevent damage to a transceiver module and to any connected cables,
disconnect all cables before installing or removing a module.
IMPORTANT: SFP, SFP+ and SFP28 modules are hot-pluggable devices. There is no need
to power down the appliance when installing or removing a module.
To install a transceiver module into an SFP cage, perform the following procedure.
IMPORTANT: (SFP+ and SFP28 modules) Do not remove the dust cap from the optical
module until directed to do so in the following procedure. In addition, always keep the dust
caps on the fibe
-optic cable connectors until ready to make a connection.
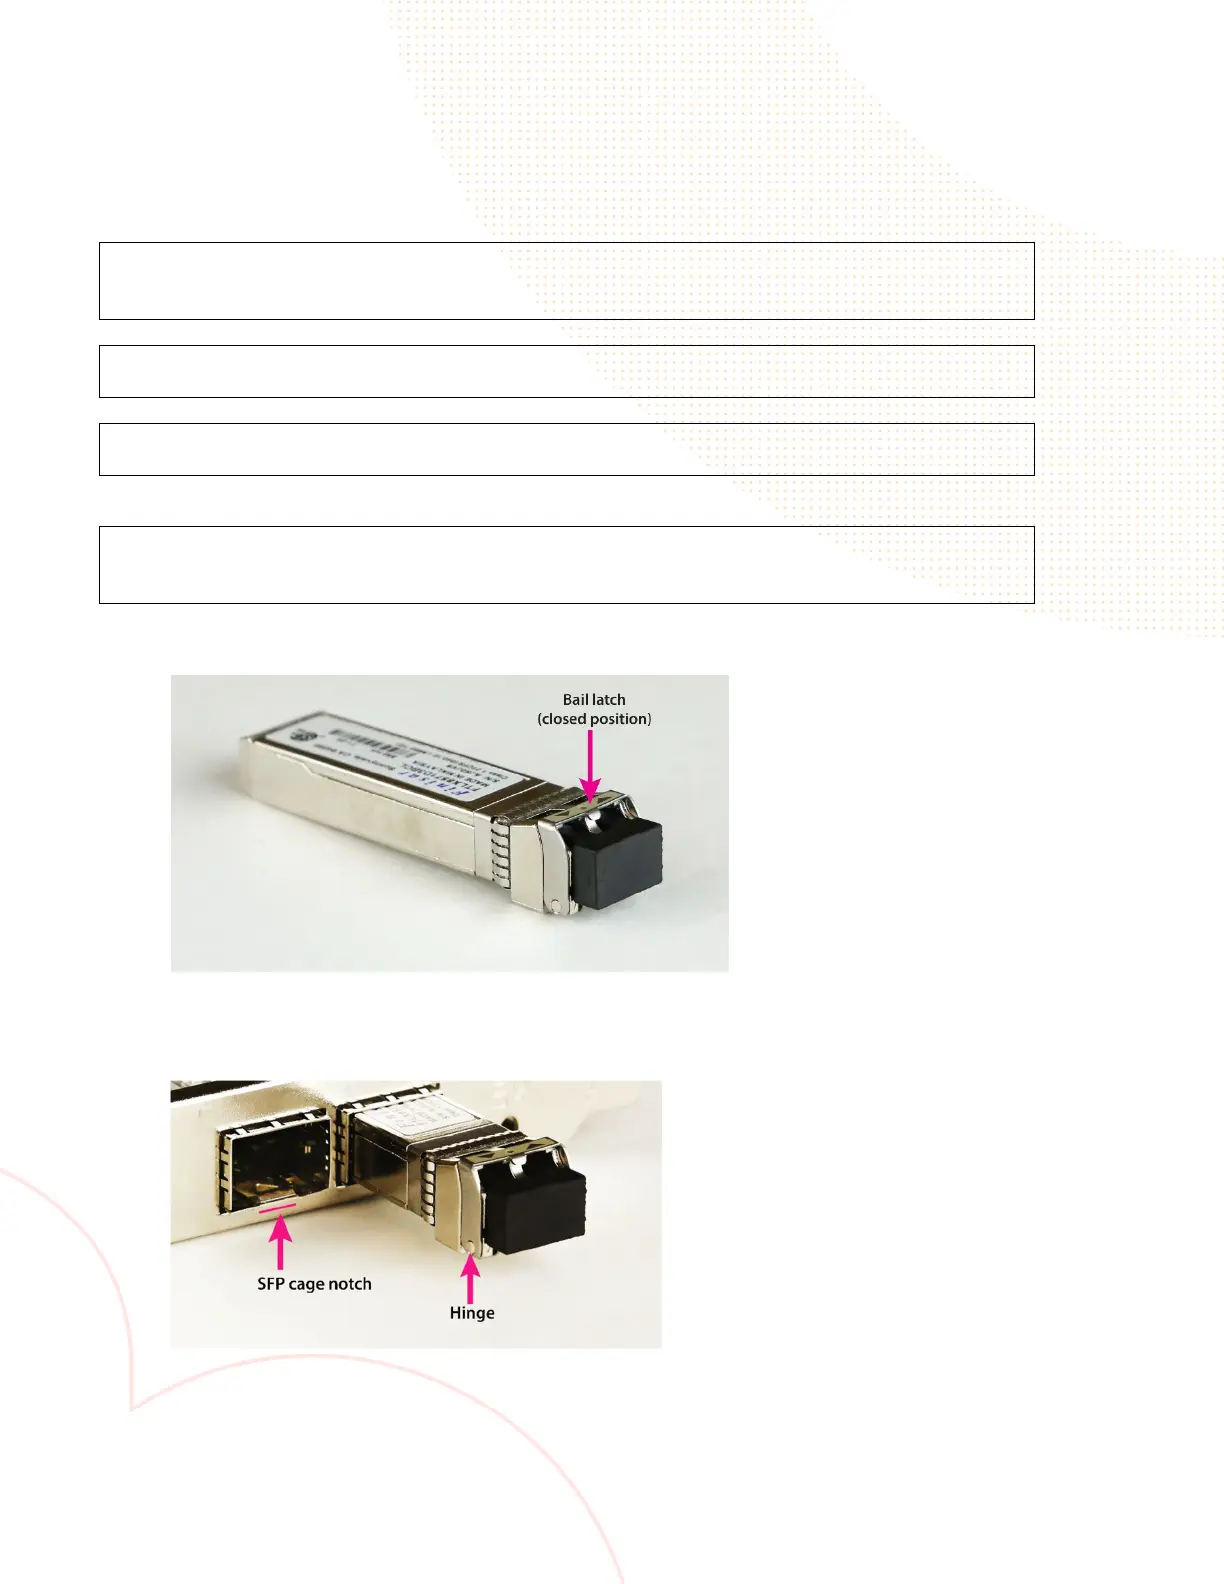
1. Verify that the bail latch is closed.
2. Verifying that the cage notch and hinge are along the same edge, insert the module into the cage
until the module latches into place. The module is fully seated when you hear a click.
3. (SFP+ and SFP28 modules) At one end of the fiber-optic cable, remove the dust caps from the
LC connectors. Save the dust caps for future use.