Do you have a question about the ASAHI Pentax KX and is the answer not in the manual?
Controls film advance for the next shot.
Selects the exposure time for the shutter.
Activates the shutter mechanism.
Indicates the number of exposures taken.
Signals that the shutter is ready to fire.
Used to rewind exposed film back into the cassette.
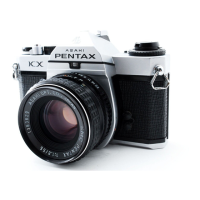
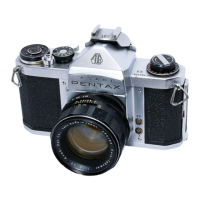
35mm SLR with built-in through-the-lens light meter.
Horizontal run focal-plane shutter with speeds from B to 1/1000 sec.
Pentaprism finder with cross-microprism or split-image focusing.
Pentax bayonet-mount system.
896g with 50mm f/1.4 lens; 631g without lens.
Align red dots, insert lens, turn clockwise until click.
Depress release lever, turn lens counter-clockwise.
Open chamber, insert two silver oxide batteries with (+) side up.
Push check button; meter needle should indicate sufficient capacity.
Align ASA number on film speed indicator.
Move lever fully until "Cocked" indicator turns red.
Align desired speed with index mark in viewfinder.
View subject through finder, turn focusing ring.
Hold camera firmly, trip shutter, then cock lever.
Open back, place cassette, insert leader into spool, advance film.
Ensure rewind knob turns counter-clockwise.
Image sharp in center when in focus, broken dots when not.
Vertical lines align when in focus, divided when not.
Turn dial; use index mark and viewfinder needle.
Shutter stays open while button is pressed; lock feature available.
Hold firmly with left hand, arms close to body.
Use forehead for support, draw arms close to body.
FP and X terminals for flash cord connection.
For shoe-mount electronic flash, auto-switches to "hot".
M, MF, FP types; use correct terminal and shutter speed.
Range of distances in focus at a given aperture.
Calibrations on lens indicate in-focus range for apertures.
Lists focal depth at various distances and apertures.
Meter reads average light, slightly weighted to center.
Adjust aperture 1-2 steps for subject/background light differences.
Match blue and black needles in viewfinder for correct exposure.
Set aperture first, then adjust shutter speed.
Set shutter speed first, then adjust aperture.
Required to mount screw-mount lenses; affects automatic diaphragm.
Screw lens into adaptor, align dots, attach unit to camera.
Remove lens first, then press spring pin and turn adaptor counter-clockwise.
Lenses with diaphragm coupling lever for open-aperture metering.
Lenses without coupling lever, or with accessories, require stop-down metering.
Use blower, brush, lens tissue; avoid scratching dirt.
Never touch mirror or shutter curtain with hands.
Prevent drops, knocks, and water exposure.
Store in cool, dry, clean, ventilated place; avoid humidity.
Return to dealer or manufacturer; keep receipts.
Fees may apply for service outside country of purchase.
| Type | 35mm SLR |
|---|---|
| Film Format | 35mm |
| Lens Mount | K mount |
| Shutter | Focal-plane shutter |
| Shutter Speed | 1/1000 to 1 sec, Bulb |
| Exposure Metering | TTL center-weighted average |
| Viewfinder | Pentamirror |
| Film Advance | Lever advance |
| Film Rewind | Crank |
| Flash Synchronization | 1/60 sec |
| Battery | 2x LR44 |
| Focusing Screen | Split image spot with microprism collar |