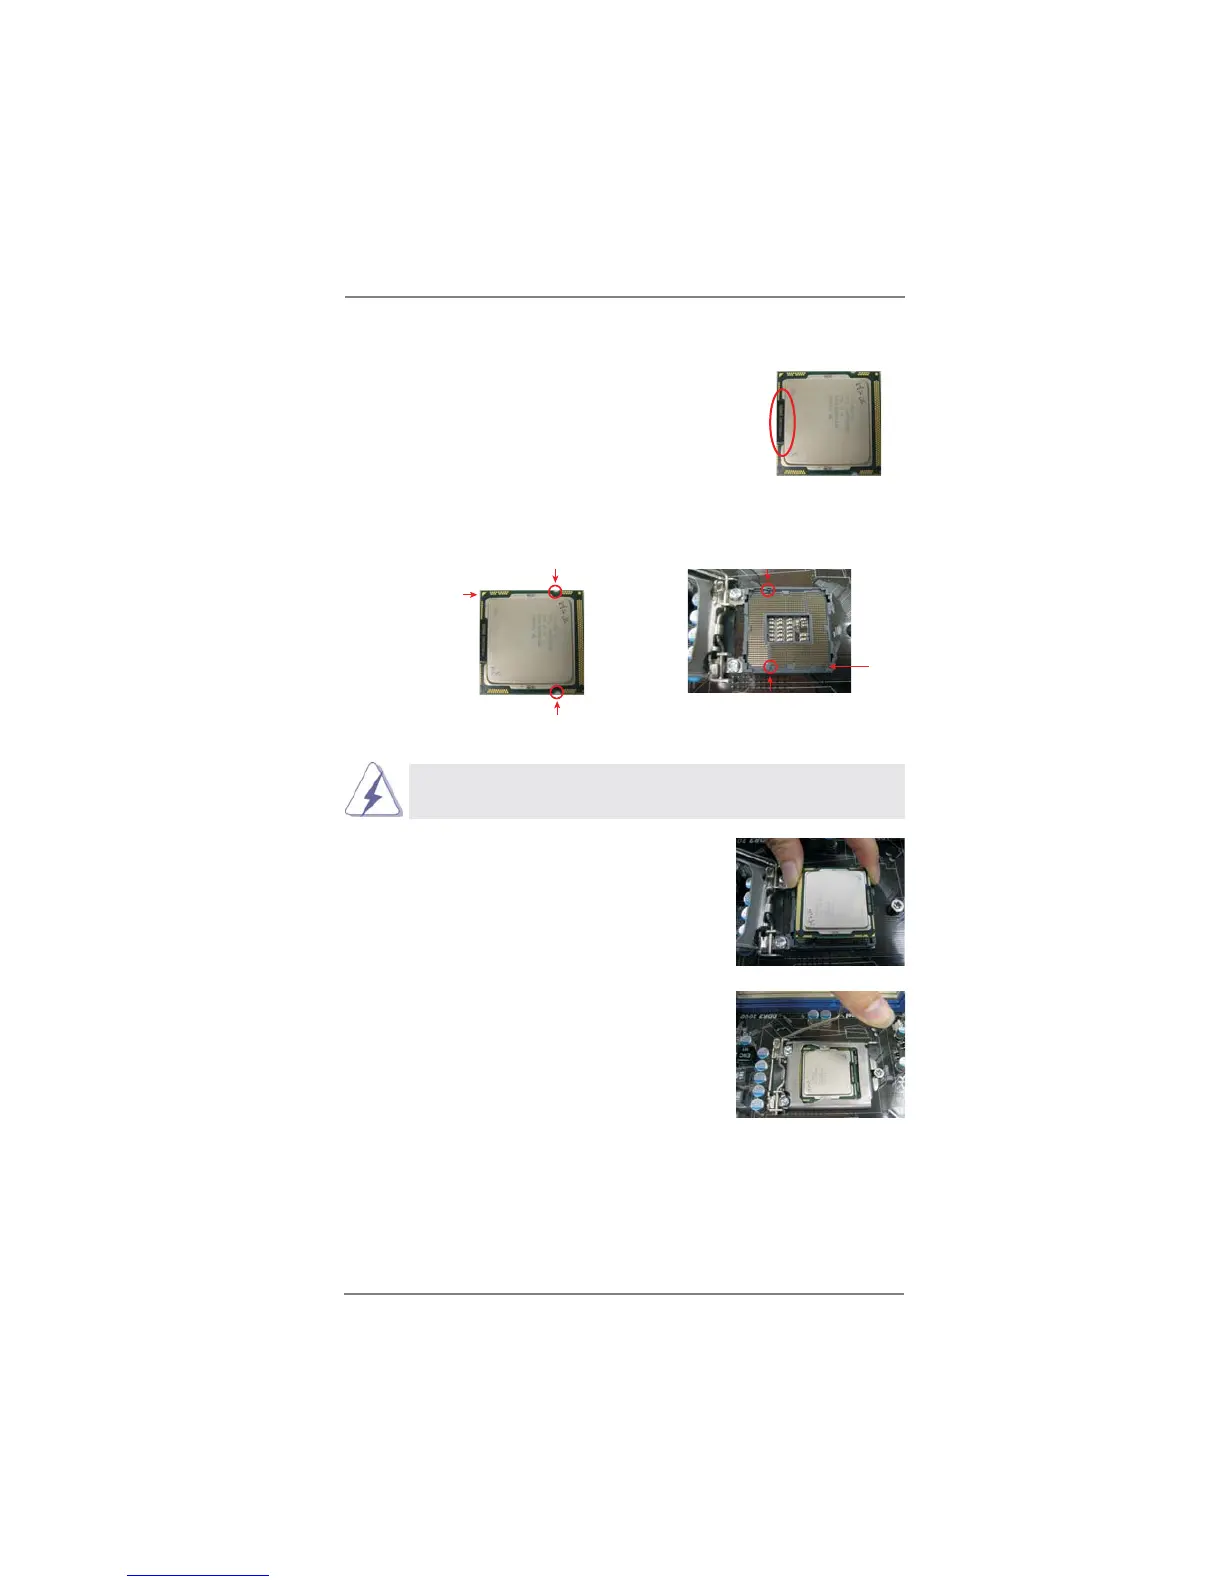
EasyManuals Logo

ASROCK H61M-VS R2.0 User Manual

ASROCK H61M-VS R2.0
53 pages
To Next Page IconTo Next Page
To Previous Page IconTo Previous Page
Page #16 background imageLoading...
Page #16 background image
16
Pin1
alignment key
alignment key
Pin1
1155-Pin CPU
1155-Pin Socket
Step 3. Insert the 1155-Pin CPU:
Step 3-1. Hold the CPU by the edge where is
marked with black line.
Step 3-2. Orient the CPU with IHS (Integrated
Heat Sink) up. Locate Pin1 and the
two orientation key notches.
For proper inserting, please ensure to match the two orientation key
notches of the CPU with the two alignment keys of the socket.
Step 3-3. Carefully place the CPU into the
socket by using a purely vertical mo-
tion.
Step 3-4. Verify that the CPU is within the sock-
et and properly mated to the orient
keys.
Step 4. Close the socket:
Step 4-1. Rotate the load plate onto the IHS.
Step 4-2. While pressing down lightly on load
plate, engage the load lever.
orientation key notch
black line

Table of Contents

Other manuals for ASROCK H61M-VS R2.0

Questions and Answers:

Question and Answer IconNeed help?

Do you have a question about the ASROCK H61M-VS R2.0 and is the answer not in the manual?

ASROCK H61M-VS R2.0 Specifications

General IconGeneral
ChipsetIntel H61
CPU SocketLGA 1155
Maximum Memory16GB
Storage Interface4 x SATA 3Gb/s
LANRealtek RTL8111E Gigabit LAN
Form FactorMicro ATX
Video Outputs1 x D-Sub
Power Connector24-pin ATX, 4-pin ATX 12V
Memory Slots2 x DIMM
Memory StandardDDR3 1600/1333/1066
Expansion Slots1 x PCIe 2.0 x1
USB Ports8 x USB 2.0
AudioRealtek ALC662 5.1-Channel HD Audio

Related product manuals