2727
2727
27
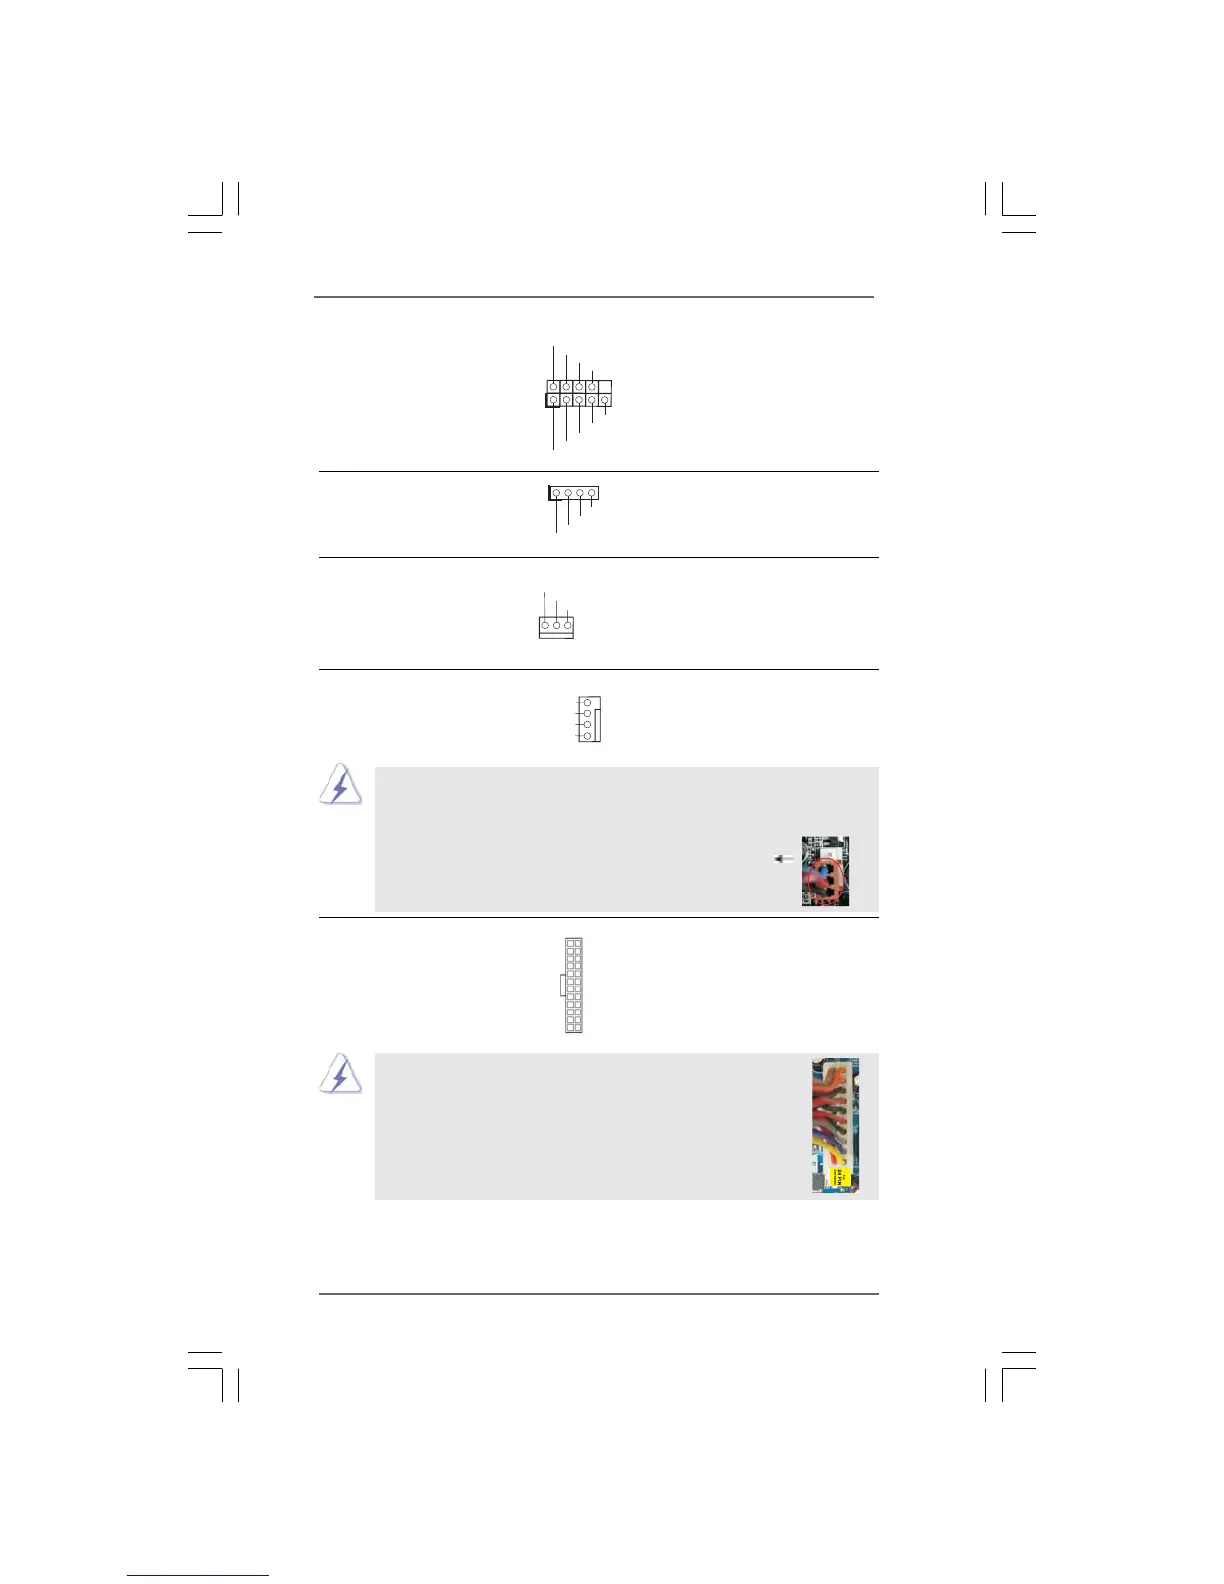
GND
PWRBTN#
PLED-
PLED+
DUMMY
RESET#
GND
HDLED+
HDLED-
1
+5 V
DUMMY
DUMMY
SPEAKER
1
Chassis Speaker Header Please connect the chassis
(4-pin SPEAKER 1) speaker to this header.
(see p.11/12 No. 20)
Chassis Fan Connector Please connect a chassis fan
(3-pin CHA_FAN1) cable to this connector and
(see p.11/12 No. 22) match the black wire to the
ground pin.
CPU Fan Connector Please connect a CPU fan cable
(4-pin CPU_FAN1) to this connector and match
(see p.11/12 No. 2) the black wire to the ground pin.
Though this motherboard provides 4-Pin CPU fan (Quiet Fan) support, the 3-Pin
CPU fan still can work successfully even without the fan speed control function.
If you plan to connect the 3-Pin CPU fan to the CPU fan connector on this
motherboard, please connect it to Pin 1-3.
3-Pin Fan Installation
Pin 1-3 Connected
System Panel Header This header accommodates
(9-pin PANEL1) several system front panel
(see p.11/12 No. 17) functions.
ATX Power Connector Please connect an ATX power
(24-pin ATXPWR1) supply to this connector.
(see p.11, No. 38 or or p.12 No. 37)
Though this motherboard provides 24-pin ATX power connector,
it can still work if you adopt a traditional 20-pin ATX power supply.
To use the 20-pin ATX power supply, please plug your
power supply along with Pin 1 and Pin 13.
13
24
1
12
13
24
1
12
4
3
2
1
GND
+12V
CPU_FAN_SPEED
FAN_SPEED_CONTROL
GND
+12V
CHA_FAN_SPEED
20-Pin ATX Power Supply Installation



 To Next Page