EasyManua.ls Logo

Assault Fitness Products Assault Airbike User Manual

Assault Fitness Products Assault Airbike
4 pages
To Next Page IconTo Next Page
Page #1 background imageLoading...
Page #1 background image
LifeCore Fitness Inc. | 5803 Newton Dr. Suite B. | Carlsbad, CA 92008
Phone: 760-599-4555 Toll Free: 888-815-5559 Fax: 760-599-4554
INSTRUCTIONAL VIDEOS FOR THE ASSAULT AIRBIKE
Any questions, please contact Garrett Reder at 760-481-5555.
TOOLS NEEDED FOR ASSEMBLY (Please use tools other than what comes with the bike):
22mm Wrench
15mm Wrench
13mm Wrench
6mm Allen Key
8mm Allen Key
22mm Socket
½ inch driver
½ extension
ASSEMBLY VIDEO:
https://www.youtube.com/watch?v=rwyQD2ih6M0
(Please note that this is correct, except shows old linkage arms)
Updates for 2015-2016
o New Spherical Bearing Linkage Arms
o Hardware is already installed on Frame (No parts bag)
TIGHTEN HANDLEBARS AND PEGS VERY IMPORTANT
Tighten the Right and Left Handlebar Assemblies
Pivot to the main frame by rotating the 22mm open
ended wrench in a clockwise direction.
Loosen the Peg Fixing Nut from the Handlebar
Assembly Pivot with 22mm socket wrench, rotating
in a counter-clockwise direction.
Tighten the Peg by inserting a long screwdriver
through the holes near the end of the peg and
tighten firmly in a clockwise direction.
Re-tighten the Peg Fixing Nut with the 22mm socket
wrench by rotating in a clockwise direction.
Handlebar Pivot Assembly
Tool: 22 mm Open End Wrench
Foot Peg
Tool: 22 mm Socket Wrench
Question and Answer IconNeed help?

Do you have a question about the Assault Fitness Products Assault Airbike and is the answer not in the manual?
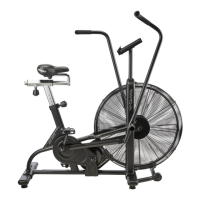
Assault Fitness Products Assault Airbike Specifications

General IconGeneral
TypeAirbike
ResistanceAir resistance
DisplayLCD
Max User Weight350 lbs
Drive SystemChain
Display MetricsTime, Distance, Calories, RPM, Watts
SeatAdjustable
HandlebarsMoving handlebars
Warranty2 year warranty
FeaturesAdjustable seat, Transport wheels

Summary

Tools Needed for Assembly

Tighten Handlebars and Pegs

Handlebar Assembly Maintenance

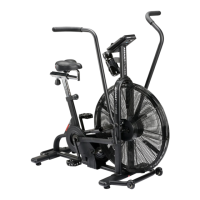
Tighten handlebar assemblies to the main frame using a 22mm open-ended wrench clockwise.

Tighten Linkage Arms

Linkage Arm Connection Maintenance

Tighten forward linkage pivot with 6mm hex & 13mm wrench, holding pivot pin.

Tighten Crank Bolts and Bell Crank Bolts

Crank and Bell Crank Bolt Maintenance

Tighten crank arm and bell crank fixing bolts with a long 8mm hex wrench.

Tighten Pedals

Pedal Maintenance

Tighten pedals with a 15mm wrench; right side clockwise, left side counter-clockwise.

Check Chain Tension and Tighten Axle Bolt

Chain Tension Maintenance

Check and adjust chain tension for both drive chains, aiming for 3-5mm flex.

Related product manuals