Do you have a question about the astreea Igloo Plus and is the answer not in the manual?
Provides an overview of the Astreea Igloo installation guide and safety considerations.
Details crucial safety precautions to follow during assembly and use of the Igloo.
Covers guidelines for assembly, maintenance, and proper usage of the Igloo.
Instructions for cleaning, storing, and responsibly disposing of the Igloo cover and components.
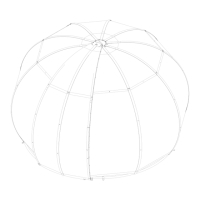
Position and fix the base rails, stop plate, and locking plate to form the Igloo's foundation.
Assemble vertical poles by joining upper and lower sections with frame rings and screws.
Mount the support plate onto the vertical pole using frame rings and specified screws.
Install the first vertical pole with its support plate onto the base rail.
Install the second vertical pole on the opposite side of the frame.
Attach all remaining vertical poles and secure the crown plate at the top.
Secure the frame to the ground using aluminum clamps and anchors.
Prepare and attach the first upper polycarbonate panel with D sealing.
Mount the first lower polycarbonate panel, aligning and fixing it with frame rings.
Install the second upper panel, ensuring overlap with the first upper panel.
Mount the rest of the polycarbonate panels in a counterclockwise direction.
Identify different frame and door strips by their lengths and part numbers for correct installation.
Fix the upper and lower frame strips to the frame rings, leaving screws untightened initially.
Mount the gutter panel under the polycarbonate disc and fix it to the crown plate.
Fix the upper part of the door side strips to the crown plate using screws and rubber spacers.
Secure the gutter panel and the left side door strip in their lower positions.
Mount the sliding door's upper poles between the upper and lower plates.
Attach the right lower pole to the upper assembly and mount the interior and exterior handles.
Connect the central lower pole to the upper assembly using frame rings and screws.
Connect the left lower pole to the upper assembly using door rings and screws.
Attach the base door rail to the lower poles and upper assembly.
Install the right and left PVC door sealing onto the door frame using screws.
Mount the upper panels of the sliding door and secure them in the upper section.
Align and fix the right lower door panels with the upper panel using screws.
Align and fix the left lower door panels with the upper panel using screws.
Mount the door upper strip onto the central upper pole using M8 washer and nut.
Attach the door lower strip to the frame, connecting it to the upper strip and lower frame rings.
Position the assembled door onto the Igloo's base rail, ensuring wheels are correctly placed.
Fix the door in the upper part to the central bolt assembly using screws.
Return the gutter panel to its position and secure it with screws, also fixing the right door strip.
Apply pre-cut protective strips to the edges of the lower door panels.
Install clothing racks and eye screws using M4x10 screws, and attach desired accessories.
Remove the sliding door by unscrewing the two M6x12 7380 screws.
Remove the lower strips by unscrewing the specified M6x16 and M6x12 screws.
Dismantle lower polycarbonate panels and the gutter panel, then secure upper panel screws.
Retighten the M6x16 7991 screws securing the lower part of the upper strips.
Untighten lower screws to fix the umbrella to the frame for all 10 poles.
| Brand | astreea |
|---|---|
| Model | Igloo Plus |
| Category | Patio Furniture |
| Language | English |