Notebook PC E-Manual
99
J. Get the new HDD.
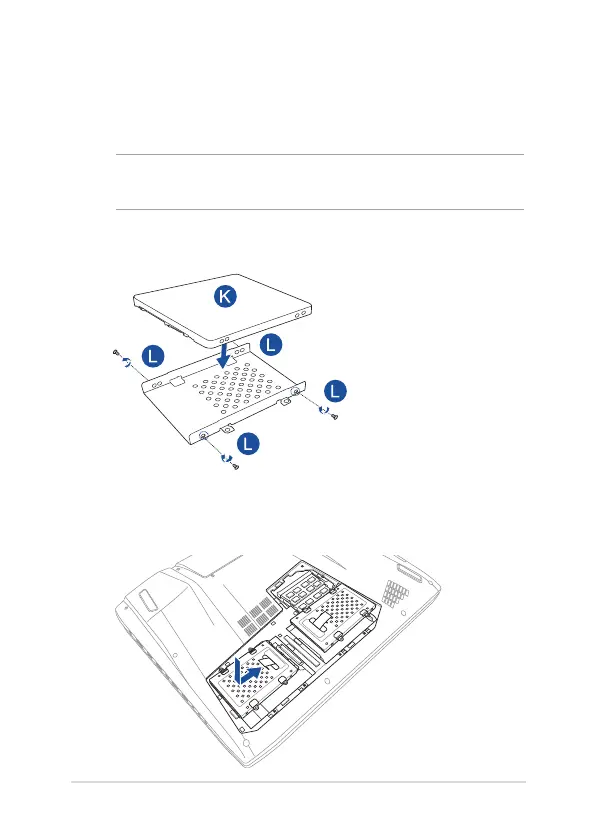
K. Place the new HDD with its PCB (printed circuit board) facing the
HDD bay.
NOTE: Ensure that the port connectors of your HDD are not obstructed
by any part of the HDD bay.
L. Reattach and secure the HDD with the screws you removed
earlier.
M. Align and insert the SATA connector of the HDD into the SATA
connector of your Notebook PC.


 To Next Page