Do you have a question about the Asus M4A88TD-V EVO and is the answer not in the manual?
FCC compliance statement for the device, outlining operational conditions and interference rules.
Canadian compliance statement for radio noise emissions from digital apparatus.
Environmental and chemical compliance information, including disposal guidelines for electronic waste.
Precautions for safe electrical handling and operation of the system and motherboard.
Guidelines for safe operation, handling, and environmental considerations for the motherboard.
Explains the structure and content of the user guide for installing and configuring the motherboard.
Lists sources for additional product and software updates, including ASUS websites.
Explains text formatting conventions like bold text, italics, and key notation used in the manual.
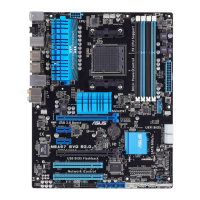
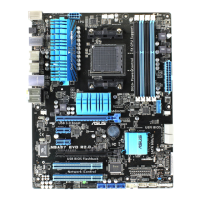
Welcomes the user and introduces the ASUS M4A88TD-V EVO motherboard.
Lists all items included in the motherboard package to check for completeness.
Details the main features like CPU support, chipset, and memory capabilities.
Describes the ASUS Xtreme Design features, including TurboV EVO for overclocking.
Details ASUS Xtreme Design features such as Turbo Key II and Core Unlocker.
Explains the ASUS Xtreme Design with Hybrid OS (Express Gate) for quick system access.
Lists unique ASUS features like Power Solutions, EPU, and MemOK!.
Important precautions before installing components or changing motherboard settings.
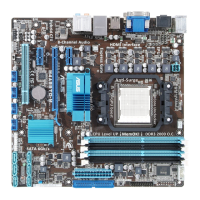
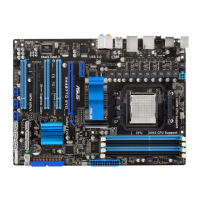
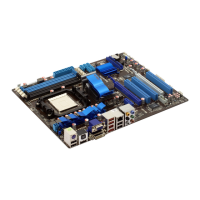
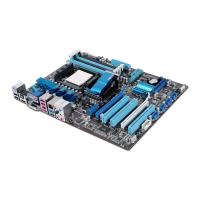
Provides an overview of the motherboard layout and its main components.
Shows a diagram of the motherboard with labels for all key components and connectors.
Lists and describes the connectors, jumpers, and slots found on the motherboard.
Instructions on how to orient the motherboard correctly when installing it into a chassis.
Indicates the locations for securing the motherboard to the chassis using screws.
Information about the CPU socket and the process of installing a CPU.
Step-by-step guide for correctly installing a CPU into the motherboard socket.
Instructions for securely installing the CPU heatsink and fan assembly.
Details about the motherboard's DDR3 DIMM sockets and memory installation.
Overview of the DDR3 DIMM sockets and their recommended configurations.
Guidance on installing memory modules for optimal compatibility and performance.
Step-by-step guide for installing a memory module into a DIMM socket correctly.
Step-by-step guide for safely removing a memory module from a DIMM socket.
Information on various expansion slots like PCI and PCI Express.
Steps for installing an expansion card into an available slot on the motherboard.
How to adjust software settings and drivers after installing an expansion card.
Details IRQ assignments for motherboard devices and expansion slots.
Describes the function and usage of standard PCI slots for add-on cards.
Details the PCI Express 2.0 x1 slot for high-speed network or other cards.
Describes the PCI Express 2.0 x16 slots, typically used for graphics cards.
Explains the function and usage of the Clear RTC RAM jumper for CMOS reset.
Describes the function of onboard switches for performance tuning and system control.
Details the Turbo Key II switch for auto-tuning CPU performance.
Explains the MemOK! switch for automatic memory compatibility tuning.
Details the Core Unlocker switch for activating additional CPU cores.
Overview of various connectors on the motherboard for system components.
Identifies and describes the rear panel I/O ports for external connectivity.
Explains how to connect audio devices to the motherboard's audio ports.
Details internal connectors for system components like IDE, SATA, and USB headers.
Describes the serial port connector for connecting legacy COM devices.
Describes the IEEE 1394a port connector for high-speed data transfer devices.
Details the USB 2.0 connectors and their pin assignments for front panel connections.
Explains the motherboard's fan connectors for CPU, chassis, and power supply.
Describes the digital audio connector for S/PDIF output.
Describes the front panel audio connector for HD Audio or AC'97 standards.
Details the ATX power connectors and recommended PSU requirements.
Explains the system panel connector for chassis functions like power and HDD LEDs.
Introduces the ASUS Q-Connector for simplifying front panel cable connections.
Explains the function of onboard LEDs for indicating system status.
Describes the standby power LED status indication.
Describes the DRAM LED for diagnosing memory-related boot issues.
Describes the Turbo Key II LED status indicator.
Describes the Core Unlocker LED status indicator.
Guide for the initial system startup process and power-on self-tests (POST).
Instructions on how to properly shut down the computer from the system.
Basic introduction to BIOS, its role in system configuration, and when to change defaults.
Explains the importance and methods of updating the motherboard BIOS for enhancements.
Details the ASUS Update utility for managing, saving, and updating the BIOS in Windows.
Guide for updating the BIOS using the ASUS EZ Flash 2 utility via USB flash drive.
Explains how to restore a corrupted BIOS file using the motherboard support DVD or USB drive.
Details the ASUS BIOS Updater utility for updating and backing up BIOS in DOS environment.
Overview of entering and navigating the BIOS setup utility for item modification.
Shows the typical layout of the BIOS menu screen with its components.
Explains the main menu items available in the BIOS setup utility.
Describes the keys used for navigating within the BIOS setup screens.
Explains how menu items are displayed and selected in the BIOS.
Describes how submenu items are indicated with a triangle and accessed.
Explains user-configurable fields in the BIOS and how to change values.
Describes pop-up windows used for selecting configuration options within the BIOS.
Explains the use of scroll bars in BIOS screens for navigating content.
Indicates where to find general help information for selected items in the BIOS.
Overview of the main BIOS screen, displaying basic system information.
Configuration for SATA and E-SATA devices, showing detected device information.
Detailed settings for configuring SATA storage devices, including RAID and AHCI modes.
Displays detailed system specifications like CPU, BIOS, and memory info.
Menu for configuring overclocking-related items, including CPU and DRAM settings.
Feature to easily overclock the CPU by selecting a predefined performance level.
Options for manual and automatic CPU overclocking, including frequency and voltage.
Setting the CPU multiplier (ratio) for adjusting CPU core clock speed.
Adjusting the DDR3 memory frequency for optimizing system performance.
Setting the frequency for the CPU/NB (Northbridge) link.
Configuring the HyperTransport link speed for better system connectivity.
Feature for overclocking the integrated GPU (Graphics Processing Unit).
Utility for automatic overclocking of CPU and DRAM frequencies and voltages.
Advanced settings for fine-tuning DRAM timings for performance optimization.
Settings for adjusting DRAM drive strength parameters.
Configuring CPU and Northbridge voltage modes (Offset or Manual).
Adjusting the CPU VDDA voltage for system stability.
Adjusting the DRAM voltage for overclocking or stability.
Adjusting the HyperTransport voltage for system stability.
Adjusting the Northbridge 1.2V voltage for system stability.
Adjusting the Northbridge 1.1V voltage for system stability.
Adjusting the Northbridge 1.8V voltage for system stability.
Adjusting the Southbridge voltage for system stability.
Adjusting the SidePort memory voltage for system stability.
Calibrating CPU Load-Line for voltage stability during overclocking.
Calibrating CPU/NB Load-Line for voltage stability.
Enabling or disabling clock signals for PCI and PCIe slots.
Menu for changing advanced system settings related to CPU and devices.
Displays and configures CPU-related settings automatically detected by BIOS.
Advanced settings for configuring the motherboard chipset and its features.
Settings for configuring onboard devices like LAN controller, HD Audio, and serial ports.
Advanced settings for PCI and Plug and Play device configuration.
Settings for configuring USB ports, including legacy support and controller mode.
Menu for changing Advanced Power Management (APM) settings.
Selects the ACPI state for system suspend, such as S1 or S3.
Enables or disables the system's support for ACPI 2.0 specifications.
Enables or disables ACPI APIC support within the interrupt controller.
Detailed configuration options for Advanced Power Management features.
Displays system hardware monitoring information like temperatures, voltages, and fan speeds.
Controls CPU fan speed based on temperature or manual settings for cooling.
Controls chassis fan speed based on temperature or manual settings.
Enables protection against power surges to prevent component damage.
Enables Northbridge thermal protection, shutting down the system if overheated.
Menu for changing system boot options, device priority, and security settings.
Sets the sequence of devices from which the system attempts to boot.
Configures boot-related settings like Quick Boot, logo display, and error handling.
Settings for system security, including supervisor and user passwords.
Access to special function tools like BIOS updater, O.C. profile, and Express Gate.
Utility for flashing the BIOS without needing an OS or floppy drive.
Enables or disables the ASUS Express Gate feature for quick system access.
Allows saving and loading multiple BIOS overclocking profiles.
Utility for checking the Realtek LAN cable status during system boot.
Options for saving/discarding changes, and loading default BIOS settings.
Information on installing supported operating systems on the motherboard.
Details about the contents of the motherboard support DVD, including drivers and utilities.
How to launch and navigate the motherboard support DVD to install software.
Instructions on how to access software manuals provided on the support DVD.
Overview of software applications included on the support DVD and their installation.
Describes the ASUS PC Probe II utility for monitoring system components and health.
Introduction to the ASUS AI Suite for launching and managing various ASUS utilities.
Utility for adjusting CPU and chassis fan speeds based on temperature and system loading.
Explains the ASUS EPU (Energy Processing Unit) for intelligent system power saving.
Describes ASUS Express Gate, an exclusive OS for quick access to internet and applications.
Details the Realtek audio codec and manager for sound configurations and connections.
Utility for overclocking the integrated GPU (Graphics Processing Unit) in Windows.
Introduction to the TurboV EVO utility for overclocking CPU, voltage, and GPU.
Guide on using ASUS TurboV for overclocking CPU frequency, voltage, and GPU.
Explains the Auto Tuning Mode for smart, automated system overclocking.
Feature to upgrade CPU performance by selecting a predefined overclocking level.
Allows setting hotkeys for physical overclocking buttons for performance boosts.
Information on configuring Serial ATA hard disk drives into RAID sets.
Explains different RAID levels (0, 1, 5, 10) and their benefits for data storage.
Steps for installing SATA hard disks into drive bays for RAID configuration.
How to enable RAID functionality in BIOS Setup before creating RAID volumes.
Utility for configuring AMD RAID options and managing RAID volumes.
Step-by-step guide on how to create a RAID volume using the Option ROM Utility.
Instructions on how to delete a RAID volume and its associated data.
How to create a RAID driver disk required for OS installation.
Steps to create a RAID driver disk before installing the operating system.
Steps to create a RAID driver disk from within the Windows environment.
How to install the RAID driver during the OS setup process.
Troubleshooting guide for using USB floppy drives with RAID drivers for OS installation.
Overview of ATI CrossFireX technology for installing multi-GPU graphics cards.
System requirements for using ATI CrossFireX technology.
Steps to prepare the system by uninstalling existing graphics card drivers.
Step-by-step guide for installing multiple graphics cards into PCIEX16 slots.
How to install the necessary graphics card drivers that support ATI CrossFireX.
Steps to enable CrossFireX technology through the ATI Catalyst Control Center.
Information on ATI Hybrid CrossFireX technology for integrated and discrete graphics.
Basic system requirements for using ATI Hybrid CrossFireX technology.
BIOS configuration steps required to support ATI Hybrid CrossFireX.
Guide to install the AMD Chipset Driver for Hybrid CrossFireX technology.
How to use the ATI Catalyst Control Center for graphics settings and CrossFireX.
| Socket | AM3 |
|---|---|
| Chipset | AMD 880G |
| Memory Slots | 4 |
| Memory Type | DDR3 |
| Max Memory | 16GB |
| Memory Standard | DDR3 2000(O.C.)/1333/1066 |
| PCI Express x16 | 2 |
| PCI Express x1 | 1 |
| PCI Slots | 2 |
| SATA 3Gb/s | 5 |
| SATA 6Gb/s | 1 |
| USB 2.0 Ports | 12 |
| USB 3.0 Ports | 2 |
| Form Factor | ATX |
| Onboard Video | ATI Radeon HD 4250 |
| Onboard LAN | Realtek 8111E Gigabit LAN |
| CrossFire Support | Yes |
| Onboard Audio | Realtek ALC892 |
| RAID Support | RAID 0, 1, 10 |