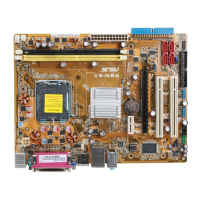
ASUS P5N73-CM 2-5
Do not turn off or reset the system during the ashing process!
9. The utility displays a
Flashing Complete message
indicating that you have
successfully ashed the
BIOS le. Remove the oppy
disk then press <F1> to
restart the system.
AwardBIOS Flash Utility for ASUS V1.17
(C) Phoenix Technologies Ltd. All Rights Reserved
F1
Reset
For 690G-SB600-P5N73-CM_H-00 DATE:
12/12/2006
Flash Type - Winbond W39V080A (8Mb)
File Name to Program: P5N73CM.bin
Flashing Complete
Press <F1> to Continue
Write OK No Update Write Fail
7. Press <N> when the utility
prompts you to save the
current BIOS le. The
following screen appears.
8. The utility veries the BIOS
le in the oppy disk, CD
ROM or a USB ash disk
and starts ashing the BIOS
le.
AwardBIOS Flash Utility for ASUS V1.17
(C) Phoenix Technologies Ltd. All Rights Reserved
Warning: Don’t Turn Off Power Or Reset System!
For 690G-SB600-P5N73-CM_H-00 DATE:
12/12/2006
Flash Type - Winbond W39V080A (8Mb)
File Name to Program: P5N-EM HDMI.bin
Programming Flash Memory - OFE00 OK
Write OK No Update Write Fail
2.1.5 Saving the current BIOS le
You can use the AwardBIOS Flash Utility to save the current BIOS le. You can load the
current BIOS le when the BIOS le gets corrupted during the ashing process.
Ensure that the oppy disk, CD ROM or a USB ash disk has enough disk space
to save the le.
To save the current BIOS le using
the AwardBIOS Flash Utility:
1. Follow steps 1 to 6 of the
previous section.
2. Press <Y> when the utility
prompts you to save the
current BIOS le. The
following screen appears.
AwardBIOS Flash Utility for ASUS V1.17
(C) Phoenix Technologies Ltd. All Rights Reserved
Message:
For 690G-SB600-P5N73-CM_H-00 DATE:
12/12/2006
Flash Type - Winbond W39V080A (8Mb)
File Name to Program: 0113.bin
Save current BIOS as:

 Loading...
