Do you have a question about the Asus P6TD - Deluxe Motherboard - ATX and is the answer not in the manual?
| Form Factor | ATX |
|---|---|
| CPU Socket | LGA 1366 |
| Memory Type | DDR3 |
| Memory Slots | 6 |
| Max Memory | 24 GB |
| PCIe 2.0 x16 Slots | 3 |
| PCIe x4 Slots | 1 |
| PCIe x1 Slots | 1 |
| PCI Slots | 2 |
| SATA 3Gb/s | 6 |
| USB 2.0 Ports | 12 |
| IEEE 1394 | 1 |
| Chipset | Intel X58 |
| Memory Standard | DDR3 1066/1333 |
| SATA 6Gb/s | 2 |
| eSATA 3Gb/s | 2 |
| RAID Support | RAID 0, 1, 5, 10 |
| LAN | 1 x Gigabit LAN |
| Audio | 8-channel |
| Back Panel Connectors | 1 x PS/2, 1 x IEEE 1394, 1 x eSATA, 6 x USB 2.0, 6 x Audio jacks |
A brief welcome message to the user for purchasing the ASUS P6TD Deluxe motherboard.
Lists all the items included in the motherboard package for user verification.
Highlights the key features and technologies supported by the motherboard.
Describes general product highlights and certifications like RoHS compliance.
Details specific technologies and innovations developed by ASUS.
Outlines essential precautions before installing components or changing settings.
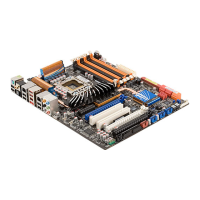
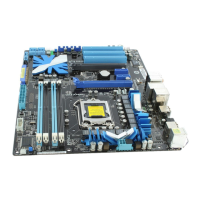
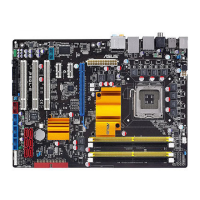
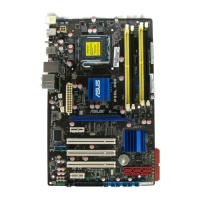
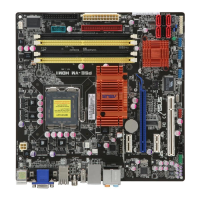
Provides a general introduction and layout of the motherboard's components.
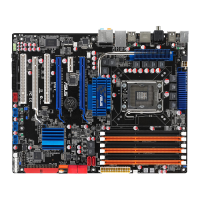
Illustrates the physical arrangement of components on the motherboard.
Lists and describes the motherboard's connectors, jumpers, and slots.
Explains the correct orientation for installing the motherboard in a chassis.
Identifies the locations for securing the motherboard with screws.
Details requirements and procedures for CPU installation.
Step-by-step instructions for installing the CPU into its socket.
Guide for correctly installing the CPU heatsink and fan assembly.
Procedures for removing the CPU heatsink and fan assembly.
Instructions for installing supplementary fans for cooling.
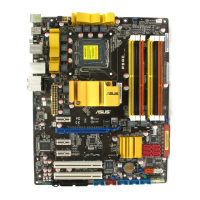
Details on installing and configuring system memory (RAM).
Introduces the motherboard's DIMM sockets and DDR3 memory support.
Explains memory installation, compatibility, and capacity limitations.
Step-by-step guide for inserting a DIMM into the memory slot.
Procedures for safely removing a DIMM from the memory slot.
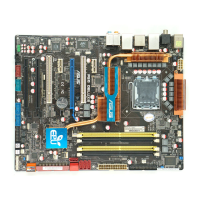
Describes the types and uses of expansion slots on the motherboard.
Guide to physically installing an expansion card into a slot.
Explains software settings and driver installation for expansion cards.
Details standard interrupt assignments and motherboard IRQ usage.
Describes the function and usage of PCI slots.
Describes the function and usage of the PCI Express x4 slot.
Describes the usage of PCI Express 2.0 x16 slots for graphics cards.
Explains the function and configuration of motherboard jumpers.
Describes the function of the motherboard's onboard power and reset switches.
Details the motherboard's rear panel and internal connectors.
Describes all external I/O ports on the motherboard's back panel.
Describes internal headers and connectors on the motherboard.
Instructions for installing an optional fan on the Northbridge heatsink.
Guide for initial system power-on, POST, and BIOS setup entry.
Explains the correct procedures for shutting down the computer.
Covers utilities for managing, saving, and updating the motherboard BIOS.
Details the ASUS Update software for BIOS management in Windows.
Explains how to update the BIOS using a USB flash drive.
Describes methods for restoring the BIOS if it fails or gets corrupted.
An introduction to using the BIOS Setup utility for system configuration.
Provides an overview of the BIOS setup interface and its layout.
Explains the main navigation items available in the BIOS menu bar.
Describes the keys used to navigate and make selections within the BIOS.
Explains how menu items are displayed and selected in the BIOS.
Describes items that have associated sub-menus.
Explains how to view and change configuration field values.
Describes the function and appearance of pop-up windows in BIOS.
Explains the use of scroll bars to view content not visible on screen.
Describes the general help information available for selected BIOS items.
Provides basic system information and initial configuration options.
Allows the user to set the system's current time.
Allows the user to set the system's current date.
Enables selection of the display language for the BIOS setup screen.
Displays and configures information for SATA devices.
Manages SATA device configurations, including RAID settings.
Configures advanced host controller interface (AHCI) settings for SATA devices.
Displays auto-detected BIOS and system specifications like CPU and memory.
Contains settings for CPU and memory overclocking and performance tuning.
Selects CPU overclocking options like Manual, Auto, D.O.C.P, or X.M.P.
Adjusts the ratio between CPU Core Clock and BCLK Frequency.
Controls CPU speed dynamically based on system load and OS settings.
Enables processor cores to run at higher frequencies under specific conditions.
Allows setting the DDR3 operating frequency for memory modules.
Sets the Uncore Clock Ratio, which must be at least twice DRAM frequency.
Sets the data rate for the QuickPath Interconnect (QPI).
Adjusts various DRAM timing parameters to optimize memory performance.
Allows adjustment of the CPU VCore voltage for overclocking.
Allows adjustment of the CPU Phase-Locked Loop voltage.
Allows adjustment of the QPI/DRAM Core voltage.
Allows adjustment of the I/O Hub (IOH) voltage.
Allows adjustment of the I/O Hub PCI Express voltage.
Allows adjustment of the I/O Controller Hub (ICH) voltage.
Allows adjustment of the Southbridge PCI Express voltage.
Allows adjustment of the DRAM voltage.
Sets the DRAM DATA Reference Voltage for memory channels.
Sets the DRAM Control Reference Voltage for memory channels.
Improves CPU VDroop stability, especially during overclocking.
Enhances BCLK overclocking ability by adjusting differential amplitude.
Helps enhance BCLK overclocking ability by adjusting clock skew.
For BCLK overclocking enhancement or EMI control.
Helps enhance BCLK overclocking ability by adjusting clock skew.
For PCIE overclocking enhancement or EMI control.
Contains settings for CPU and other system devices.
Displays and configures CPU-related settings like speed and virtualization.
Allows advanced configuration of chipset settings, including PCIe link width.
Enables or disables various onboard devices like audio, LAN, and USB controllers.
Configures USB features, controllers, and legacy support.
Advanced settings for PCI/PnP devices, including Plug and Play OS configuration.
Contains settings for Advanced Power Management (APM) features.
Selects the ACPI state for system suspend operations.
Determines if VGA BIOS POST is invoked upon resuming from S3/STR.
Adds additional tables according to ACPI 2.0 specifications.
Enables or disables ACPI support within the APIC controller.
Configures power management settings like AC power loss behavior.
Displays system temperatures, voltages, fan speeds, and fan control settings.
Configures system boot options and device priority.
Sets the sequence of devices for system boot-up.
Configures boot-related settings like Quick Boot and logo display.
Sets system security features, including supervisor and user passwords.
Provides access to special function utilities.
Utility to update the BIOS without needing an operating system.
An instant-on environment for quick access to Internet, Skype, and more.
Allows saving and loading multiple BIOS settings configurations.
Checks the Marvell LAN cable status during Power-On Self-Test (POST).
Options to save/discard changes, or load default BIOS settings.
Guide for installing Windows XP/Vista operating systems on the motherboard.
Describes the contents and usage of the motherboard support DVD.
Instructions on how to launch the motherboard support DVD interface.
Lists available device drivers for installation from the support DVD.
Lists available utilities and software applications on the support DVD.
Contains options to create driver disks for Intel ICH10R or Marvell 61xx.
Provides access to supplementary user manuals in PDF format.
Provides ASUS technical support contact details.
Displays additional information and the motherboard's general specifications.
Details the applications and utilities included on the support DVD.
Utility to customize the motherboard's boot logo.
Features the Marvell Virtual Cable Tester for LAN diagnostics.
Monitors system components and alerts users to potential problems.
Integrates utilities for overclocking, fan control, and power saving.
Minimizes power consumption and system noise when the computer is idle.
Adjusts fan speeds for optimal cooling and quiet operation.
An energy-efficient tool for optimizing system performance and power saving.
A utility for real-time overclocking of CPU, voltage, and memory.
Provides 8-channel audio capabilities with advanced audio features.
An instant-on environment for quick access to Internet, Skype, and photo viewing.
Explains RAID levels, definitions, and configuration procedures.
Defines RAID 0 (striping), RAID 1 (mirroring), RAID 5, and RAID 10.
Steps for installing SATA hard disks to create a disk array.
Enables the RAID function within the BIOS Setup.
Utility for creating and managing RAID volumes using Intel Matrix Storage.
Guide for creating a RAID driver disk for OS installation.
Steps to create a RAID driver disk using the support DVD outside the OS.
Steps to create a RAID driver disk from within the Windows environment.
Guide for installing the RAID driver during Windows OS setup.
Workaround for Windows XP recognition issues with USB floppy drives.
Details on installing and configuring ATI CrossFireX multi-GPU technology.
Lists necessary hardware, driver, and PSU requirements for CrossFireX.
Instructions for uninstalling existing graphics card drivers.
Step-by-step guide for installing two ATI CrossFireX compatible graphics cards.
Step-by-step guide for installing three ATI CrossFireX compatible graphics cards.
Guide for installing the necessary graphics card device drivers.
Enables CrossFireX functionality via the ATI Catalyst Control Center.
Details on installing and configuring NVIDIA SLI multi-GPU technology.
Lists necessary hardware, driver, and PSU requirements for NVIDIA SLI.
Step-by-step guide for installing two NVIDIA SLI compatible graphics cards.
Guide for installing the necessary graphics card device drivers.
Enables SLI functionality via the NVIDIA Control Panel.