ASUS P8H61-M LX2 R2.0 1-24
6. Intel
®
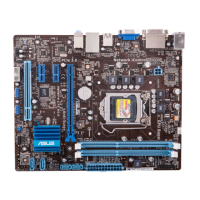
H61 Serial ATA 3.0Gb/s connectors (7-pin SATA3G_1~4)
These connectors connect to Serial ATA 3.0 Gb/s hard disk drives and optical drives via
Serial ATA 3.0 Gb/s signal cables.
GND
RSATA_TXP1
RSATA_TXN1
GND
RSATA_RXN1
RSATA_RXP1
GND
SATA3G_2
SATA3G_1
GND
RSATA_TXP2
RSATA_TXN2
GND
RSATA_RXN2
RSATA_RXP2
GND
GND
RSATA_RXP3
RSATA_RXN3
GND
RSATA_TXN3
RSATA_TXP3
GND
GND
RSATA_RXP4
RSATA_RXN4
GND
RSATA_TXN4
RSATA_TXP4
GND
SATA3G_3
SATA3G_4
P8H61-M LX2 R2.0 SATA connectors
P8H61-M LX2 R2.0
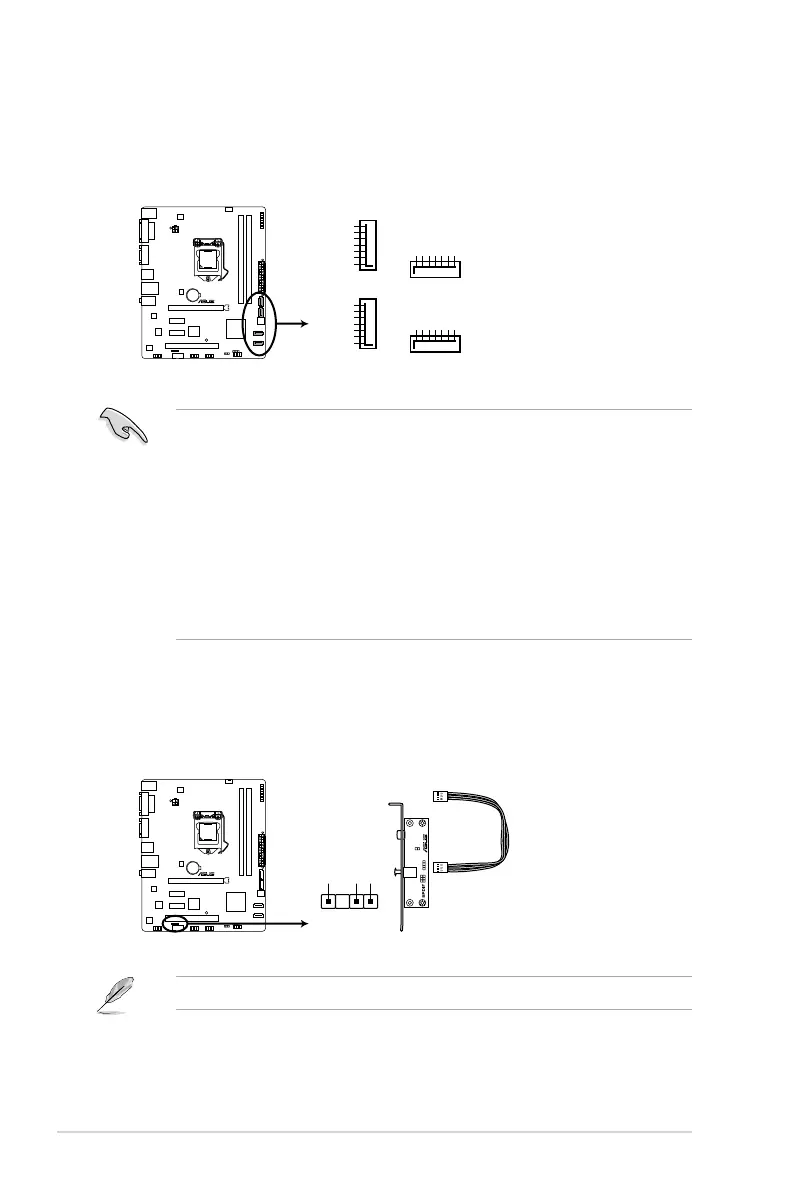
7. Digital audio connector (4-1 pin SPDIF_OUT)
This connector is for an additional Sony/Philips Digital Interface (S/PDIF) port. Connect
the S/PDIF Out module cable to this connector, then install the module to a slot
opening at the back of the system chassis.
The S/PDIF module is purchased separately.
SPDIF_OUT
+5V
SPDIFOUT
GND
P8H61-M LX2 R2.0 Digital audio connector
P8H61-M LX2 R2.0
• You must install Windows
®
XP Service Pack 3 or a later version before using Serial ATA
hard disk drives.
• Due to H61 Chipset limitation, AHCI Mode only works on Windows
®
Vista / Windows
®
7.
Please use IDE Mode on Windows
®
XP.
• [IDE] is the default SATA type. Under Windows
®
XP, there is no need to change the
SATA type.
• To congure the SATA type in BIOS, click Advanced Mode > Advanced tab > SATA
Conguration > SATA Mode Selection.
• When using hot-plug and NCQ on Windows
®
Vista / Windows
®
7, set the SATA Mode
item in the BIOS to [AHCI Mode]. See section 2.5.4 SATA Conguration for details.
 Loading...