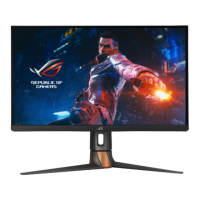
3-3ASUS PG279QM Series LCD Monitor
* MonitoringRectangleSize: Manually adjusts the size of the
monitoring rectangle using the ( 5-way) button.
You can also download and install the GeForceExperience to enjoy the full
experience of system latency analysis.
The GeForceExperience setup steps are as follows:
a. Install the GeForceExperience.
b. Ensure the monitor is set to 240Hz in the NVIDIA Control Panel.
c. Open GeForceExperience by clicking the desktop shortcut or by right-
clicking the NVIDIA logo in the Windows System Tray near the clock.
d. Log in to GeForceExperience.
e. Click the gear and check the EnableExperimentalFeatures box in
General settings to expose performance metrics.
f. Press ALT + Z to open the GeForce Experience in-game overlay.
g. Now that the GeForce Experience overlay is open, click Performance.
h. Click the small gear to congure the performance overlay.
i. Ensure Performance is highlighted, choose an overlayposition, then
click Latency.
j. This will open the PerformanceOverlay with latencymetrics.
2. Gaming
MOVE/ENTER
BACK
EXIT
G-SYNC Mode DisplayPort 2560x1440@240 Hz
HDR Off Racing Mode Analyzer Inactive
ROG Swift 240Hz PG279QM
G-SYNC Processor
®
G-SYNC
Processor
Gaming
Image
Color
Input Select
Shortcut
Lighting Effect
System Setup
®
OD
GamePlus
GameVisual
Dark Boost
• OD: Improves the gray level response time of the LCD panel. It contains 4
modes including Extreme, Normal, Esports, and OFF.
• GamePlus: See 1.3.3GamePlusFunction for details.
• GameVisual:See 1.3.4GameVisualFunction for details.
• Dark Boost: Dark color enhancement adjusts monitor’s gamma curve to
enrich the dark tones in an image making dark scenes and objects much
easier to see.
 Loading...