This document is a user guide for the ASUS VK221/VK222 Series LCD Monitor, published in January 2008. It provides comprehensive instructions for setting up, operating, and maintaining the monitor, along with important safety information and troubleshooting tips.
Function Description
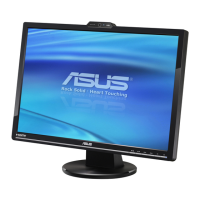
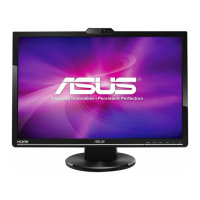
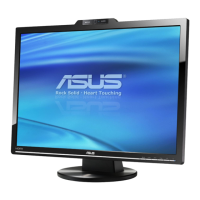
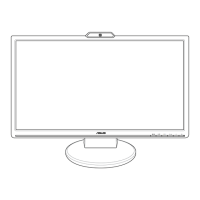
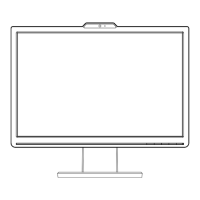
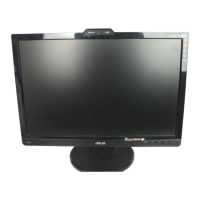
The ASUS VK221/VK222 Series LCD Monitor is a widescreen display designed to offer a crisp, broad, and bright viewing experience. It integrates a range of features aimed at enhancing visual quality and user convenience. Depending on the specific model (VK221S, VK221D, VK222H, VK222U, VK222S), the monitor may include various input options such as VGA, DVI, and HDMI, as well as built-in speakers and a webcam. The monitor is designed for use with personal computers and supports different video preset modes to optimize display settings for various content types like games, movies, and photo viewing.
Usage Features
The monitor offers a user-friendly On-Screen Display (OSD) menu for easy configuration and adjustment of various settings.
Monitor Assembly and Adjustment:
- Assembling the Monitor Base: The base connects to the monitor with a simple click, and the monitor's angle can be adjusted for optimal viewing comfort. Users are advised to cover the table surface with a soft cloth during assembly to prevent damage.
- Detaching the Arm/Stand (for VESA Wall Mount): The stand is detachable, allowing the monitor to be mounted on a VESA-compatible wall mount (100 mm x 100 mm kit, purchased separately). This involves removing an arm cover, placing the monitor face down on a soft surface, and unscrewing three screws from the stand.
- Adjusting the Monitor Angle: The monitor's tilt can be adjusted from -5° to 20° to achieve the most comfortable viewing position. Users should hold the stand to prevent the monitor from falling while adjusting the angle.
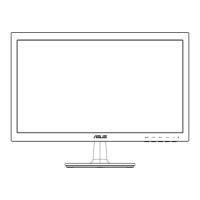
The front of the LCD monitor features several control buttons and a power indicator, with slight variations across models (VK222H/VK222U, VK221S/VK222S, VK221D).
- Splendid™ Video Enhancement Technology Button: This button (labeled 'S' or with a specific icon) allows users to switch between five video preset modes: Game Mode, Night View Mode, Scenery Mode, Standard Mode, and Theater Mode. It also serves as an exit button for the OSD menu.
- *Navigation Buttons ( /▼ and /▲): These buttons are used to navigate through OSD menu functions and adjust selected values. They also double as hotkeys for Volume adjustment ( /▼) and Brightness adjustment (*/▲). For the VK221D model, the /▼ button is a hotkey for Contrast Ratio adjustment.
- MENU Button: This button is used to enter the OSD menu and select highlighted icons or functions within the menu.
- Auto-Adjustment Button (A): For VGA mode only, this button automatically adjusts the image to its optimized position, clock, and phase when long-pressed for 2-4 seconds.
- Input Select Button: This hotkey allows users to switch between available input signals, such as VGA, DVI, and HDMI (for models that support these inputs).
- Power Button: Turns the monitor on or off.
- Power Indicator: Displays the monitor's status: Blue for ON, Amber for Standby mode, and OFF when the monitor is off.
The OSD menu provides extensive control over the monitor's display and system settings.
- Splendid: Offers five sub-functions (Scenery Mode, Standard Mode, Theater Mode, Game Mode, Night View Mode) to optimize the display for different content. Each mode includes a Reset option. In Standard Mode, Saturation and ASCR functions are not configurable, while in other modes, sRGB is not configurable.
- Image: Allows adjustment of Brightness, Contrast, Sharpness, and Saturation. For VGA-only models, it also includes Position (H-Position and V-Position) and Focus (Phase and Clock) adjustments to reduce horizontal and vertical line noise. The ASCR (ASUS Smart Contrast Ratio) function can be enabled or disabled for dynamic contrast. Over Drive technology is available on some models to speed up response time.
- Color: Enables selection of preferred image color settings, including Color Temp (Cool, Normal, Warm, sRGB, User mode) and Skin Tone (Reddish, Natural, Yellowish). In User mode, R, G, and B colors can be individually configured.
- Input Select: Allows manual selection of the input source (VGA, DVI, HDMI) if the monitor has multiple inputs.
- System Setup: Provides access to system-level adjustments:
- Volume: Adjusts the audio output level.
- OSD Setup: Configures OSD display settings, including H-Position, V-Position, and OSD Timeout (from 10 to 120 seconds).
- Language: Selects the OSD menu language from ten options, including English, German, Italian, French, Dutch, Spanish, Russian, Traditional Chinese, Simplified Chinese, Japanese, and Korean.
- Aspect Control: Adjusts the aspect ratio to "Full" or "4:3".
- Information: Displays monitor details.
- Reset: Reverts all settings to the preset mode.
Connectivity:
The rear of the LCD monitor features various ports depending on the model:
- AC-IN Port: Connects the power cord.
- HDMI-IN Port (VK222H only): Connects to an HDMI source.
- DVI Port: A 24-pin port for DVI-D digital signal connection from a PC (available on some models).
- VGA Port: A 15-pin port for VGA connection from a PC.
- Audio-in Port: Connects to a PC audio source using the bundled audio cable (available on some models).
- Earphone-out Port (VK222H only): Connects earphones or standalone speakers.
- USB-IN Port: Connects the built-in webcam to the computer.
Webcam and Software (VK222/VK221 Series):
- The VK222/VK221 series monitors include a built-in webcam.
- LifeFrame 2 Software: This easy-to-use software, bundled on the support CD, allows users to create photos or video clips using the webcam. It supports Microsoft® Windows® Vista/XP Service Pack 2 operating systems. Installation involves closing other applications, inserting the support CD, running the program, and following on-screen instructions.
Maintenance Features
Proper care and cleaning are essential for maintaining the monitor's performance and longevity.
- Handling: Before lifting or repositioning the monitor, disconnect all cables and the power cord. When moving the monitor, grasp its edges and avoid lifting it by the stand or cord.
- Cleaning:
- Turn off the monitor and unplug the power cord before cleaning.
- Use a lint-free, non-abrasive cloth to clean the monitor surface.
- For stubborn stains, a cloth dampened with a mild cleaner can be used.
- Avoid cleaners containing alcohol or acetone.
- Use a cleaner specifically intended for LCDs.
- Never spray cleaner directly onto the screen, as liquid may drip inside and cause electric shock.
- Ventilation: Slots and openings on the cabinet are for ventilation. Do not block these slots or place the product near radiators or heat sources without proper ventilation.
- Power Source: Operate the monitor only from the type of power source indicated on the label. Use the appropriate power plug for your local standard and avoid overloading power strips or extension cords to prevent fire or electric shock.
- Environmental Conditions: Avoid dust, humidity, and extreme temperatures. Do not place the monitor in wet areas and ensure it is on a stable surface.
- Protection from Surges: Unplug the unit during lightning storms or if it will not be used for extended periods to protect it from power surges.
- Foreign Objects/Liquids: Never push objects or spill liquids into the monitor cabinet slots.
- Troubleshooting: If technical problems arise, contact a qualified service technician or your retailer. Do not attempt to open the monitor cabinet or fix the power supply yourself, as high voltages can cause serious injury.
Normal Monitor Symptoms:
- Flickering: Initial flickering due to fluorescent light is normal. Turning the power switch off and on again usually resolves this.
- Uneven Brightness: Slight unevenness in brightness may occur depending on the desktop pattern.
- Afterimage: If the same image is displayed for hours, an afterimage may remain after switching images. The screen will recover slowly, or turning off the power switch for several hours can help.
- Black/Flashing Screen: If the screen becomes black, flashes, or stops working, contact your dealer or service center.
Troubleshooting (FAQ) provides solutions for common issues:
- Power LED not ON: Check if the monitor is ON and if the power cord is connected.
- Power LED amber, no screen image: Check if the monitor and computer are ON, ensure the signal cable is properly connected and not damaged, and test with another monitor.
- Screen image too light/dark: Adjust Contrast and Brightness via OSD.
- Screen image not centered/sized properly: Use the auto-adjustment button (A) or adjust H-Position/V-Position via OSD.
- Screen image bounces/wave pattern: Ensure the signal cable is properly connected, move electrical devices causing interference, and check for bent pins.
- Color defects: Perform OSD Reset, adjust R/G/B color settings, or select Color Temperature via OSD.
- Blurry/fuzzy screen: Use the auto-adjustment button (A) (VGA mode only) or adjust Phase and Clock settings via OSD.
- No sound/low sound: Ensure the audio cable is connected, adjust volume settings on both monitor and computer, and check if the computer sound card driver is installed.
- Webcam not working: Verify the USB 2.0 cable connection to both monitor and computer, and ensure Microsoft® Windows® Vista/XP Service Pack 2 is used.