EasyManua.ls Logo

Asus VP228HE - User Manual

Asus VP228HE
30 pages
Print Icon
To Next Page IconTo Next Page
Loading...
VP228 Series
LCD Monitor
User Guide
Question and Answer IconNeed help?

Do you have a question about the Asus VP228HE and is the answer not in the manual?

Summary

Notices and Regulatory Compliance

Federal Communications Commission Statement

Device complies with FCC rules and Class B digital apparatus limits.

Canadian Department of Communications Statement

Apparatus compliance with Canadian ICES-003 for radio noise emissions.

Safety Information

Care and Cleaning

Guide Conventions and Symbols

Explains symbols and terms used for warnings, cautions, and notes.

Information Sources

ASUS Websites

Provides updated product information online.

Optional Documentation

Lists additional documents included in the package.

Chapter 1: Product Introduction

1.1 Welcome!

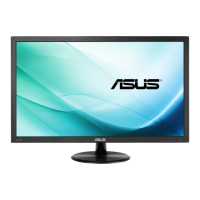
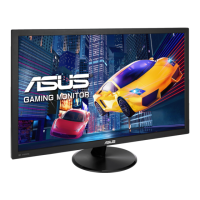
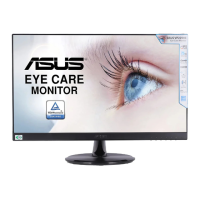
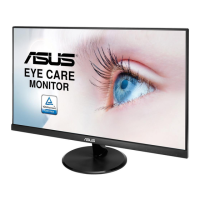
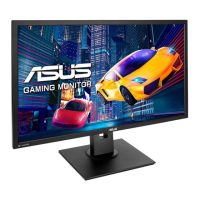
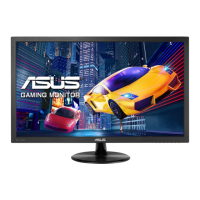
A brief introduction to the ASUS LCD monitor and its features.

1.2 Package Contents

Lists all items included in the monitor package for verification.

1.3 Assembling the Monitor

Step-by-step guide on attaching the monitor base and arm.

1.4 Connecting Cables

Instructions for connecting various cables to the monitor.

1.5 Monitor Introduction

Overview of monitor controls, buttons, and power indicator status.

Chapter 2: Setup

2.1 Detaching the Arm;Stand for VESA Mount

Guide on detaching the monitor stand for VESA wall mounting.

2.2 Adjusting the Monitor

Guidance on tilting the monitor for optimal viewing comfort and stability.

Chapter 3: General Instruction

3.1 OSD (On-Screen Display) Menu

Details OSD menu navigation, reconfiguration, and function introductions.

3.2 Specifications

Technical specifications for various VP228 models including resolution and dimensions.

3.3 Troubleshooting (FAQ)

Common problems and their possible solutions for monitor operation and display issues.

3.4 Supported Timing List

List of supported PC, IBM, MAC, and VESA timings for optimal display performance.

Overview

This document is a user guide for the ASUS VP228 Series LCD Monitor, providing comprehensive instructions for its setup, operation, and maintenance. The monitor is designed to offer a crisp, broader, and brighter display, enhancing the user's viewing experience with a host of features.

Function Description

The ASUS VP228 Series LCD Monitor serves as a visual display unit for computers, offering various input options including VGA, DVI, and HDMI (depending on the specific model). It is equipped with an On-Screen Display (OSD) menu that allows users to adjust a wide range of image settings and system configurations. The monitor supports multiple display modes optimized for different content types, such as scenery photos, document editing, movie watching, and gaming. It also incorporates features aimed at enhancing visual comfort and energy efficiency.

Usage Features

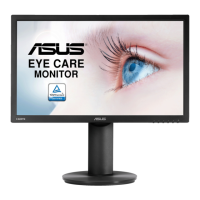
The monitor is designed for ease of assembly and adjustment. Users can easily attach the monitor base to the arm and fix it with a screw, then adjust the monitor's angle from -5° to +20° for optimal viewing comfort. For wall mounting, the detachable stand can be removed by loosening screws and detaching the arm/stand from the monitor body. The monitor is compatible with VESA wall mount kits (100 x 100 mm) and requires a UL Listed Wall Mount Bracket with a minimum weight/load of 12 kg.

The control buttons, located on the back of the monitor, provide access to the OSD menu. These include a MENU button to enter the OSD, a Close button to exit, an Input Select button to switch between VGA, DVI, and HDMI input signals, and two Shortcut keys. The default settings for the shortcut keys are Brightness and Blue Light Filter, but users can customize them to quickly access other functions like Splendid modes, Contrast, Color Temp., Volume, or GamePlus. An Auto Button is also available to automatically adjust the image to its optimized position, clock, and phase, particularly useful for VGA input.

The OSD menu is structured into several main functions:

  • Splendid: This function offers eight pre-set display modes: Scenery Mode, Standard Mode, Theater Mode, Game Mode, Night View Mode, sRGB Mode, Reading Mode, and Darkroom Mode. Each mode is optimized for specific content, leveraging SPLENDID™ Video Intelligence Technology. For instance, Scenery Mode is ideal for photo display, Theater Mode for movies, and Game Mode for gaming. Most modes allow for user configuration, though some settings like Saturation, SkinTone, Sharpness, and ASCR may be fixed in Standard, sRGB, and Reading Modes.
  • Blue Light Filter: This feature allows users to adjust the energy level of blue light emitted from the LED backlight across four levels (Level 0 to Level 4). Level 0 signifies no change, while higher levels reduce blue light. When activated, the default settings of Standard Mode are automatically applied. Levels 1 to 3 allow for user-configurable Brightness, while Level 4 is an optimized setting compliant with TUV Low Blue Light Certification, with fixed Brightness. This feature is designed to alleviate eye strain, and the guide provides recommendations for eye care, such as taking regular breaks and performing eye exercises.
  • Color: This function enables users to customize image colors. Adjustable parameters include Brightness, Contrast, and Saturation, each with a range from 0 to 100. Color Temp. offers three preset modes (Cool, Normal, Warm) and a User Mode, where R, G, and B colors can be individually adjusted. Skin Tone provides Reddish, Natural, and Yellowish options. Smart View technology offers versatile viewing positions.
  • Image: This section allows for fine-tuning of image quality. Settings include Sharpness (0-100), Trace Free (0-100, for faster response time via Over Drive technology, available on specific models), Aspect Control (Full, 4:3, Overscan for HDMI input), VividPixel (0-100, for crystal-clear and detail-oriented visuals), and ASCR (ON/OFF for dynamic contrast ratio). For VGA input, Position (H-Position and V-Position, 0-100), Focus (Phase and Clock, 0-100, to reduce line noise), and Auto Adjust are also available.
  • Input Select: This function allows users to manually choose the input source from VGA, DVI, or HDMI, depending on the monitor model.
  • System Setup: This comprehensive menu provides various system configurations. It includes Splendid Demo Mode, Volume (for models with speakers), GamePlus, QuickFit, ECO Mode, OSD Setup, Language, and additional options under "More."
    • GamePlus: This toolkit enhances the gaming experience, particularly for First Person Shooter (FPS) games. It offers Crosshair and Timer functions. Users can select ON to enter the GamePlus menu, choose between Crosshair and Timer, confirm their selection, and exit.
    • QuickFit: This feature provides three patterns: Grid pattern (Alignment Grid 1 and 2) for organizing content layout and Photo size (4x6, 3x5, 2x2) for accurately viewing and editing photos in real size.
    • ECO Mode: Activates an ecology mode for power saving.
    • OSD Setup: Adjusts OSD Timeout, DDC/CI, and Transparency of the OSD screen.
    • Language: Allows selection of OSD language from a wide range of options including English, French, German, Spanish, Italian, Dutch, Russian, Polish, Czech, Croatian, Hungarian, Romanian, Portuguese, Turkish, Simplified Chinese, Traditional Chinese, Japanese, Korean, Persian, Thai, and Indonesian.
    • Key Lock: Disables all key functions. It can be activated by pressing the second button on the right for more than five seconds.
    • Power Indicator: Toggles the power LED indicator on/off.
    • Power Key Lock: Disables/enables the power key.
    • All Reset: Reverts all settings to the factory default mode.
    • Information: Displays monitor information.

Maintenance Features

Proper care and cleaning are essential for maintaining the monitor's longevity and performance. Before lifting or repositioning the monitor, it is recommended to disconnect all cables and the power cord. When handling, users should grasp the edges of the monitor, avoiding lifting it by the stand or cord.

For cleaning, the monitor should be turned off and unplugged. The surface can be cleaned with a lint-free, non-abrasive cloth. Stubborn stains may be removed with a cloth dampened with a mild cleaner. It is crucial to avoid cleaners containing alcohol or acetone and to use a cleaner specifically intended for LCDs. Spraying cleaner directly on the screen is not recommended, as it may drip inside and cause electric shock.

The user guide also outlines normal symptoms that do not indicate a fault:

  • Screen flicker during initial use due to fluorescent light, which typically disappears after turning the power switch off and on.
  • Slightly uneven brightness depending on the desktop pattern.
  • Afterimages remaining when the same image is displayed for extended periods, which will recover slowly or by turning off the monitor for several hours.
  • Slight shaking of the monitor when adjusting the viewing angle.

Safety information is provided to prevent damage and injury:

  • Always read the documentation before setup.
  • Avoid exposing the monitor to rain or moisture to prevent fire or shock hazards.
  • Never attempt to open the monitor cabinet due to dangerous high voltages inside.
  • If the power supply is broken, contact a qualified service technician.
  • Ensure all cables are correctly connected and undamaged before use.
  • Do not block ventilation slots on the back or top of the cabinet.
  • Operate the monitor only from the specified power source and use the appropriate power plug.
  • Avoid overloading power strips and extension cords.
  • Keep the monitor away from dust, humidity, and extreme temperatures, and place it on a stable surface.
  • Unplug the unit during lightning storms or prolonged periods of disuse.
  • Do not push objects or spill liquid into the monitor cabinet.
  • Use the monitor only with UL listed computers with appropriate receptacles (100 ~ 240V AC).
  • The socket-outlet should be easily accessible.
  • In case of technical problems, contact a qualified service technician.
  • Ensure proper earthing connection before connecting the mains plug and disconnect it after pulling out the mains plug.

The manual also warns against using unspecified head- or earphones, as this can lead to hearing loss due to excessive sound pressures. Troubleshooting tips are included for common issues such as the power LED not turning on, no screen image, image quality problems, and no sound.

Asus VP228HE Specifications

General IconGeneral
Colorblack
Screen Typeled
Tiltableyes
Wall Mount100mm x 100mm
Webcamno
OS Compatibilitywindows
Screen Size21.5 inches
Aspect Ratio16:9
Resolution1920 x 1080
Native Resolution1920 x 1080
Refresh Rate75hz
Horizontal Viewing Angle170 degrees
Vertical Viewing Angle160 degrees
Response Time1 milliseconds
Brightness250 candela per square meter
Contrast Ratio100, 000, 000:1
Horizontal Scan Rate83 kilohertz
Built-In Speakersyes
VGA Ports1
DVI1
Power Saving Mode0.5 watts
Power Consumption21.1 watts
Width with Stand20.20 inches
Net Weight without Stand7.7 pounds

Related product manuals