Do you have a question about the Asus VW199 Series and is the answer not in the manual?
Statement regarding compliance with FCC Rules and potential interference.
Statement regarding compliance with Canadian regulations for digital apparatus.
Describes common visual behaviors of the monitor during use.
Explains symbols and their meanings for warnings, cautions, and notes.
Information on accessing updated product and software details online.
Note about potential additional documents included by the dealer.
Details of the front panel buttons, indicators, and controls for different models.
Identification of rear connectors and VESA wall mount screw holes.
Steps to navigate and change settings within the On-Screen Display menu.
Overview of OSD functions like Splendid, Color, Image, Input Select, and System Setup.
The ASUS VW199 Series LED Monitor is a widescreen display designed to provide a crisp, broad, and bright viewing experience with a host of features to enhance user interaction. This user guide outlines the monitor's functionality, setup, adjustment, and maintenance, ensuring users can maximize their display's potential.
The ASUS VW199 Series LED Monitor serves as a visual output device for computers, offering a high-quality display for various applications, from document editing to multimedia consumption and gaming. It features an On-Screen Display (OSD) menu that allows users to customize various display settings, including image quality, color modes, and system configurations. The monitor supports both VGA and DVI input sources, providing flexibility for connecting to different computer systems. Certain models (VW199T/S) also include built-in speakers, offering an integrated audio solution. The monitor is designed with a detachable stand, making it compatible with VESA wall mounts for alternative mounting options.
The monitor offers a range of features designed to enhance the user experience:
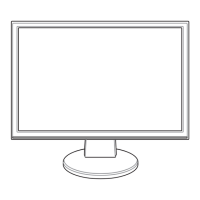
Easy Assembly and Adjustment: The monitor is designed for straightforward assembly, requiring users to simply connect the base to the monitor until it clicks into place. Once assembled, the monitor's angle can be adjusted from -5° to 20° to achieve the most comfortable viewing position. When adjusting the angle, it is recommended to hold the stand to prevent the monitor from falling. For VESA wall mounting, the stand is detachable by removing three screws, allowing for integration with a separately purchased VESA wall mount kit (100 x 100 mm).
Intuitive OSD Menu Navigation: The On-Screen Display (OSD) menu is the primary interface for configuring the monitor's settings. It is activated by pressing the MENU button. Users can navigate through the menu using the directional buttons (▼ and ▲) to highlight and select desired functions. Pressing the MENU button again activates the highlighted function or enters a sub-menu. Settings within functions can be adjusted using the ▼ and ▲ buttons. The S/A button serves as an exit key, allowing users to return to the previous menu or exit the OSD entirely.
SPLENDID™ Video Intelligence Technology: This technology offers six preset video modes to optimize the display for different content types:
Image and Color Customization: The OSD menu provides extensive controls for image and color adjustments:
Input Source Selection: Users can easily select the input source between VGA and DVI (for VW199T/N models) through the "Input Select" function in the OSD menu, ensuring compatibility with various devices.
System Setup Options: The "System Setup" menu offers advanced configuration options:
Hotkey Functionality: Dedicated hotkeys provide quick access to frequently used functions:
Power Management: The monitor features a power button to turn the display on or off. A power indicator light changes color to reflect the monitor's status: blue for ON, amber for standby mode, and off when the monitor is powered off.
Proper care and maintenance are crucial for extending the lifespan and ensuring optimal performance of the ASUS VW199 Series LED Monitor:
Safe Handling: Before lifting or repositioning the monitor, it is advisable to disconnect all cables and the power cord. When moving the monitor, grasp it by its edges, avoiding lifting it by the stand or the cord, to prevent damage.
Cleaning Instructions: To clean the monitor, first turn it off and unplug the power cord. The monitor surface should be cleaned with a lint-free, non-abrasive cloth. For stubborn stains, a cloth dampened with a mild cleaner can be used. It is important to avoid cleaners containing alcohol or acetone, and never spray cleaner directly onto the screen, as this could cause liquid to drip inside the monitor and lead to an electric shock.
Environmental Considerations:
Power Supply Management: The monitor should only be operated from the type of power source indicated on its label. Users should consult their dealer or local power company if unsure about their home's power supply type. It is essential to use the appropriate power plug that complies with local power standards and to avoid overloading power strips and extension cords, as this can lead to fire or electric shock. The monitor should only be used with UL listed computers that have appropriately configured receptacles marked between 100-240V AC.
Troubleshooting Guidance: The manual provides a troubleshooting section (FAQ) to help users diagnose and resolve common issues such as the power LED not turning on, no screen image, image quality problems (too light/dark, not centered, blurry, color defects), image instability (bouncing, wave patterns), and audio issues (no sound or low sound for VW199T/S models). Solutions often involve checking cable connections, adjusting OSD settings (Brightness, Contrast, H/V-Position, Phase, Clock, Color Temperature, Volume), performing an "All Reset," or ensuring proper driver installation for sound cards.
Professional Assistance: Users are advised never to attempt to open the monitor cabinet or repair the power supply themselves, as high voltages inside can cause serious physical injury. If the power supply is broken or if technical problems persist, users should contact a qualified service technician or their retailer for assistance. Pushing objects or spilling liquid into the monitor cabinet slots should also be avoided.
| Screen Size | 19 inches |
|---|---|
| Resolution | 1440 x 900 |
| Panel Type | TN |
| Aspect Ratio | 16:10 |
| Brightness | 300 cd/m² |
| Response Time | 5 ms |
| Viewing Angle (Horizontal/Vertical) | 170° / 160° |
| Input Ports | VGA |