This document is a Memory Installation Guide for ASUSTOR AS65XXR Series NAS (Network Attached Storage) devices, specifically version 3.5.5.0120. It provides detailed instructions and precautions for users intending to upgrade or replace the memory modules in their ASUSTOR NAS.
Function Description
The primary function of this guide is to assist users in safely and correctly installing or replacing memory modules in their ASUSTOR AS65XXR Series NAS devices. It covers the entire process from preparing the NAS for memory installation to reassembling it and troubleshooting common issues. The guide emphasizes the importance of proper handling and installation techniques to prevent damage to the NAS or the memory modules.
Important Technical Specifications
- Supported Memory Capacity: All AS65XXR Series NAS devices support up to 128GB of memory.
- Memory Module Type: The guide refers to "DIMM" for memory modules, indicating that these are likely standard desktop-style RAM modules, although specific form factors (e.g., UDIMM, SO-DIMM) are not explicitly mentioned. The images show what appear to be standard DIMM slots.
- Compatibility: ASUSTOR does not guarantee that third-party memory modules will work in their NAS. They recommend purchasing memory from local dealers or the ASUSTOR Accessories Store (http://shop.asustor.com) to ensure compatibility.
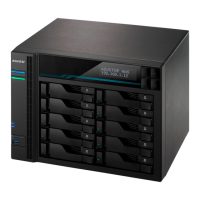
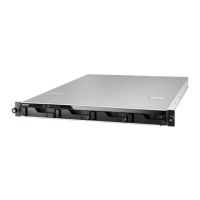
- Models Covered: The guide provides specific illustrations and instructions for AS6504RS, AS6504RD, and AS6512RD models, indicating that the memory installation process may vary slightly between these models, particularly concerning the physical access to the memory slots and the number of screws to remove.
Usage Features
The guide is structured to be user-friendly, breaking down the installation process into clear, sequential steps:
- Introduction and Precautions: This section highlights critical safety measures and warnings to prevent damage to the device or injury to the user. It covers electrostatic discharge prevention, proper tool usage, and the risks associated with incorrect installation.
- Step-by-Step Installation Guide:
- Removing the Cover: Instructions begin with safely shutting down the NAS via the ADM User Menu and disconnecting all cables. It then details how to loosen specific screws on the rear of the NAS (three screws for AS6504RS/AS6504RD, and for AS6512RD, the illustration shows a similar process) and how to gently slide the cover off the chassis.
- Installing Memory: This section describes how to locate the RAM slots on the motherboard (typically on the left-hand side). It instructs users to insert a DIMM into an empty slot at a 45° angle, ensuring the notches on the RAM and the slot align. The module should then be gently pushed down until both latches click into place, making the RAM flush with the motherboard.
- Replacing the Cover: After memory installation, users are guided to replace the cover and tighten the previously removed screws.
- Reconnect and Power On: The final step involves reconnecting all cables, including the power cord, and starting up the NAS.
- Memory Check on Startup: A crucial note informs users that after installing new RAM, the ASUSTOR NAS will perform a memory check on startup, which can take up to 10 minutes. This is a normal, one-time process.
Maintenance Features
While primarily an installation guide, it touches upon aspects related to maintenance and troubleshooting:
- Troubleshooting Section: This section addresses a common issue: "After installing new memory my NAS won't start. What's wrong?" It provides a systematic approach to diagnose the problem:
- Check LED indicators, system buzzer, and LCD display panel for normal operation.
- Verify memory compatibility and proper reinstallation if the NAS fails to recognize new memory or start up correctly.
- Suggests removing the newly installed memory module and restarting the NAS to see if it operates normally, helping to isolate if the new memory is the cause of the issue.
- Advises contacting local dealers or ASUSTOR customer service if the problem persists.
- Contact Information: The guide provides multiple channels for technical support:
- Email: support@asustor.com
- Online Support Form: http://www.asustor.com/service/online_support
- ASUSTOR Online Community: http://forum.asustor.com/
- Warranty Considerations: The introduction explicitly warns against actions that could invalidate the warranty, such as installing memory without familiarity, touching connectors, or opening the memory compartment cover unnecessarily. It also states that repair fees may be charged for accidents or malfunctions caused by self-installation errors. This encourages users to follow the guide carefully and seek professional help if unsure.
The guide is well-illustrated with images demonstrating each step, such as disconnecting power cables, loosening screws, removing the cover, and inserting memory modules, making it easier for users to follow along visually. The clear and concise language, combined with the visual aids, aims to make the memory upgrade process as straightforward and safe as possible for ASUSTOR AS65XXR Series NAS owners.