EasyManua.ls Logo

AT&T 1337 User Manual

AT&T 1337
10 pages
To Next Page IconTo Next Page
Page #1 background imageLoading...
Page #1 background image
Answering System 1337
Installation
Answering System Operation
Remote Operation
Installation
Setting Up the System
Follow these steps to set up your new answering system for proper operation.
1.
Install the battery:
Remove the battery cover on the left side of the unit by pressing in on the cover
and sliding it down. Insert the battery, then replace the cover.
2.
Connect the line cord:
Plug one end of the line cord into the TEL LINE jack at the rear of the unit,
and plug other end into a modular wall jack for your telephone line.
3.
Connect your telephone:
(If you do not wish to connect a telephone to the system, go to step 4)
Plug your telephone set cord into the TEL SET jack located at the rear of the answering system.
4.
Connect the power cord:
Plug the right-angle plug on the power cord into the answering system jack
marked POWER. Plug the power transformer into an electrical outlet that is not controlled by a wall
switch.
You should use only the power cord supplied with your answering system. If you need a replacement cord,
call the National Sales and Service Center at 1-800-222-3111.
Formatting Digital Memory
When you connect the unit to an electrical outlet, the system automatically begins formatting digital
memory. This takes about 4 minutes.
While the system is formatting memory, the Message Indicator Light flashes rapidly on and off. The
Message Window begins to count down from 64 to 0. You cannot use any system features while the
formatting routine is in progress, but you may wish to look through the rest of this manual and review
instructions for other features.
When the formatting of the unit’s memory is completed, the Message Indicator Light stops flashing (but
remains on) and the Message Window shows 0. The 0 blinks on and off slowly to indicate that you need to
record an announcement.
NOTE:
If you did not install a battery, or if the battery is low on power or installed incorrectly,
the system alternates between the usual display and the message Lo. You should install a battery
so that there is backup power to save messages in the event of a power failure.
System Reset
If the system does not record messages when memory is available, or otherwise malfunctions, press
RESET. (The RESET button is on the right side of the unit and is recessed to prevent your pressing it
accidentally.)
CAUTION:
When you press RESET, the system begins the four-minute formatting routine
described on this page. The announcement and any messages stored in memory are deleted. The
Remote Access code also returns to the factory setting of 10.
Question and Answer IconNeed help?

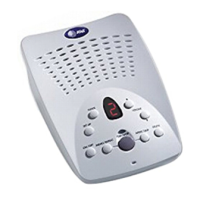
Do you have a question about the AT&T 1337 and is the answer not in the manual?

AT&T 1337 Specifications

General IconGeneral
BrandAT&T
Model1337
CategoryAnswering Machine
LanguageEnglish

Summary

Installation Guide

Setting Up the System

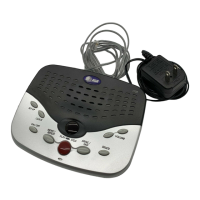
Step-by-step instructions for connecting and setting up the answering system.

Formatting Digital Memory

Details the automatic formatting process for digital memory upon initial power-up.

System Reset Procedure

Instructions for resetting the system, including its effect on memory and settings.

Answering System Operation

Recording Your Announcement

Guide on how to record a personalized outgoing announcement for callers.

Playing Back Your Announcement

Instructions for listening to the previously recorded outgoing announcement.

Message Volume Control

How to adjust the speaker volume for playing messages and announcements.

Automatic Answering Operation

How the system automatically answers calls and records incoming messages.

Call Handling Features

Covers bypassing announcements, no-answer mode, announce-only, and call screening.

Ring and Toll Saver Settings

Configuration options for the number of rings before answering and toll saver functionality.

Message Indicator Displays

Understanding Window and Light Status

Explains the meaning of codes in the Message Window and the Message Indicator Light.

Listening to Your Messages

Playing All Messages

Instructions for playing back all recorded messages and memos stored in the system.

Listening to New Messages Only

How to play only messages received since the last playback session.

Message Playback Controls

Details on using buttons like STOP, REPEAT, and FORWARD during message playback.

Saving and Deleting Messages

Procedures for saving, deleting selected, or deleting all stored messages.

Handling Full Memory

Information on what happens when memory is full and how to manage storage.

Remote Operation Features

Remote Access Code Management

Instructions for displaying and changing the system's remote access code.

Using Your Remote Access Code

How to access and control the answering system from a remote location.

Remote Message Playback

How to play messages, including all, new, or specific messages remotely.

Remote Message Management

Instructions for deleting messages remotely, either individually or all at once.

Remote Memo Recording

How to record a personal memo to the system from a remote telephone.

Remote Announcement Changes

Procedure for changing the outgoing announcement remotely.

Remote System Control

How to turn the answering system on or off remotely.

Troubleshooting and Support

Message Window Issues

Troubleshooting steps for a blank or unclear message window display.

Message Incompleteness

Reasons why recorded messages might be cut off or incomplete.

Call Answering Problems

Diagnosing issues with the system not answering or difficulty hearing messages.

'Lo' Indicator and Battery Issues

Understanding the 'Lo' indicator and its relation to battery backup power.

Related product manuals