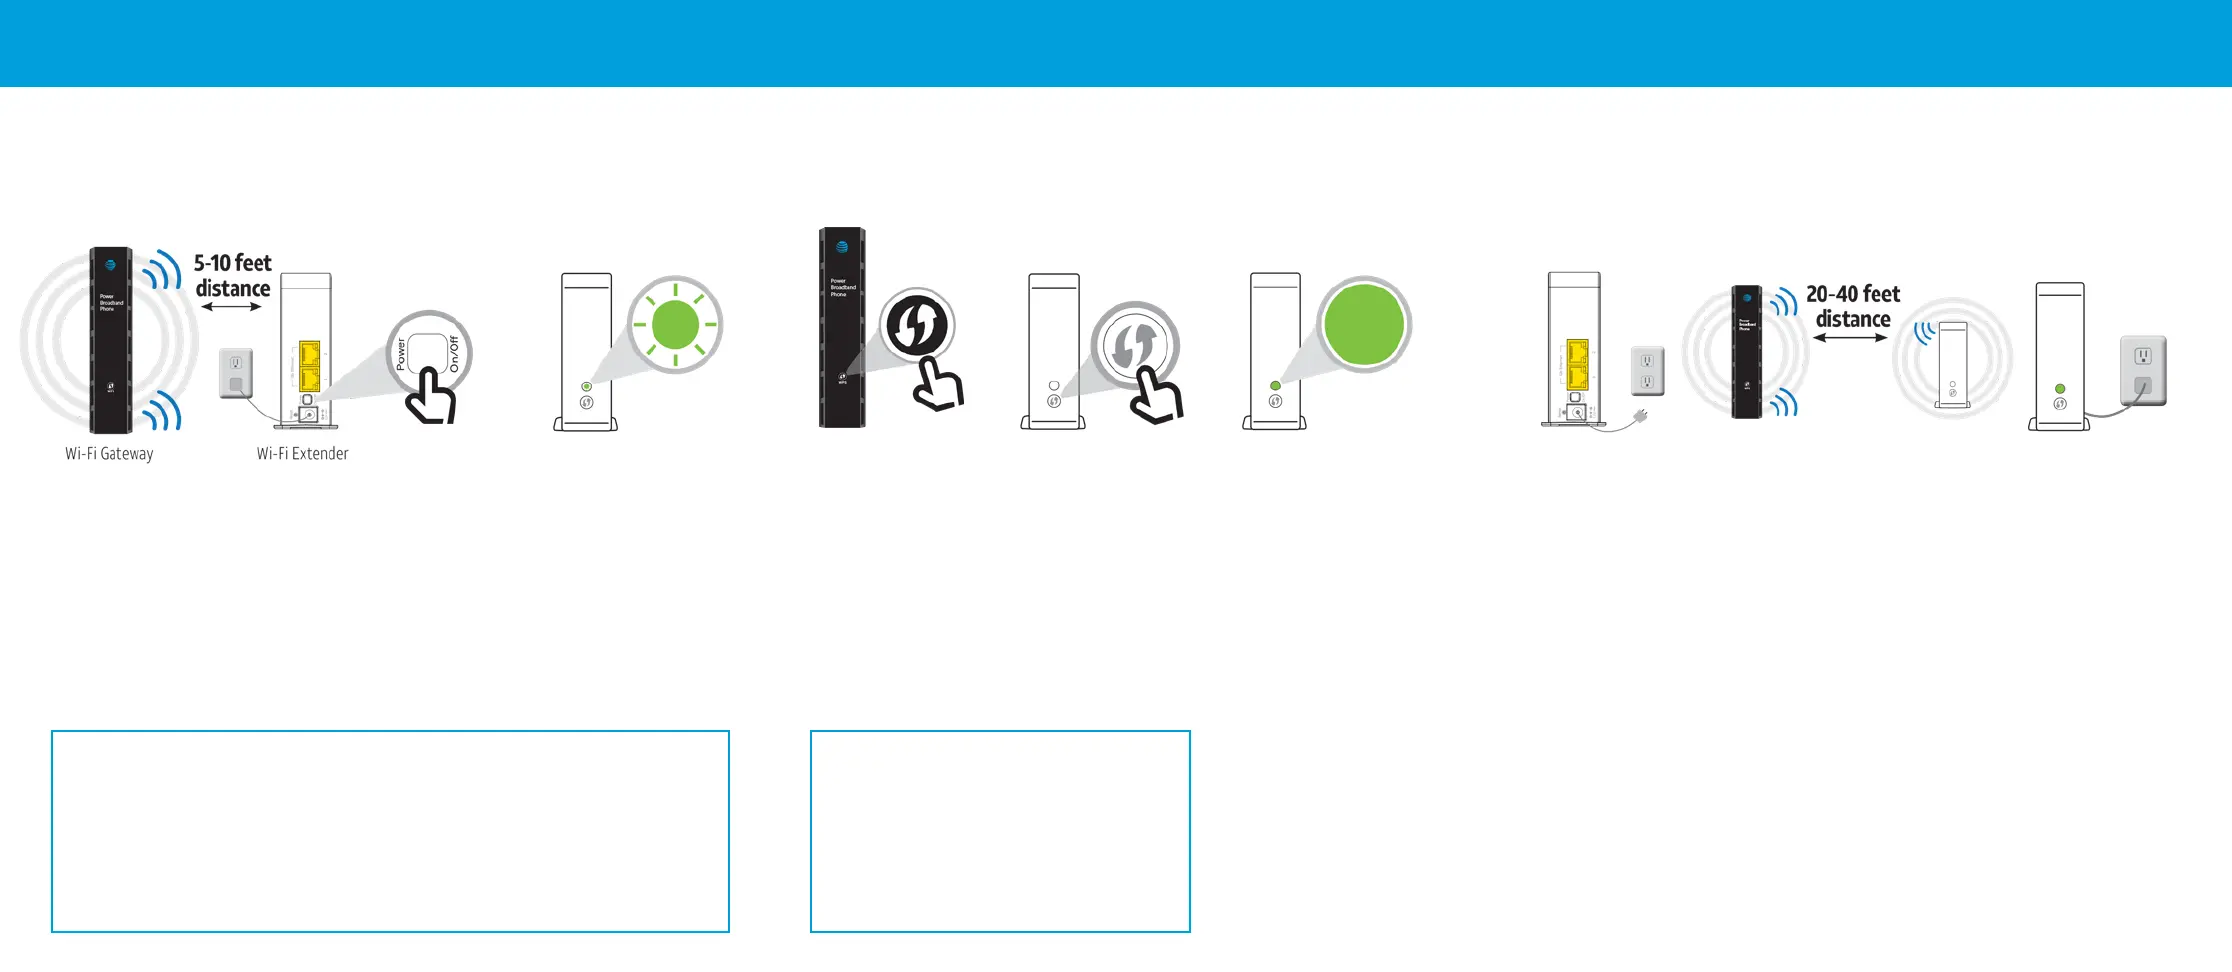
Alternate Setup Method
Power Up
Plug in
the power cord to
your Wi-Fi Extender
and then plug it into a
power outlet close to
your Wi-Fi Gateway.
Push
the Power
button on
the back
of the Wi-Fi
Extender.
Watch
for the light to
blink GREEN.
Tip:
For a successful setup, make sure:
•
Both the 2.4GHz and 5GHz radio bands are enabled. For help, use the
Smart Home Manager app or go to att.com/enhancedwi
• If you have dual SSIDs make sure they have the same name and password
Pair
Press
and release
the WPS
button on
your Wi-Fi
Gateway.
Press
and release
the WPS
button on
your Wi-Fi
Extender.
Wait
about 3 minutes
for the devices to
automatically pair.
The blinking light
will turn solid GREEN
when paired.
Note: If it does not light up solid
GREEN within 5 minutes, repeat
the pairing process or refer to the
Troubleshooting section.
Tip:
Once the Wi-Fi Extender is successfully
paired and placed in the home, the
Extender provides two optional wired
Ethernet connections for devices, such
as game consoles, connected TVs, etc.
Place
Unplug
your Wi-Fi
Extender
from the
power
outlet.
Move
your Wi-Fi Extender
to its new location
between your Wi-Fi
Gateway and the area
where you want a
stronger signal.
Tip:
Max distance between nearest
Gateway or Extender is 40 , two walls,
or one oor away. Extenders work best
when placed up o the oor and on open
surfaces away from large obstructions
and things that can cause interference
(e.g., microwaves, wireless devices, etc.).
Plug
your Wi-Fi
Extender into
a power outlet
and wait a few
minutes for the
connection to
re-establish and
the light to turn
GREEN.
You’re done!
 Loading...