The ATEN Video Extender Rack Mount Kit, model VE-RMK2U, is a specialized accessory designed to streamline the organization and deployment of ATEN video extenders within a standard server rack environment. This kit provides a robust and efficient solution for integrating multiple video extenders into a compact 2U rack space, enhancing system neatness, accessibility, and overall management.
Function Description
The primary function of the VE-RMK2U kit is to securely house and organize up to 12 ATEN video extenders within a 2U rack unit. By consolidating these devices, the kit helps to reduce cable clutter, optimize rack space utilization, and improve the professional appearance of an installation. It acts as a central mounting frame, allowing for a structured and scalable approach to deploying video extension solutions in data centers, control rooms, or any environment requiring multiple video extenders.
The kit is compatible with a range of ATEN video extender models, including VE800A, VE803, VE810, VE600A, VE602A, VE560, and CE100. This broad compatibility ensures its versatility across various ATEN video extension applications, from basic HDMI and DVI extension to more advanced KVM over IP solutions.
Usage Features
The VE-RMK2U kit is designed for straightforward installation and ease of use, making it accessible for both experienced technicians and those new to rack mounting.
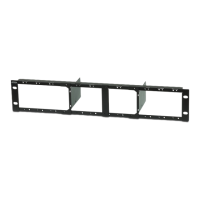
- Rack Mounting: The installation process begins by positioning the VE-RMK2U Frame on the front of a standard server rack. The mounting brackets on the frame are designed to align precisely with the holes in the rack, allowing for secure attachment using standard rack screws (not provided). This ensures a stable and robust foundation for the video extenders.
- Modular Design: The kit features a modular design that simplifies the integration of individual video extenders. Each video extender is first attached to a dedicated 2U Mounting Plate. This individual mounting approach allows for flexible configuration and easy replacement or addition of extenders without disturbing the entire setup.
- Secure Attachment: The video extenders are secured to the 2U Mounting Plates using M3X5 countersunk head screws, ensuring a firm and stable connection. Once an extender is attached to its plate, the plate then slides into a designated slot within the main VE-RMK2U Frame.
- Tool-Assisted Assembly: The kit utilizes a combination of screws for secure assembly. Countersunk head screws are used for attaching the video extenders to the mounting plates, providing a flush finish. Plastic captive screws are then used to secure the mounting plates, with their attached extenders, to the main frame. These captive screws are designed to remain attached to the mounting plate even when loosened, preventing loss during installation or maintenance.
- Center Brace for Stability: The VE-RMK2U Frame includes a removable center brace. This brace contributes to the structural integrity of the frame during initial setup and can be detached by removing two screws. This feature might facilitate easier access or specific installation steps, depending on the user's preference or the rack environment.
- High-Density Integration: The kit's ability to accommodate up to 12 video extenders in just 2U of rack space is a significant usage feature. This high-density integration is crucial for environments where rack space is at a premium, allowing for efficient scaling of video extension capabilities without consuming excessive physical resources.
- Organized Cabling: By providing a structured mounting solution, the VE-RMK2U kit inherently promotes better cable management. The consolidated placement of extenders within the rack facilitates neater cable routing, reducing tangles and improving airflow, which can contribute to the longevity of the devices.
- Visual Clarity: The organized arrangement of video extenders within the rack mount kit provides clear visual identification of each device. This can be particularly helpful during troubleshooting, maintenance, or system expansion, as technicians can quickly locate and identify specific extenders.
Maintenance Features
The design of the VE-RMK2U kit also incorporates features that simplify maintenance and servicing of the video extenders.
- Individual Extender Access: The modular design, where each video extender is mounted on a separate 2U Mounting Plate, allows for individual access to each device. If a single video extender requires servicing, replacement, or configuration adjustments, its mounting plate can be easily detached from the main frame without affecting the operation or mounting of the other extenders. This minimizes downtime for the entire system.
- Easy Removal and Reinstallation: The use of plastic captive screws for securing the mounting plates to the frame means that these screws are less likely to be misplaced during removal or reinstallation. This streamlines the process of taking an extender out for maintenance and putting it back in, reducing the time and effort involved.
- Improved Airflow (Indirect): While not a direct maintenance feature, the organized and spaced arrangement of devices within the rack mount kit can indirectly contribute to better airflow. This improved ventilation helps to prevent overheating, which is a common cause of device failure and can reduce the need for premature maintenance or replacement.
- Simplified Troubleshooting: In a neatly organized rack, identifying which extender is connected to which source or display becomes much easier. This clarity significantly speeds up troubleshooting processes, as technicians can quickly trace connections and isolate faulty devices, leading to more efficient problem resolution.
- Durability and Longevity: The robust construction of the VE-RMK2U Frame and mounting plates ensures that the video extenders are securely held and protected within the rack. This physical protection can extend the lifespan of the extenders by shielding them from accidental damage, vibrations, and other environmental factors present in a rack environment.
- Scalability for Future Needs: The kit's design anticipates future expansion. As an organization's video extension needs grow, additional extenders can be easily integrated into available slots within the frame, or another VE-RMK2U kit can be added to the rack. This scalability simplifies system upgrades and reduces the need for complete reconfigurations.
In summary, the ATEN Video Extender Rack Mount Kit VE-RMK2U offers a comprehensive solution for managing ATEN video extenders in a professional rack environment. Its focus on organization, ease of installation, and simplified maintenance makes it an invaluable tool for optimizing system performance, reducing operational complexities, and ensuring the long-term reliability of video extension infrastructure.