EasyManua.ls Logo

Atlantic VIPER 3000 User Manual

Atlantic VIPER 3000
7 pages
To Next Page IconTo Next Page
Page #1 background imageLoading...
Page #1 background image
VIPER 3000
Item #: 33906164
THIS INSTRUCTION BOOKLET CONTAINS IMPORTANT SAFETY
INFORMATION. PLEASE READ AND KEEP FOR FUTURE REFERENCE.
ESTE FOLLETO DE INSTRUCCIONES CONTIENE INFORMACIÓN IMPORTANTE
DE SEGURIDAD. POR FAVOR LÉALO Y GUÁRDELO PARA REFERENCIA FUTURA.
Congratulations on your latest Atlantic purchase. Follow these instructions and you’ll have this
new product assembled in no time. If you need any help,or to order replacement/missing parts,
please call 1-800-747-2660 or email customer_relations@atlantic-inc.com.
Felicitaciones por su reciente compra del Atlántico. Siga estas instrucciones y tendrá este nuevo
producto se reunieron en ningún momento. Si usted necesita cualquier ayuda, o para pedir que
faltan / piezas de repuesto, por favor llame al 1-800-747-2660 o customer_relations@atlantic-inc.com
de correo electrónico.
Question and Answer IconNeed help?

Do you have a question about the Atlantic VIPER 3000 and is the answer not in the manual?

Atlantic VIPER 3000 Specifications

General IconGeneral
BrandAtlantic
ModelVIPER 3000
CategoryIndoor Furnishing
LanguageEnglish

Summary

Assembly and Safety Information

Assembly Tips

Provides general advice for a smooth assembly process, emphasizing preparation and tool usage.

Safety Precautions

Details essential safety warnings related to furniture use, weight limits, and placement.

Parts List

Assembly Steps

Step 1: Attach Middle Support Bar

Connects the middle support bar to the legs using bolts and an Allen wrench.

Step 2: Attach Side Support Bars

Connects side support bars to the legs and middle support bar with bolts.

Step 3: Place Desktop and Attach Leg Frame

Attaches the assembled leg frame to the desktop using bolts.

Step 4: Attach Hooks, Basket, and Cup Holder

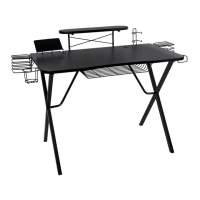
Installs hooks, basket, and cup holder onto the desktop using bolts.

Step 5: Connect USB Hub

Explains how to connect and power the 3.0 USB Hub for charging and data transfer.

Step 6: Enjoy Your Gaming Table

Final step indicating the completion of assembly and enjoyment of the new gaming table.

Product Warranty Information

Related product manuals