Page 9E0/65+>(A4>9,6F&+'540A'G61,+9'+6>9,,6H.$$$.$"".!I#I<Item 56992 56998
*JE@KLM%@NJKOMPQJOPK@PJPR@ *@KS%
J''+?8,D6OA'5/&>540A'
N+9265(+6@PKON@ OQ%MNKJPK6*JE@KL6OP*KNSRKOMP*6'+>540A69565(+68+=4AA4A=60-65(4'6?9A&9,6
4A>,&24A=69,,65+]56&A2+/6'&8(+924A='65(+/+4A68+-0/+6'+56&160/6&'+60-65(4'61/02&>5<
P05+: For additional information regarding the parts listed in the following pages,
refer to the Assembly Diagrams near the end of this manual.
MA,D6&'+69>>+''0/4+'69A269559>(?+A5'65(956(9`+68++A6-0&A265068+69>>+1598,+6-0/6&'+6745(65(+6,97A6?07+/<66
S'+60-69AD605(+/69>>+''0/D60/69559>(?+A5'6?4=(564A>/+9'+65(+6/4'X60-64AY&/D<
J559>(6S11+/6Z9A2,+
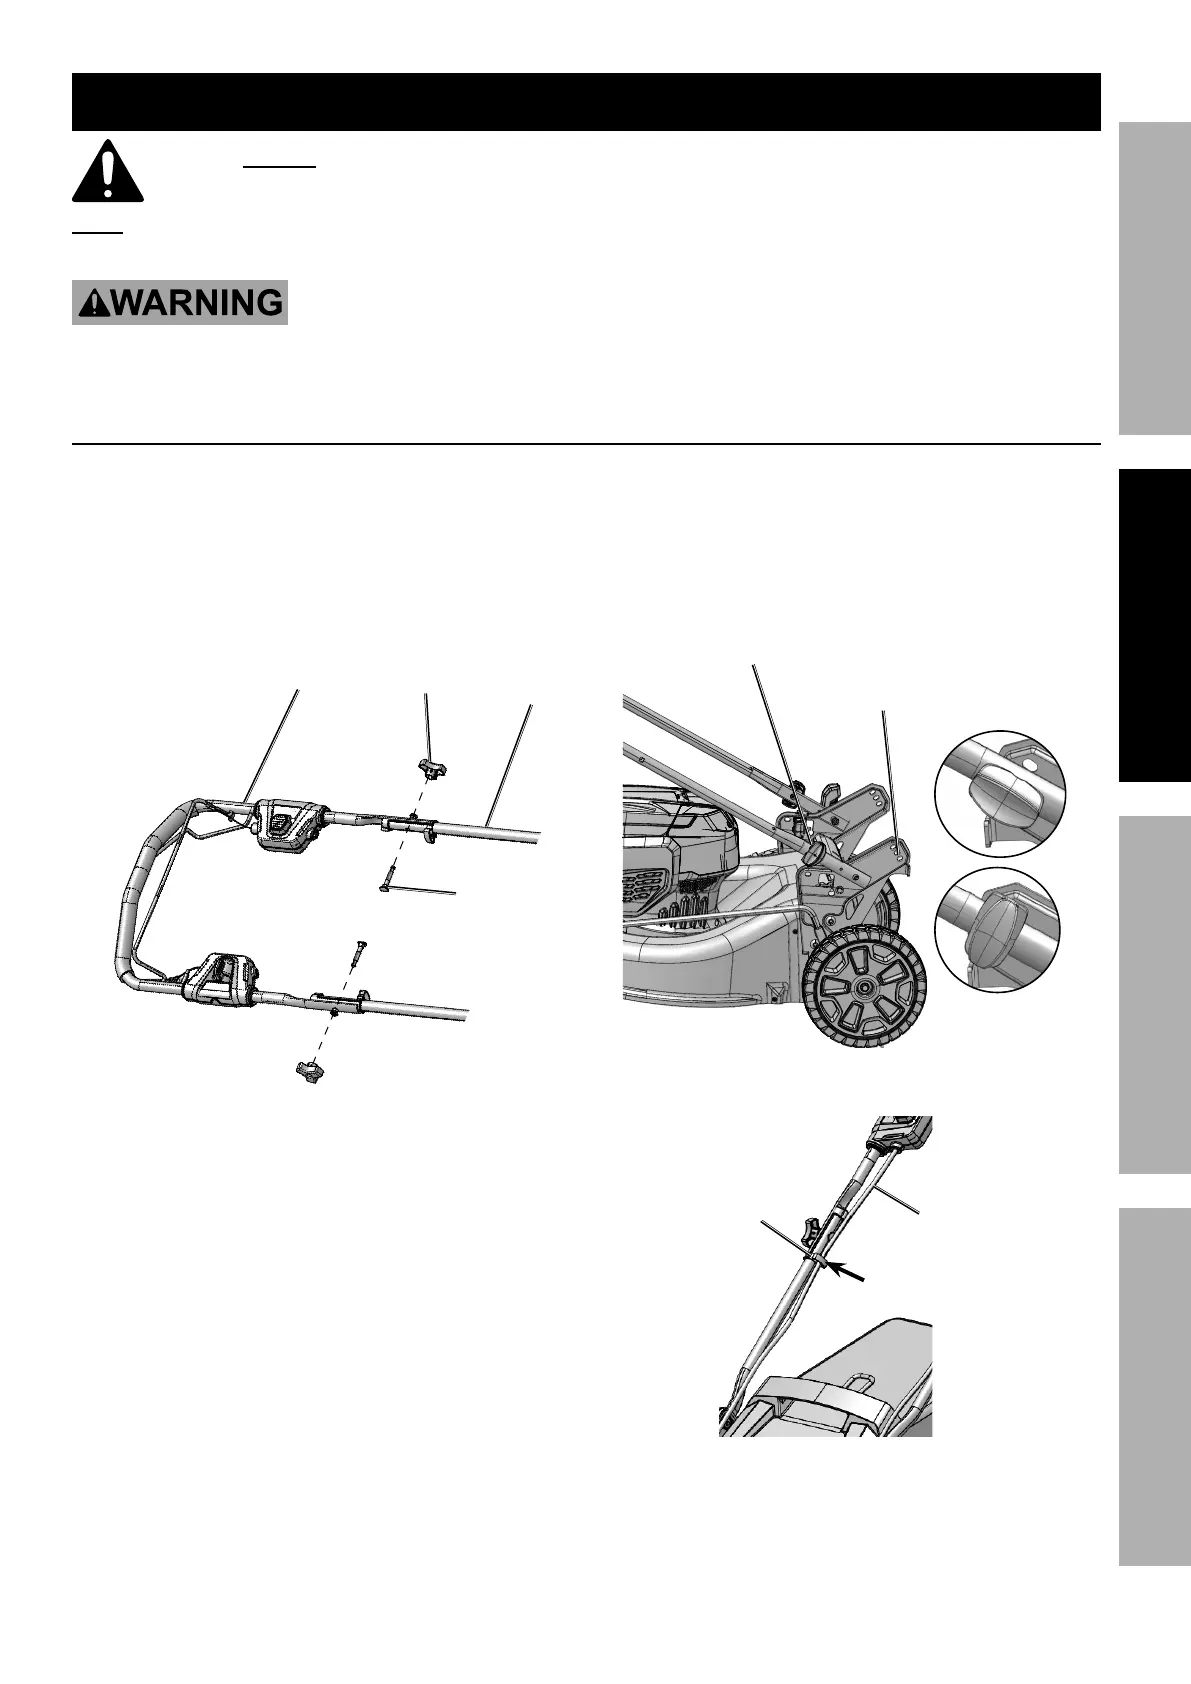
1. Lift Upper Handle and carefully line up with
Lower Handles without pinching or twisting cables.
2. Connect Upper Handle to Lower Handles
with Handle Connect Knobs (53) and
Handle Bolts (55). Tighten securely.
S11+/6
Z9A2,+
V07+/6
Z9A2,+
Z9A2,+6
R0AA+>56
\A086b!dc
Z9A2,+6
C0,56b!!c
!"##)6*(07A
3. Unlock Lower Handles: Pull out and rotate
Handle Lock Knobs 90 degrees.
4. Move Handle assembly to operating position, locking
each side into preferred handle height position.
Check that both sides are securely locked into place.
Z9A2,+6
V0>X6\A08
Z9A2,+6Z+4=(56
%0'4540A'
V0>X+2
SA,0>X+2
5. Route cables through clips, then push clips to lock.
R98,+
R,41
%&'(6506
V0>X



 To Next Page