Quick Start Steps 12
Cyclops
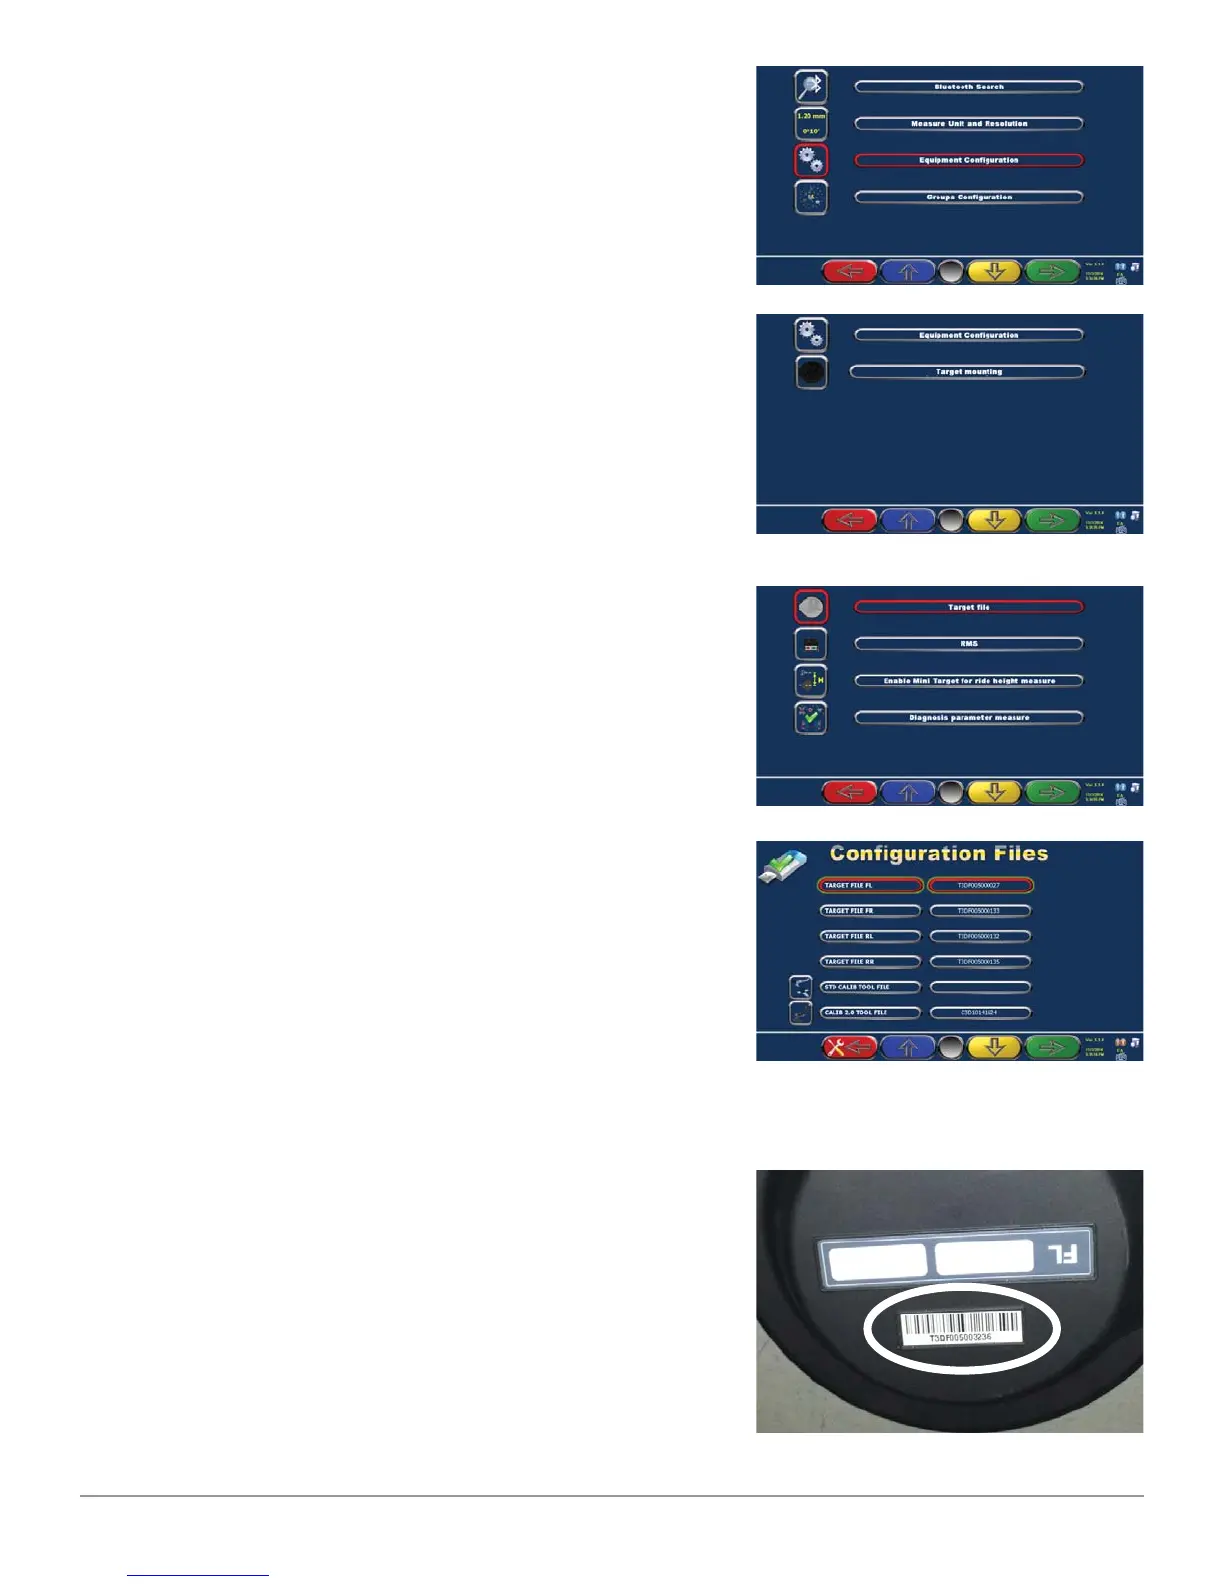
Press “F2” or “F3” key (blue or yellow) to move the
cursor to “Equipment Confi guration”.
Press “F4” to continue.
Press “F2” or “F3” key (blue or yellow) to move the
cursor to “Equipment Confi guration”.
Press “F4” to continue.
WE CHECK THAT THE TARGET CODE (ON
BAR CODE STACKED ON THE REAR OF THE
EACH TARGET) MATCHES WITH THE FILES
ENTERED IN THE WHEEL ALIGNMENT PROGRAM
CONFIGURATION.
Press “F2” or “F3” key (blue or yellow) to move the
cursor to the “Target File” Press “F4” to continue.
Check that the names of the Target written on this
page match with the code on the label stacked on
each target, see photo below. The name written here
should match with the fi le characterization/calibration
of the target and this fi le is used to correctly read the
angles of the wheels. If the fi le name is wrong also
fi le stored on your computer is not correct. Enter
correct code and the right fi le normally stored on
the USB memory key will be automatically copied on
the wheel aligner program.
The Target fi les are located in the memory stick that
came with the PC. Check on the memory key, in the
“TARGET” folder, the fi les stored have the same name
of the target mounted on Clamps. Connect the USB
to the PC.
Referring to the previous image, write the correct
code in each box of the Target if wrong or not
present. When you press the “F1” key to exit this
page, the program will automatically copy the fi les
from USB to PC, if not already done.
 Loading...