Quick Start Steps 6
Cyclops
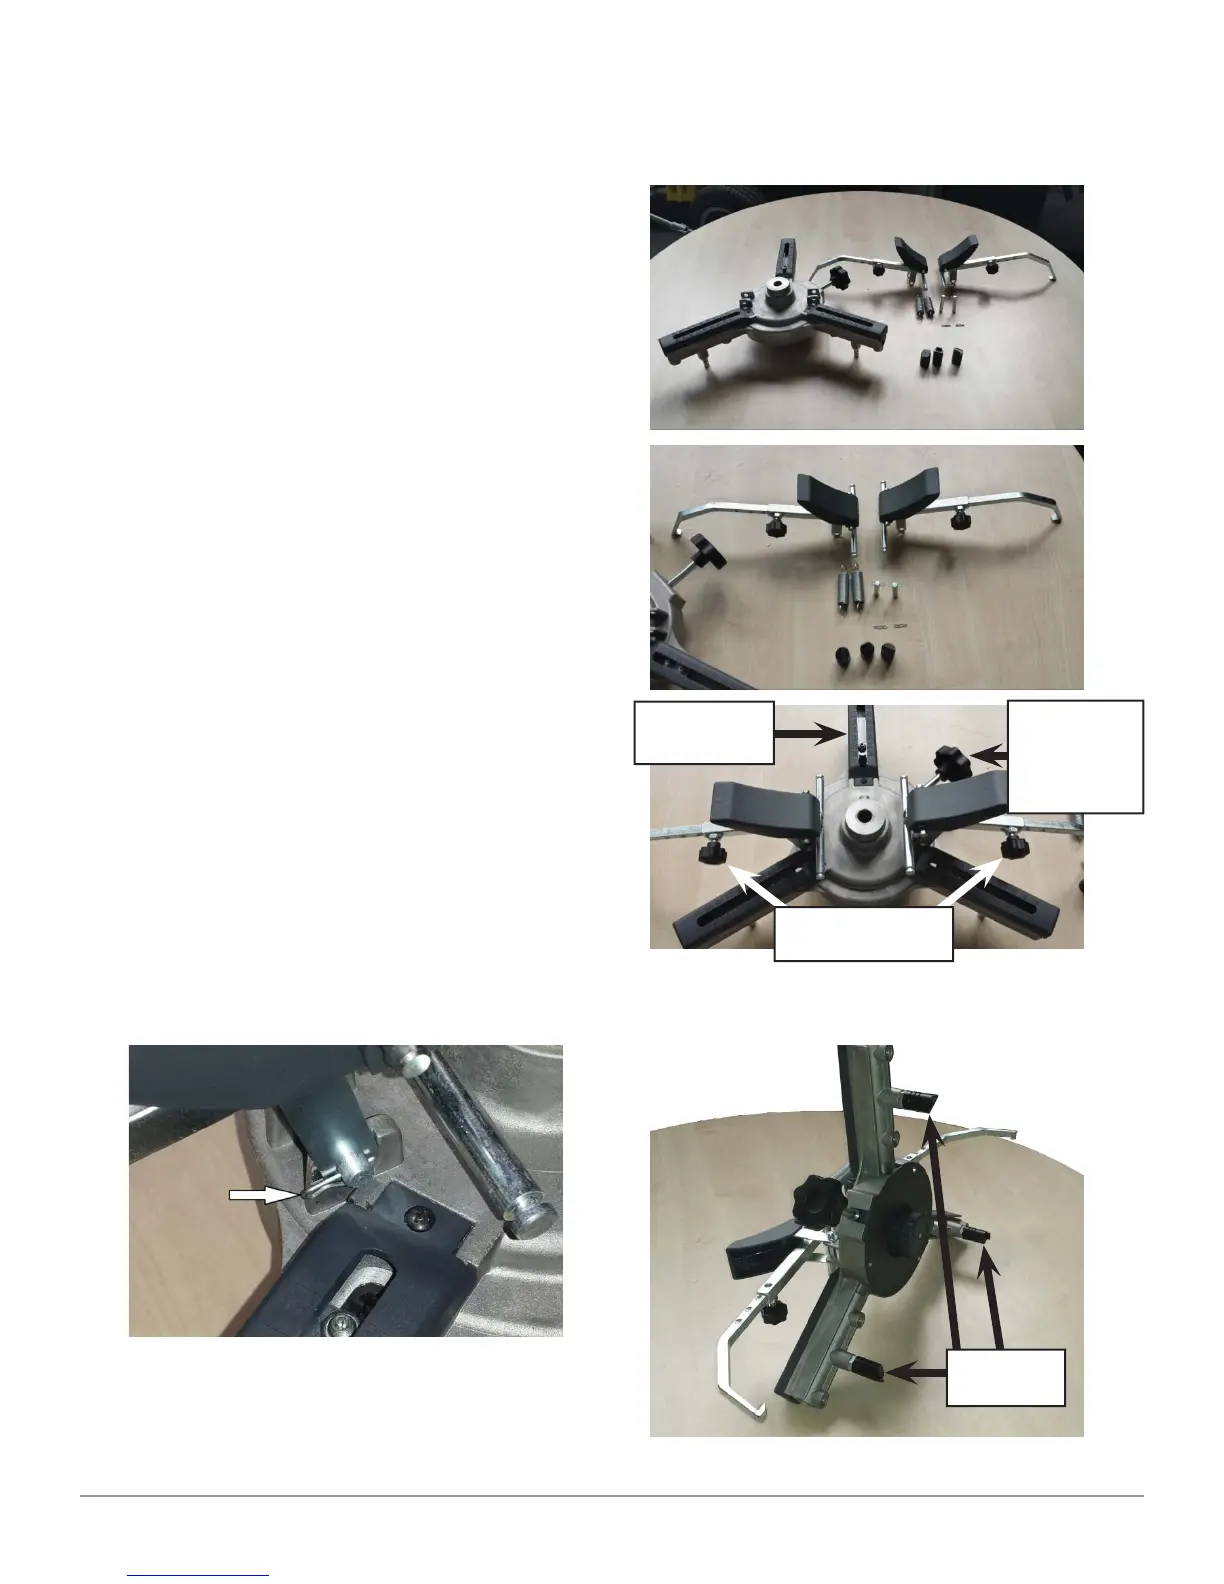
Mount Clamps And Quick-Locking Arms
Identify the package containing the clamps and open it.
Remove the clamps and assemble
them. The knobs used to stop the arms
should be pointing towards the ground
in order to facilitate the adjustment
of the arm and be sure that the knob
turns easily into the groove on the arm
to ensure a good seal.
Please note the mounting position of
the Quick Locking arms and relative
adjustment knobs. The system is
designed to have a left and right arm
with both knobs mounted as shown,
respect this position to have an easy
adjustment, see the following fi gure.
Clamp positioned with one arm in
the “12 o’clock” Wheel diameter
adjustment knob to the right, Quick
Locking arms properly mounted with
knobs at “6 o’clock”
Connect the quick locking device on
the clamp
Insert the clips to lock the pin.
Assemble the springs.
Attach the claws.
Knobs at “6
o’clock”- OK
Wheel
diameter
adjustment
knob
Arm in the
“12 o’clock”
Attach the
claws
 Loading...