Tools Required:
Before starting:
• Unpack the fixture and ensure that there are no
damaged or missing parts.
• Ensure that the supply power is shut off.
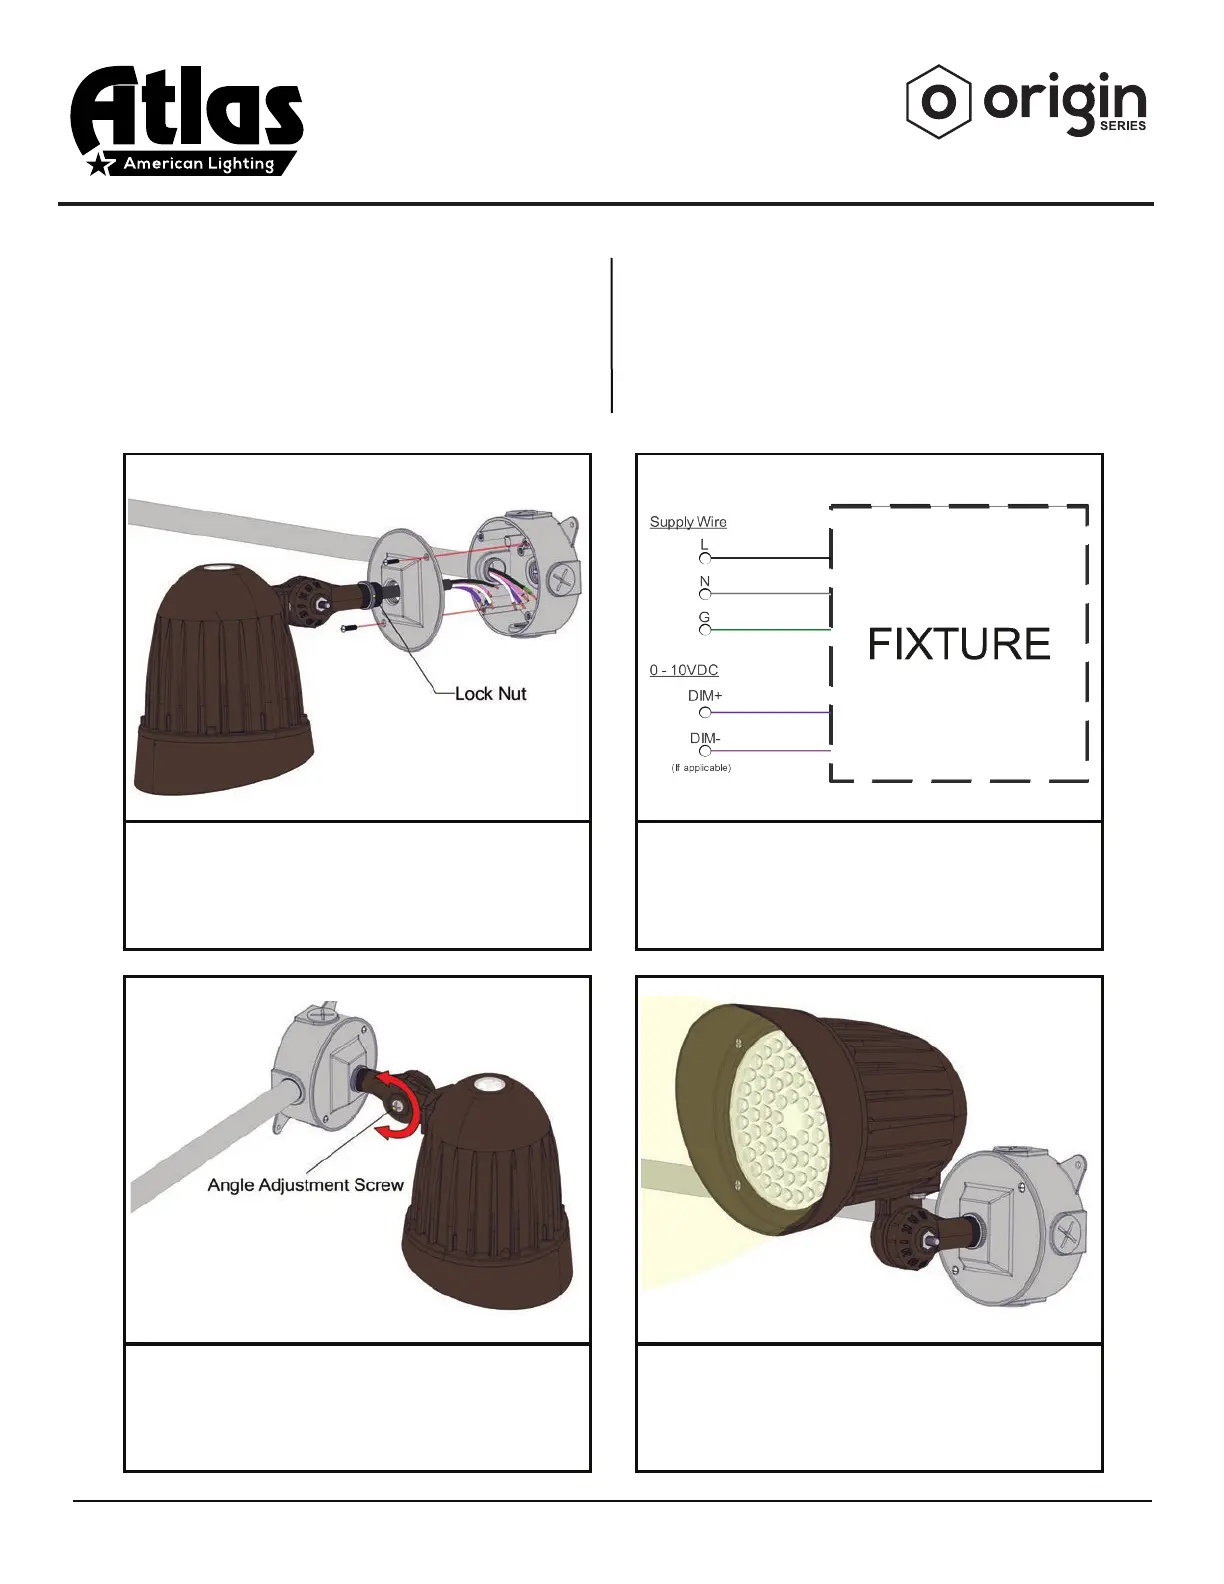
Step 4: Restore power and check that the fixture
is working properly.
Step 2: Make the wiring connections according to
the diagram on Page 4. If dimming is not required,
make sure the dimming leads are capped.
Wire Strippers
Wire Cutters
Phillips screwdriver
Step 1: Feed the power cord into the junction box
or conduit. If j-box mounted, insert the threaded
portion of the knuckle into the threaded hole of
the cover. Secure the fixture with the Lock Nut.
Step 3: To aim the fixture, use a screwdriver to
loosen the Angle Adjustment Screw. Move the
fixture head to the appropriate position and
tighten the screw to lock it in position.
Standard Installation
Installation Instruction
06.23
Origin Series by Atlas Lighting | 1406 S. Mebane St. | Burlington, NC 27215 | 800-849-8485 | www.atlasled.com
Page 2