ATMOS MULTI Weather Dependant Control
Page 5
Instructions
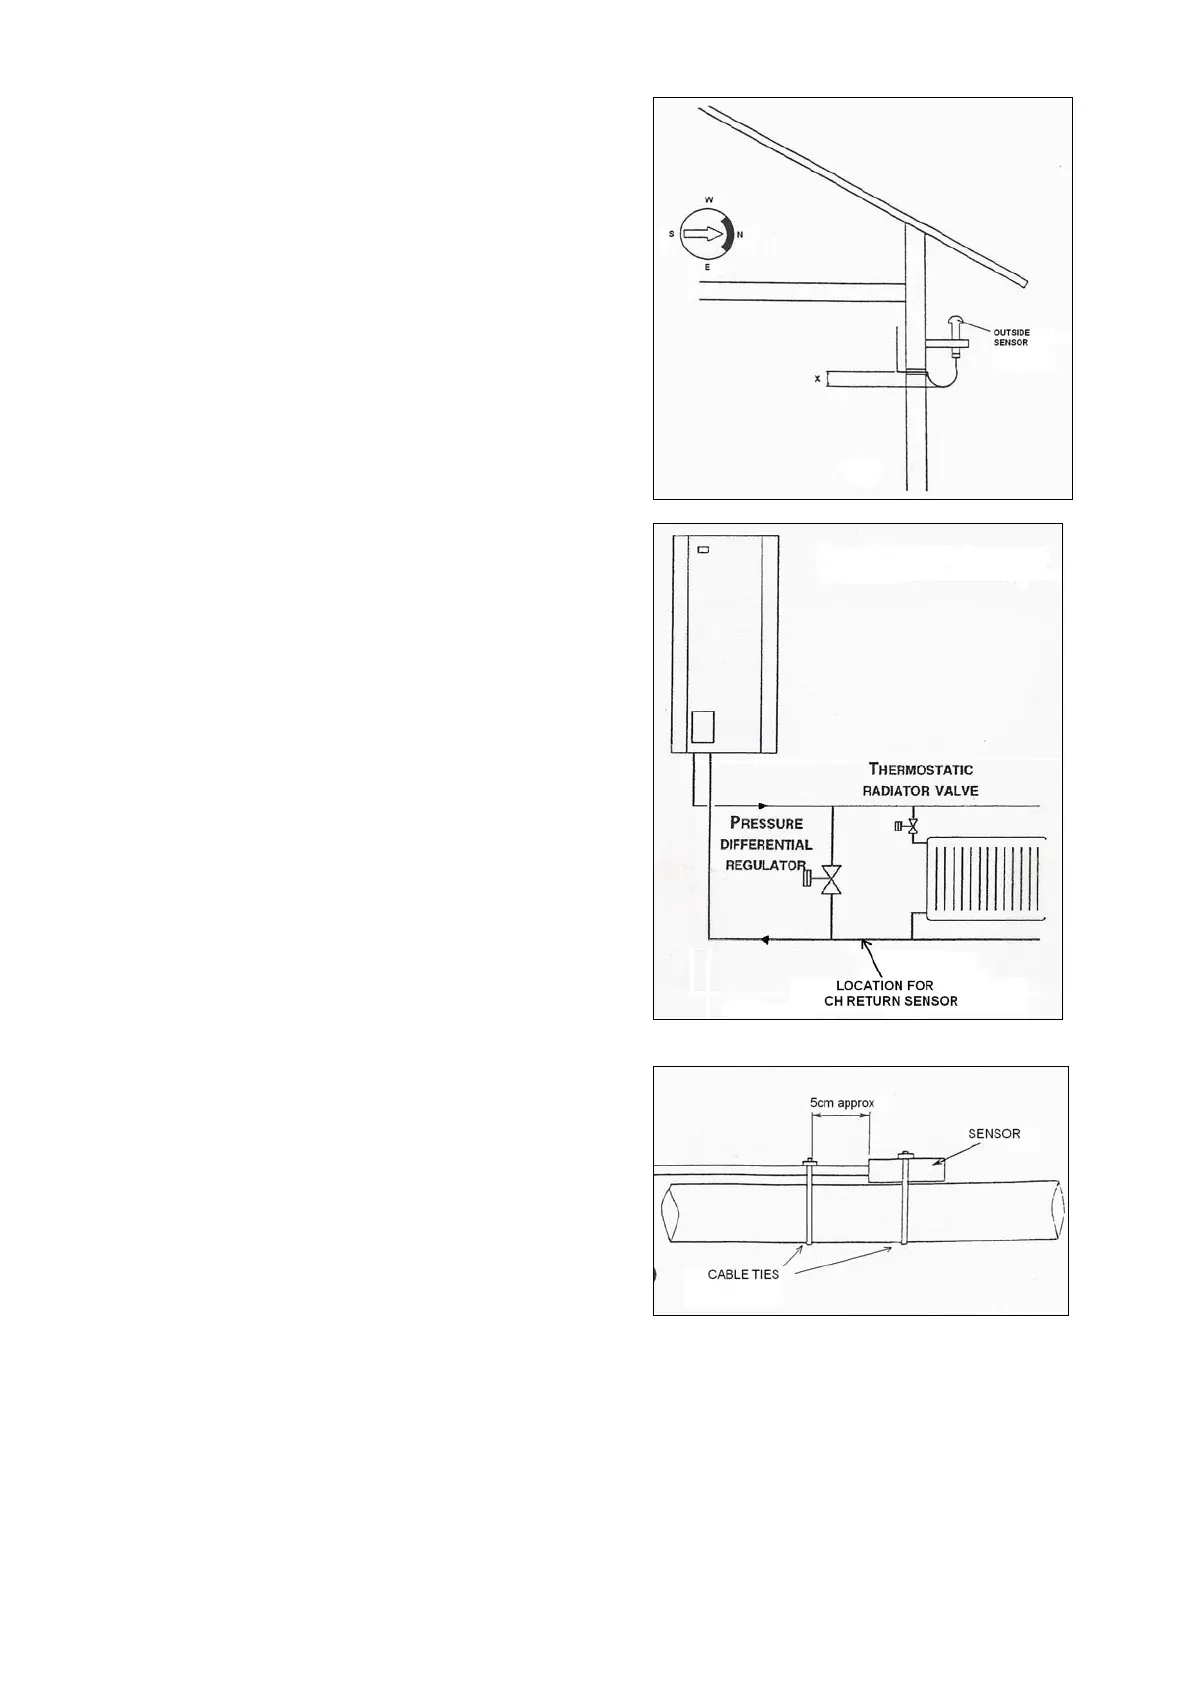
a) Drill a hole in the wall for the connection cable.
b) Determine where to put the outside sensor,
ensuring that the cable hangs from the hole, to
prevent moisture/ water getting into the hole.
c) Run the cable back to the appliance, ensuring that
holes in exterior walls are sealed. Pass the cable
through the cable gland and connect to the cable
connector (position outside sensor).
1.3 Connecting the CH return sensor
The return sensor must be fitted to the return pipe on
the Atmos Multi.
Note! If radiators are fitted entirely with thermostatic
radiator valves, then an automatic bypass must be
fitted. Where a bypass is fitted, then the return sensor
must be located on the radiator side of the bypass as
shown in Fig 4.
Instructions
a) Ensure that the CH return pipe is clean from rust
and paint.
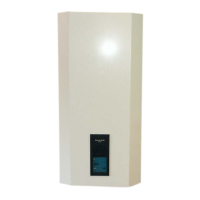
b) Attach the sensor to the pipe with the cable tie (Fig
5).
c) Use a small cable tie at about 5 cm from the sensor
to strap the cable to the pipe.
d) Run the cable into the appliance through the cable
gland, and connect to the cable connector (position
CH return).
Note
The room thermostat connections of the controller
(top left) should be connected to a time clock, or
linked out to give continuous operation.
Note that this is a 24volt circuit and must only be
connected to voltage free contacts.
Fig 3
Fig 4
Fig 5