COMPLETE WORKSHOP MANUAL (CONTINUED)
18
!
NOTE
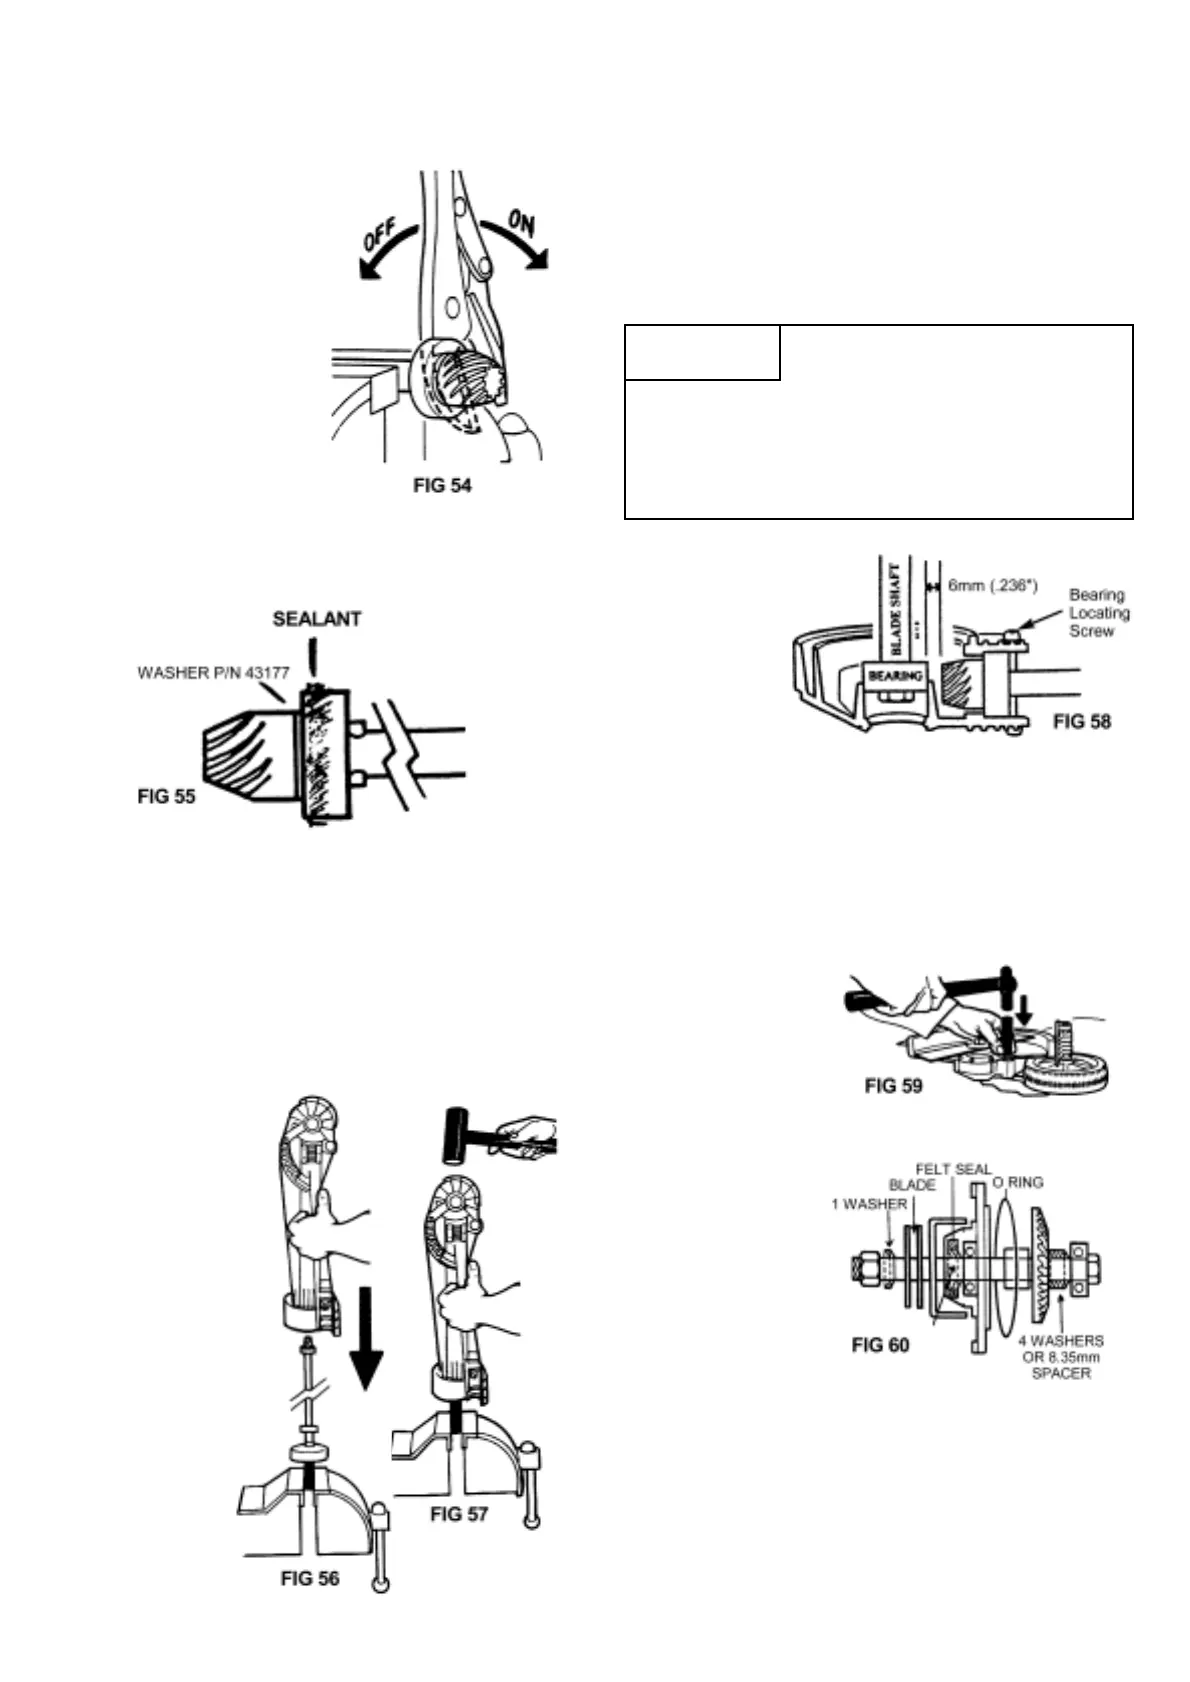
Bearing must be forward to
allow bearing locating screw to
be fitted, then pinion and bearing forced back
onto screw. If this is not done, pinion or crown
gear could be tight. Correct distance is 6mm
(.236”) Fig. 58.
TO REMOVE PINION
1. Hold shaft in vice
between two pieces of
aluminium so as not to
damage shaft.
2. To remove pinion, grip
shaft just behind
bearing in jaws of vice
(Fig. 54) and unscrew
pinion counter (anti)
clockwise (normal
thread) with vice grips.
If tight, heat to break
loctite seal.
3. Fit new pinion with
fresh loctite on thread,
making sure it is tight up to spacer washer
#43229, (Fig. 55) and washer does not move.
4. With a soft hammer, tap casing down until it
bottoms on pinion bearing (Fig. 57).
5. Fit bearing location screw (See Fig. 48 marked A)
and leave nut loose.
6. Using a screwdriver, lever pinion firmly back onto
bearing locating screw and tighten nut (Fig. 52 &
53).
4. To remove clutch drum, grip shaft just behind bearing
in aluminium vice jaws and impact off with 14mm
(9/16”) hex socket. See Page 17 for replacement of
drum.
ASSEMBLING MAIN HOUSING
1. Clean and dry bearing. Place oil resistant gasket
sealant (e.g. Fullerprene 303) around bearing as
in Fig. 55.
2. Place and
lock-up a
15mm
diameter
(approx.)
brass drift
vertically in a
vice (Fig. 56).
3. Hold centre of
clutch drum
nut on top of
drift and slide
main body
housing down
over shaft
(Fig. 56).
7. Replace
crown gear
if teeth are
worn. See
sequence
of assembly
(Fig. 60).
8. Check and
renew O’
ring #40906 if necessary. Fit assembly into
housing. If bearing is loose in housing, smear
loctite around bearing before assembling.
Carefully drive down (making sure gears are
meshing) by gently tapping around bearing area
(Fig. 59) and turning clutch drum. Refit 6 screws
around shaft.
9. Fill or top up with
gear lubricant.
See Page 11
“LUBRICATION
OF GEARS”.
10. Fit blade (see
page 10) and
bearing cap and
check rotation
that gears are
not binding. It
should turn
smoothly from
clutch end.
Backlash at end
of blade about
2-4mm. Refit
blade cover lid,
engine, handles and test.