©
2012 Escalade Sports
For Customer Service Call 1-888-996-2729
7
All Rights Reserved.
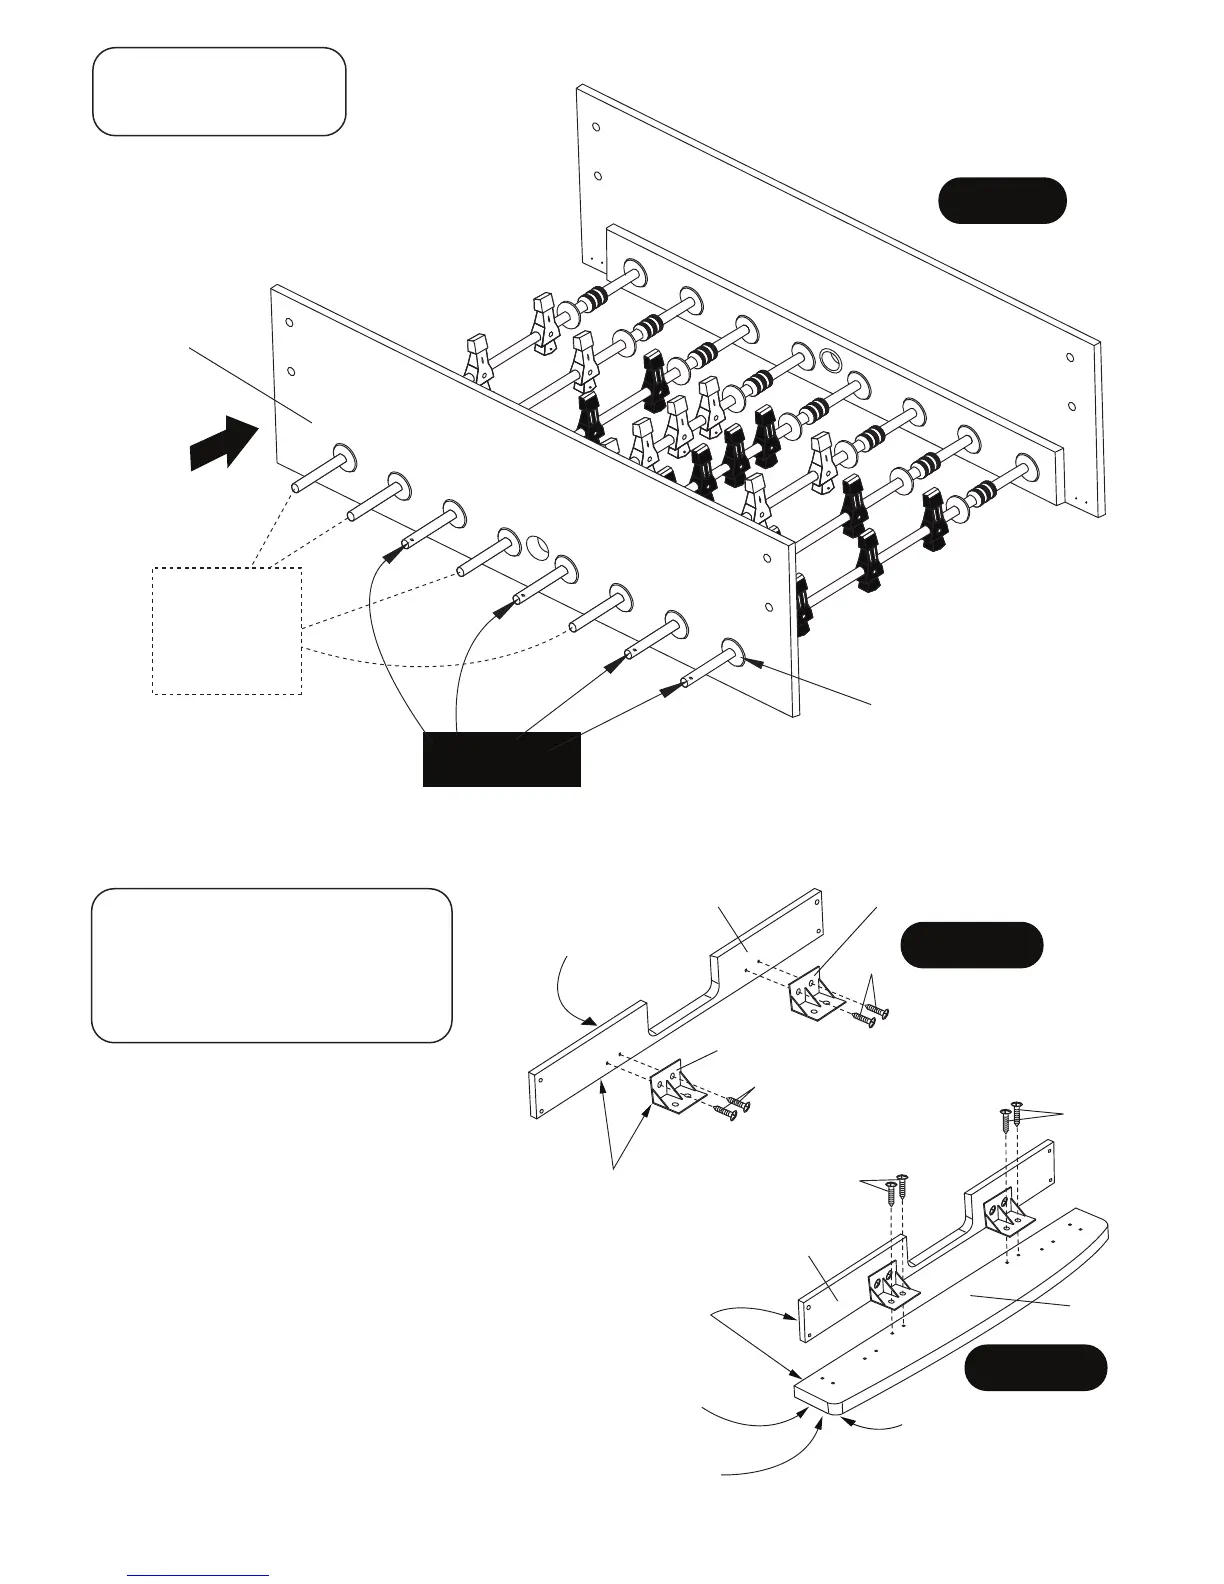
STEP 2:
Once your are sure you have the rods set
correctly, slide the other P1 Side Apron on
the rods as shown in FIGURE 2.
PARTS REQUIRED:
1 pc - P1 Side Apron
FIGURE 2
R1, R2 and R3
Hole/Handle End
R4, R5 and R6
Hole/Handle
goes on the
other end of
these rods
R2
R1
R3
R6
R2
R5
R4
R5
P1
C1 Rod Bushing
Note: C1 Rod Bushings
are already attached
onto P1 Side Apron
PARTS REQUIRED:
16 pcs - H4 Phillips Round Head Screw
2 pcs - P5 End Top Rail
2 pcs - P6 Goal End Board
4 pcs - P18 Plastic Bracket
STEP 3:
Place two P18 Plastic Brackets onto each inside
end of P6 Goal End Board as shown and attach
using the pre-drilled pilot holes with H4 Screws
as shown in FIGURE 3A.
Tighten, but do not strip out H4 screws.
NOTE: Be sure bottom edge of P18 Plastic
Brackets is flush with bottom edge of board.
Next, attach this assembly to P5 End Top Rail
using pre-drilled pilot holes with H4 Screws as
shown in FIGURE 3B.
Tighten, but do not strip out H4 screws.
NOTE: Be sure bottom edge of P6 Goal End
Board is flush with bottom edge of P5 Top Rail.
Repeat procedure for second assembly.
P6
White laminate
this side
P18
H4
H4
P18
FIGURE 3A
Black laminate
on bottom side
Round Corner
this position
FIGURE 3B
H4
H4
P6
P5
Edge must be
flush for correct
assembly
Edge must be
flush for correct
assembly
NOTE: See STEP 4 to look at
correct assembly P5 and P6.