©
2012 Escalade Sports
For Customer Service Call 1-888-996-2729
8
All Rights Reserved.
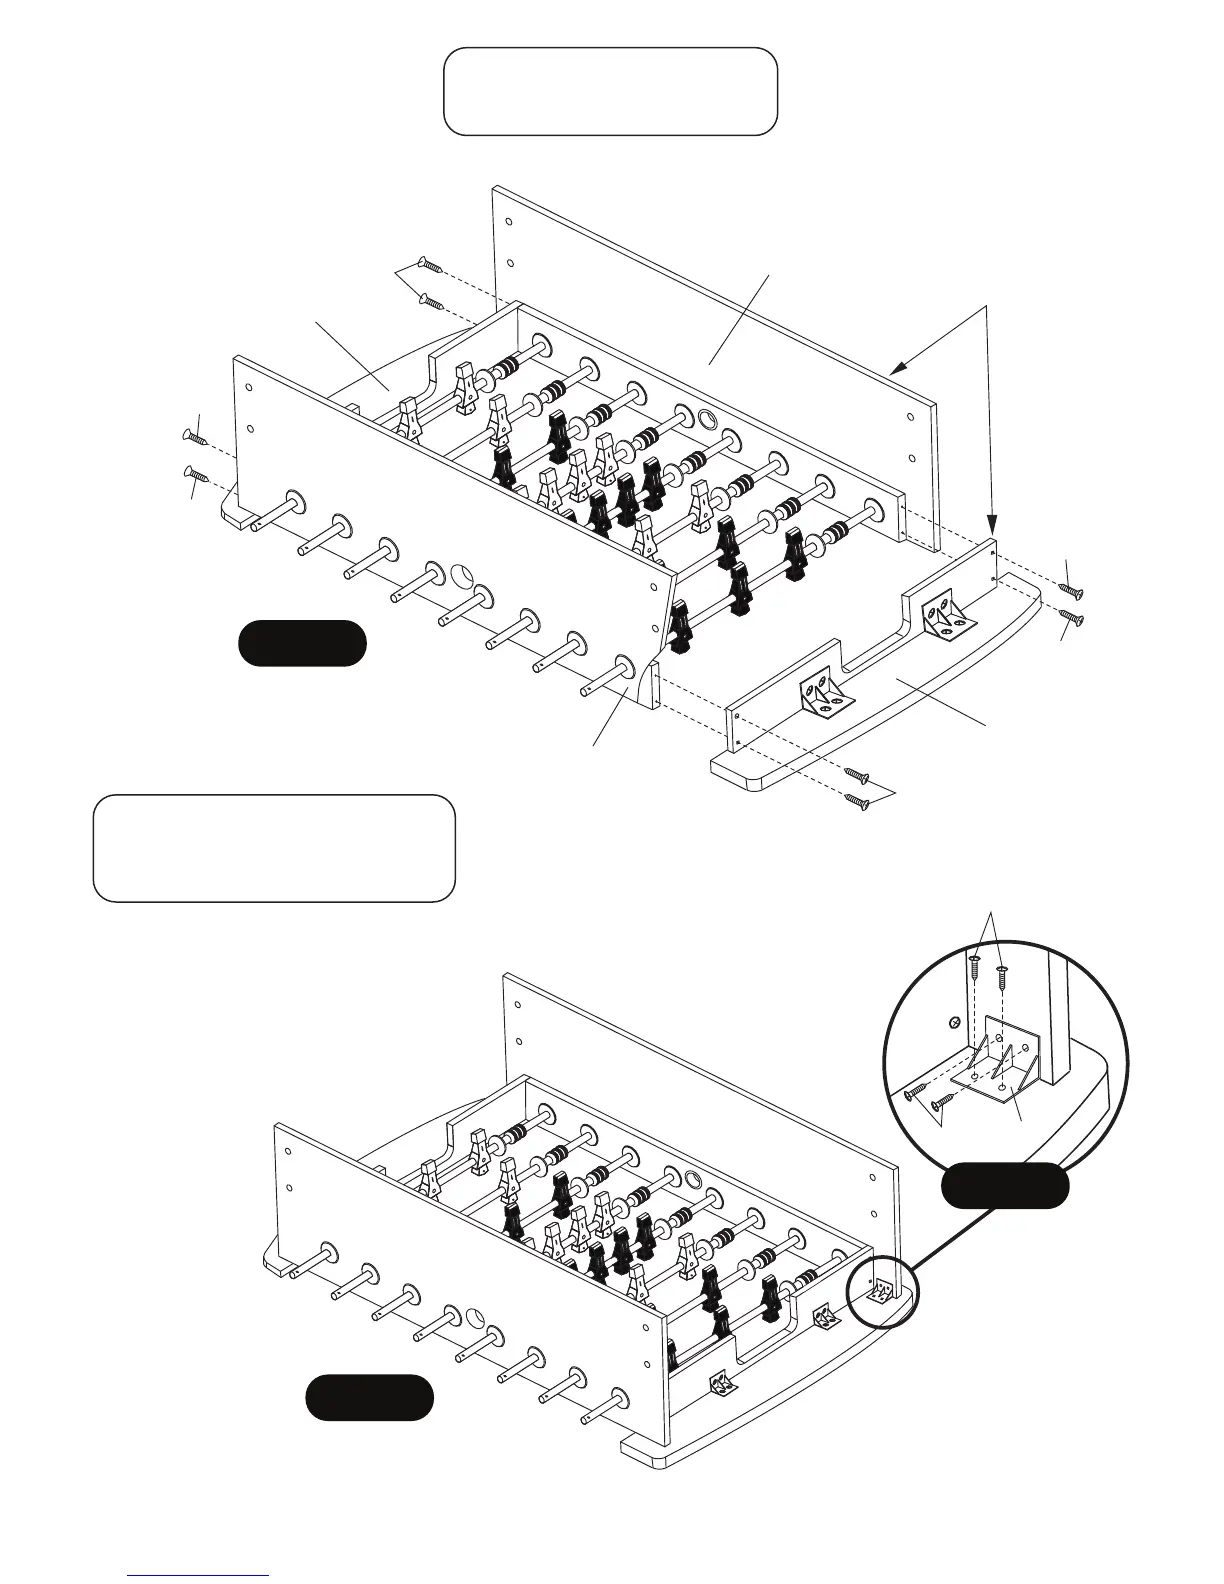
STEP 4:
Attach P5/P6 previous assemblies STEP 3 to P1 Side Apron using pre-drilled pilot holes with H3 Screws as
shown in FIGURE 4.
Tighten, but do not strip out H3 screws.
PARTS REQUIRED:
8 pcs - H3 Phillips Flat Head Screw
FIGURE 4
P5/P6
Assembly
H3
H3
H3
P5/P6
Assembly
H3
H3
H3
P1
P1
STEP 5:
Install one piece P18 Plastic Bracket
into each inside corner of P1 Side Apron
using pre-drilled pilot holes and H4
screws as per FIGURE 5 and DETAIL A.
Tighten, but do not strip out H4 screws.
PARTS REQUIRED:
16 pcs - H4 Phillips Round Head Screw
4 pcs - P18 Plastic Bracket
H4
H4
P18
DETAIL A
FIGURE 5
IMPORTANT NOTE:
Be sure to keep this assembly
square during P5/P6 assembly.