6
© 2013 Escalade Sports
For Customer Service Call 1-886-996-2729
All Right Reserved.
PARTS REQUIRED
8 pcs - H5 Flat Washer 8 pcs - H16 Phillips Round Head Screw 2 pcs - P19L Large
8 pcs - H6 Hex Head Bolt 4 pcs - H18 Phillips Washer Head Screw Cue Clip
8 pcs - H7 Barrel Nut 2 pcs - P19S Small Cue Clip 1 pc - T1 Wrench
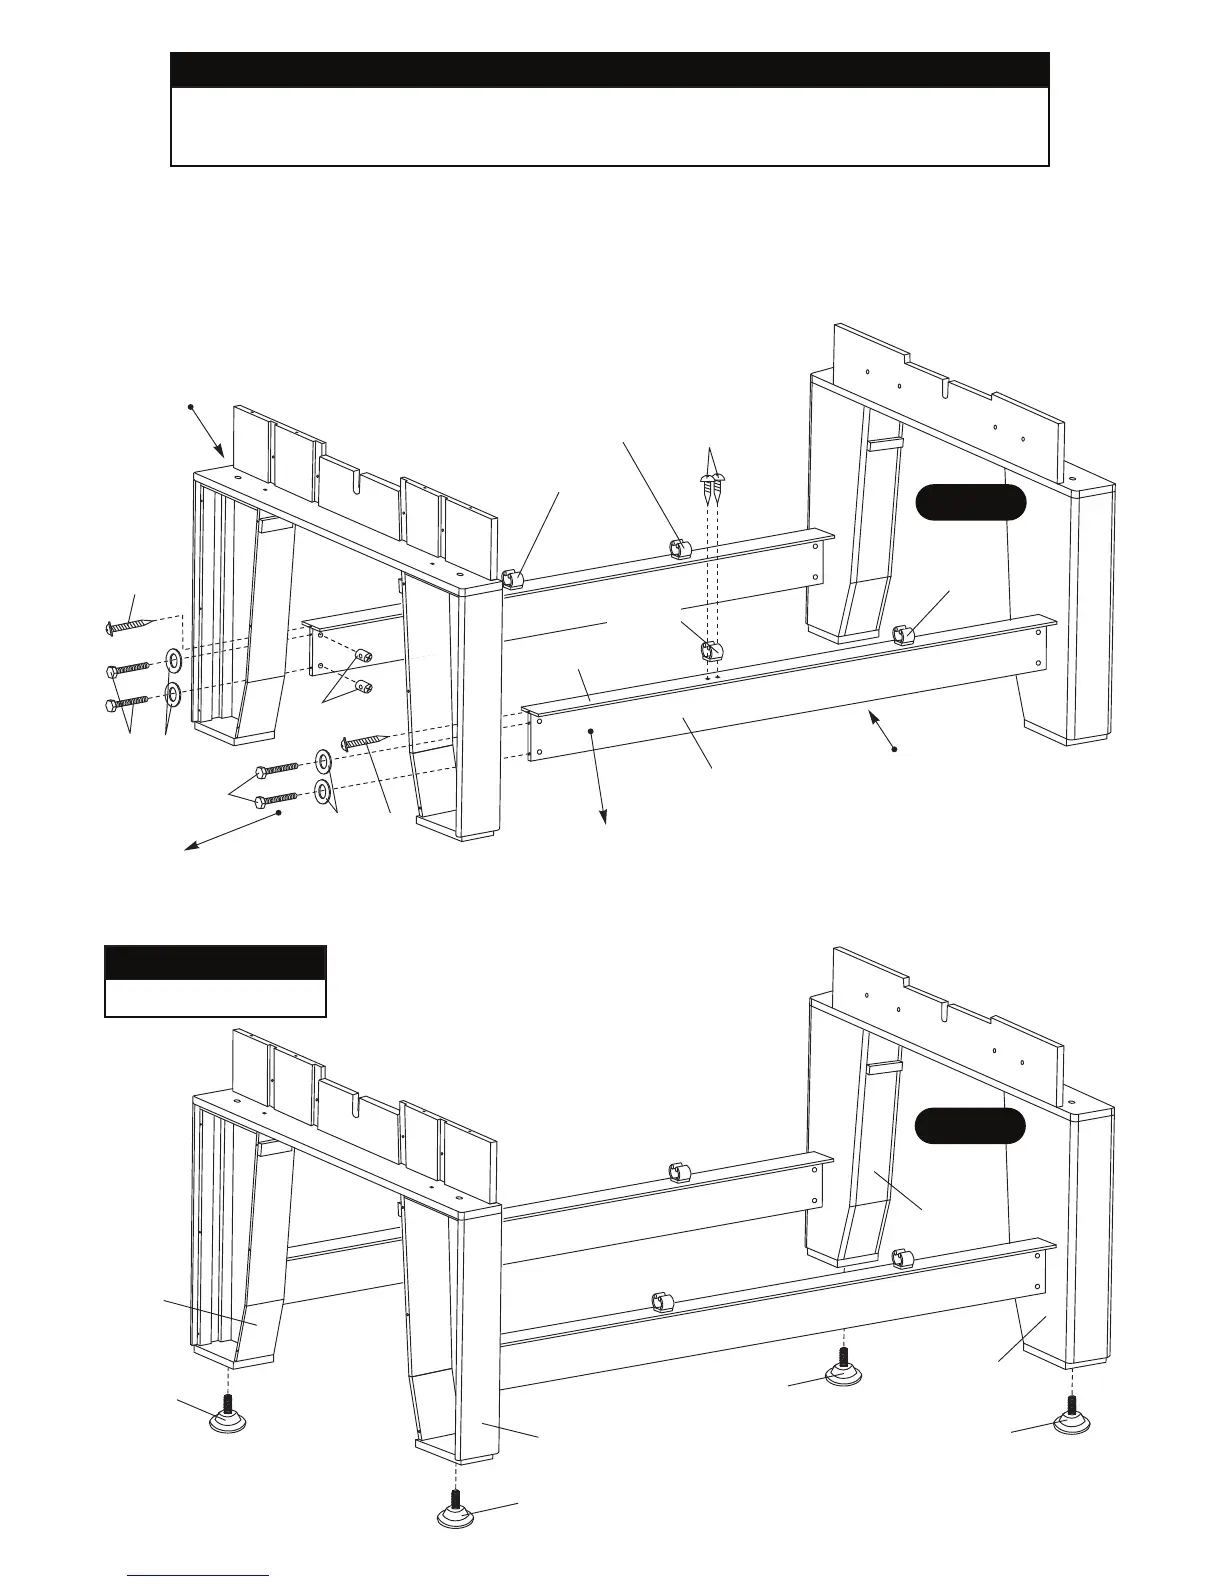
STEP 3:
With the help of another adult, attach the assembly from STEP 2 (FIGURE 2) to the assembly from STEP 1 (FIGURE 1B)
using H6 Hex Bolts with H5 Flat Washers and H7 Barrel Nuts as shown in FIGURE 3. Do Not Tighten H6 Bolts at this
time. Next, secure P15 Leg Panel Stiffener using H18 Screws as shown in FIGURE 3. Use T1 Wrench to tighten H6 Bolts.
Attach P19S Small & P19L Large Cue Clips to P15 Leg Panel Stiffeners using pre-drilled holes with H16 Screws as shown
in FIGURE 3. Important Note: Be careful not to strip these screws. All H16 & H18 Screws must be tight - but not
stripped.
H5
H6
H18
H6 H5
H18
H7
H16
P15
P14
FIGURE 3
Assembly from
STEP 1.
Assembly from
STEP 2.
P19L
(Large)
P19S
(Small)
P19S
(Small)
P19L
(Large)
FIGURE 4
STEP 4:
Thread H14 Leg Levelers onto each P3 Right Leg and
P4 Left Leg as shown in FIGURE 4.
PARTS REQUIRED
4 pcs - H14 Leg Leveler
P3
H14
P4
H14
P4
H14
H14
P3
IMPORTANT NOTE:
Tighten, But do not overtighten all H6 Bolts.
IMPORTANT NOTE:
Install each P14/P15 (Assembly from STEP 2) by making sure the 5(five)
black barrel nuts are facing inside of table.