IMPORTANT NOTE:
Be careful not to strip these screws.
All H1 Screws must be tight - but not stripped.
Steel inserts
nuts must be
on bottom
PARTS REQUIRED
8 pcs - H1 Phillips Flat Head Screw 2 pcs - P3 Right Leg 2 pcs - P11 Frame Bottom Board
8 pcs - H4 Hex Head Bolt 2 pcs - P4 Left Leg 1 pc - T1 Wrench
8 pcs - H5 Flat Washer 2 pcs - P9 End Frame Panel
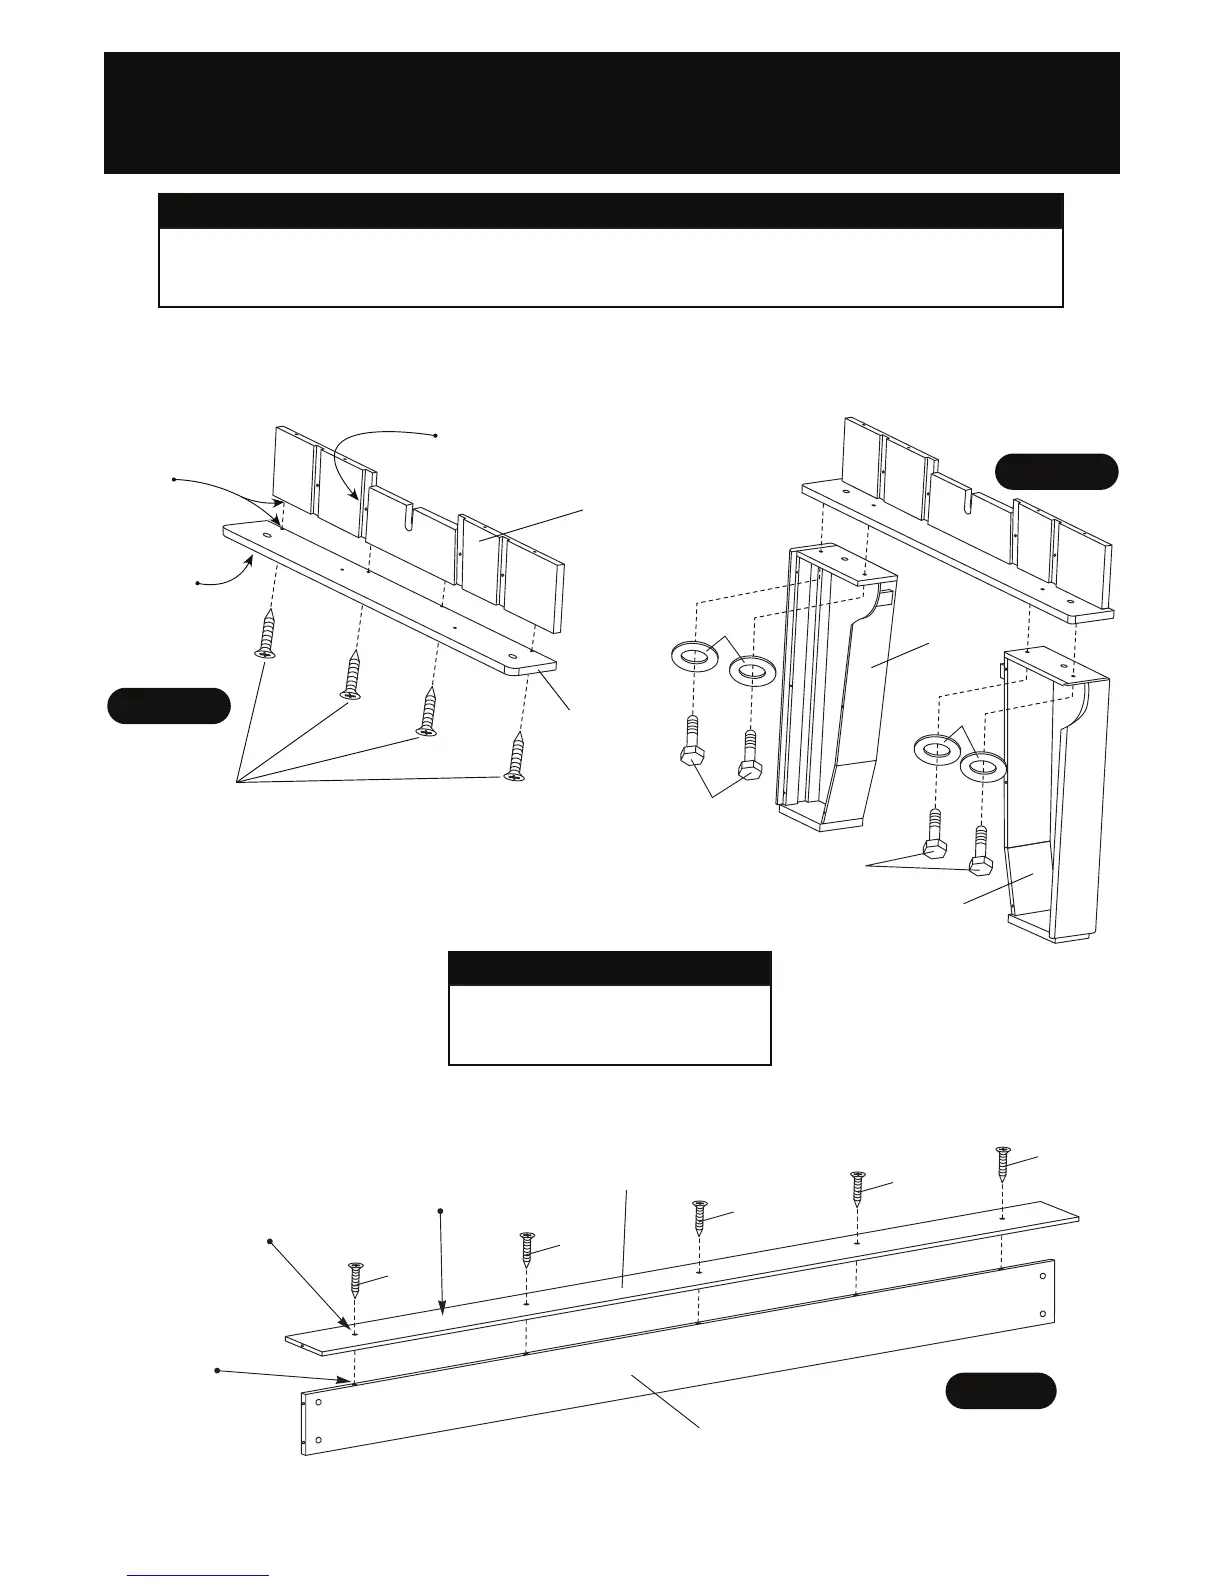
STEP 1:
Secure P9 End Frame Panel to P11 Frame Bottom Board using H1 Screws as shown in FIGURE 1A.
Attach the assembly from FIGURE 1A to P3 Right Leg and P4 Left Leg by insert H4 Bolts and H5 Washers from inside of
leg as shown in FIGURE 1B. Use T1 Wrench to tighten H4 Bolts. Repeat with other set of legs.
IMPORTANT NOTE: CAREFULLY LIFT UP THE AIR HOCKEY PLAYFIELD AND REMOVE ALL ASSEMBLY
PARTS, BEING SURE TO CHECK ALL INNER TABLE COMPARTMENTS FOR PARTS. FIND A CLEAN
LEVEL PLACE TO BEGIN ASSEMBLY. WE RECOMMEND BUILDING THE TABLE IN THE BOX TOP TO
PROTECT PARTS DURING ASSEMBLY.
FIGURE 1A
H1
P11
P9
FIGURE 1B
5
© 2013 Escalade Sports
For Customer Service Call 1-886-996-2729
All Right Reserved.
P4
P3
Grooves on this side.
H5
H4
H4
H5
Please note
Pre-Drilled
holes on
both P9 & P11
PARTS REQUIRED
10 pcs - H2 Phillips Flat Head Screw
2 pcs - P14 Leg Connecting Panel
2 pcs - P15 Leg Panel Stiffener
STEP 2:
Install P15 Leg Panel Stiffeners to P14 Leg Connecting Panels using H2 Screws as shown in FIGURE 2.
Important Note: Be careful not to strip these screws. All H2 Screws must be tight - but not stripped.
FIGURE 2
H2
P14
P15
Black laminate
on this side.
H2
H2
H2
H2
Please note
pilot holes on
this top.
Please note
Pre-Drilled
holes on
this side.