Do you have a question about the Atwood AC-1361 and is the answer not in the manual?
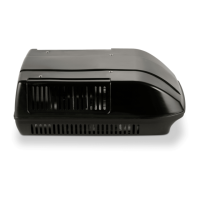
Outlines the design and intended application of the Atwood AirCommand AC unit in RVs.
Details factors affecting AC performance and methods to reduce vehicle heat load.
Explains condensation causes and provides guidance for its prevention and management.
Emphasizes reading instructions and conforming to electrical and vehicle codes.
Highlights hazards of improper installation, modification, and servicing requirements.
Details critical placement requirements for central location and direction of travel.
Outlines how to assess roof strength and prepare the opening for the unit.
Specifies minimum clearance needed around the unit for proper operation and airflow.
Guides on placing the unit over the gasket and aligning mounting holes.
Details the process of securing the unit using hold down bars and bolts.
Alerts users about unit weight, lifting safety, and electrical hazards during installation.
Provides a table to determine required duct and bolt lengths based on roof thickness.
Explains the types of cables needed for power, furnace, and thermostat connections.
Shows the interconnection diagram for AC models with a wall-mounted thermostat.
Details wiring connections for AC power supply to the unit according to codes.
Provides step-by-step instructions for installing the COC-1 power connector.
Illustrates proper wire stripping and preparation for the connector.
Details precise wire stripping, placement, and sheath routing for the connector.
Guides on attaching the housing and using tools for secure wire crimping.
Explains how to connect and disconnect the assembled COC-1 connector.
Covers cable installation, gasket placement, and initial power connection.
Provides instructions for cutting and inserting the polystyrene baffle into the plenum deck.
Details attaching the hold down bars and raising the plenum deck assembly to the unit.
Guides on screwing hold down bolts and tightening them to the specified torque.
Instructs on attaching the plenum fascia using screws and covering them with plugs.
Lists steps to verify the unit's cooling and heating functions after installation.
Explains how to clean and maintain the unit's plenum filters.
Advises on checking the tightness of mounting bolts at specified intervals.
Provides guidance on running the unit during vehicle storage.
Describes how to select and use COOL, FAN, HEAT, DRY, and AUTO modes.
Explains the SLEEP, TIMER, and LOCK functions for enhanced control.
Covers changing display units and the functionality of the remote control unit.
Details how to power the unit on/off and adjust the temperature settings.
Explains advanced temperature setting, C/F conversion, and mode selection.
Details furnace overriding and fan speed adjustments.
Describes how to activate or deactivate the sleep mode on the thermostat.
Explains how to set the on/off timer for the air conditioner.
Lists and explains various error codes displayed by the thermostat.
Lists physical dimensions and weights for the air conditioner and plenum.
Provides electrical ratings, capacity, and refrigerant information.
Addresses common reasons for the unit not powering on or displaying issues.
Guides on diagnosing and resolving issues with cooling capacity or heating.
Outlines the terms, conditions, and duration of the manufacturer's warranty.
Details what is not covered by the warranty and owner responsibilities.
Explains how to initiate a warranty claim and required procedures.
Presents the detailed wiring diagram for ducted air conditioners and heat pumps.
| Brand | Atwood |
|---|---|
| Model | AC-1361 |
| Category | Air Conditioner |
| Language | English |