- 11 -
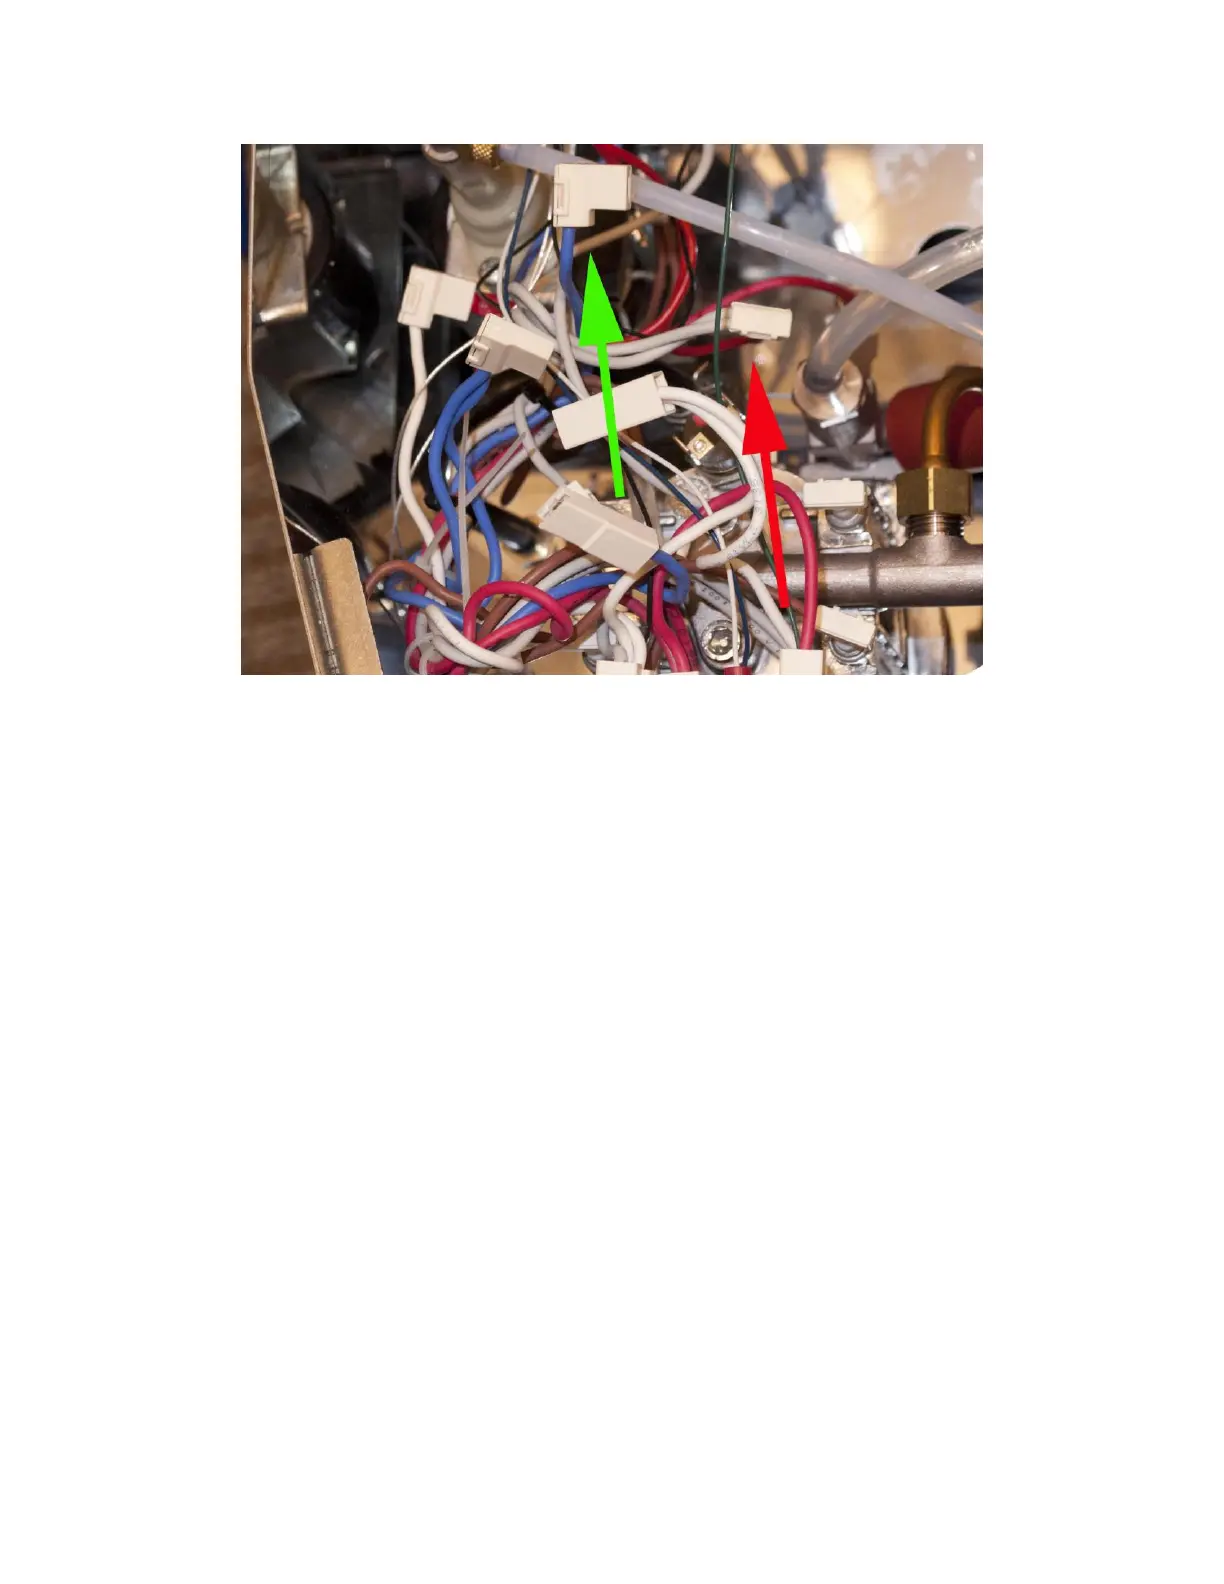
Fig 17d Double grey wires from the steam control thermostat should be connected to the
second SSR output indicated by the red arrow. Connector with single blue cable can be left
on the steam thermostat or leave in the air (green arrow).
Note: Since not all Gaggia Classic use the same color code for cable, connecting which cable on
the thermostat to the SSR output cable can be confusing. There is an easier way to solve this
problem. There is one cable on the thermostat connects between the brew thermostat and steam
thermostat. It also connects to the steam switch (the blue colored cable in this machine). This is
the cable that will NOT be connected to the SSR output control cable. After installation, all
three ends of this cable can be left in the air. The other two cables, one on the brew thermostat
and the other on the steam thermostat, need to be connected to the SSR output cables.
D. Tapping the controller power line to the espresso machine.
The power for the controller is tapped from two places. One cable is tapped to the hot wire from
the main power switch in the front. The other cable is tapped to the neutral wire at the back panel
where the power line enters the machine.
1) Tap the hot wire on the main power switch at the front panel. The black colored cable with
piggyback connector needs to be tapped to the center tab of the power switch. Fig 18a is for
Gaggia Classic made before 2006. It has two blue wires on the center tap. Fig. 18b is for
Gaggia Classic made after 2006. It has two white wires on the center tab. Remove the
cable(s) on the center tab of the switch, and install our piggyback connector with black
cable to the center tab. Then put the original cable on the piggyback connector as shown in
Fig 18a [NOTE: You might need to bend the spade tongue of the piggyback connector to
make them fit in the space.]
 Loading...