Do you have a question about the AUDAC XMP44 and is the answer not in the manual?
Follow all instructions, handle with care, avoid liquids, ensure ventilation, use indoors, and connect to earthed outlet.
No user serviceable parts; refer servicing to qualified personnel. Product meets EC conformity directives.
Do not dispose with household waste. Recycle at designated collection points for environmental protection.
Explains symbols for dangerous voltages and need to consult manual for important information.
In- and output connections follow international wiring standards for professional audio.
Details pin assignments for balanced signal input/output and ground on terminal blocks.
Illustrates wiring for balanced line input/output and unbalanced line in/output using terminal blocks.
Details RS232 connection pinout and settings for remote control and automation systems.
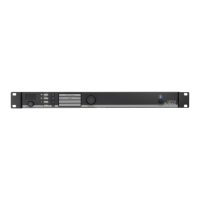
Describes PFL speaker, USB ports, LCD display, control buttons, and power switch on the front panel.
Explains using the LCD, buttons, and rotary dial for system navigation and control.
Describes the main screen and module selection/operation via the front panel interface.
Accessing and adjusting individual module settings using the front panel controls.
Configuring global settings like Lock, LCD, Password, USB, and Time Server via the front panel.
Setting up DHCP, IP address, Subnet mask, Gateway, and DNS via the front panel.
Details AC power inlet, RS232, Ethernet RJ45, and SourceCon interface card slots on the rear panel.
Accessing the XMP44 via web browser; administrator and user login procedures.
Overview of web interface main screen, module selection, and function displays.
Adjusting general and module settings through the web interface, including browsing functionalities.
Ensure power is off before installation to prevent damage or electrical shock.
Step-by-step guide: handling, alignment, insertion, and fastening modules into slots.
Modules are automatically detected and made operational upon system power-on.
Explains TCP/IP, IP addresses, and IP ranges required for Ethernet connectivity.
Lists key product details: inputs/outputs, control, display, power, dimensions, weight, compatible modules.
| power type | Switching mode |
|---|---|
| voltage range | 100 ~ 240V AC |
| frequency range | 50 ~ 60 Hz |
| power consumption | 2 Watt |
| dimensions | 482 x 44 x 330 mm |
|---|---|
| weight | 3.4 Kg |
| unit height | 1 HE |