7 2 Seat s and storage
necessary to safely trans port luggage,
bicycles, surf boards, skis or small boats.
- All necessary hardware for these systems is
available from your authorized Audi dealer.
When should the roof rack be removed ?
- Before going through an automatic car wash
(it is best to ask the car wash opera tor)
- When not in use (reduce fuel consumpt ion,
reduce wind noise and gua rd against theft)
_& WARNING
- Use of an unapproved roof rack or incor-
rect mo unt ing of an app roved roof rack
can cause the roof rack or the items car-
ried on it to fall
off the roof onto the
road.
- Objects falling from the roof of a vehicle
can cause a crash and persona l injury.
- Only mount the system between the
markings shown in
r=> page 72, fig . 83
or r=>page 73, fig. 84.
- The roof rack system must be insta lled
exactly according to the instr uctions pro-
vided.
(D Note
- Any damage to the veh icle caused by us-
ing roof racks or other types of cross bars
that have not been approved by Audi for
your vehicle, or incorrect roof rack instal-
lation, is not covered by the Warranty.
- Always check the roof rack mount ings
and hardware before each trip and dur-
ing a tr ip to make sure everything is se-
curely tightened . If necessary, retighten
the mount ings and check the ent ire sys-
tem from t ime to t ime.
- After mounting a roof rack system, or
when you transport objects on the roof
of your veh icle, the height of the vehicle
is natur ally increased. Be careful when
driving under low bridges or in park ga-
rages for example. This could cause
damage to the veh icle and even the load.
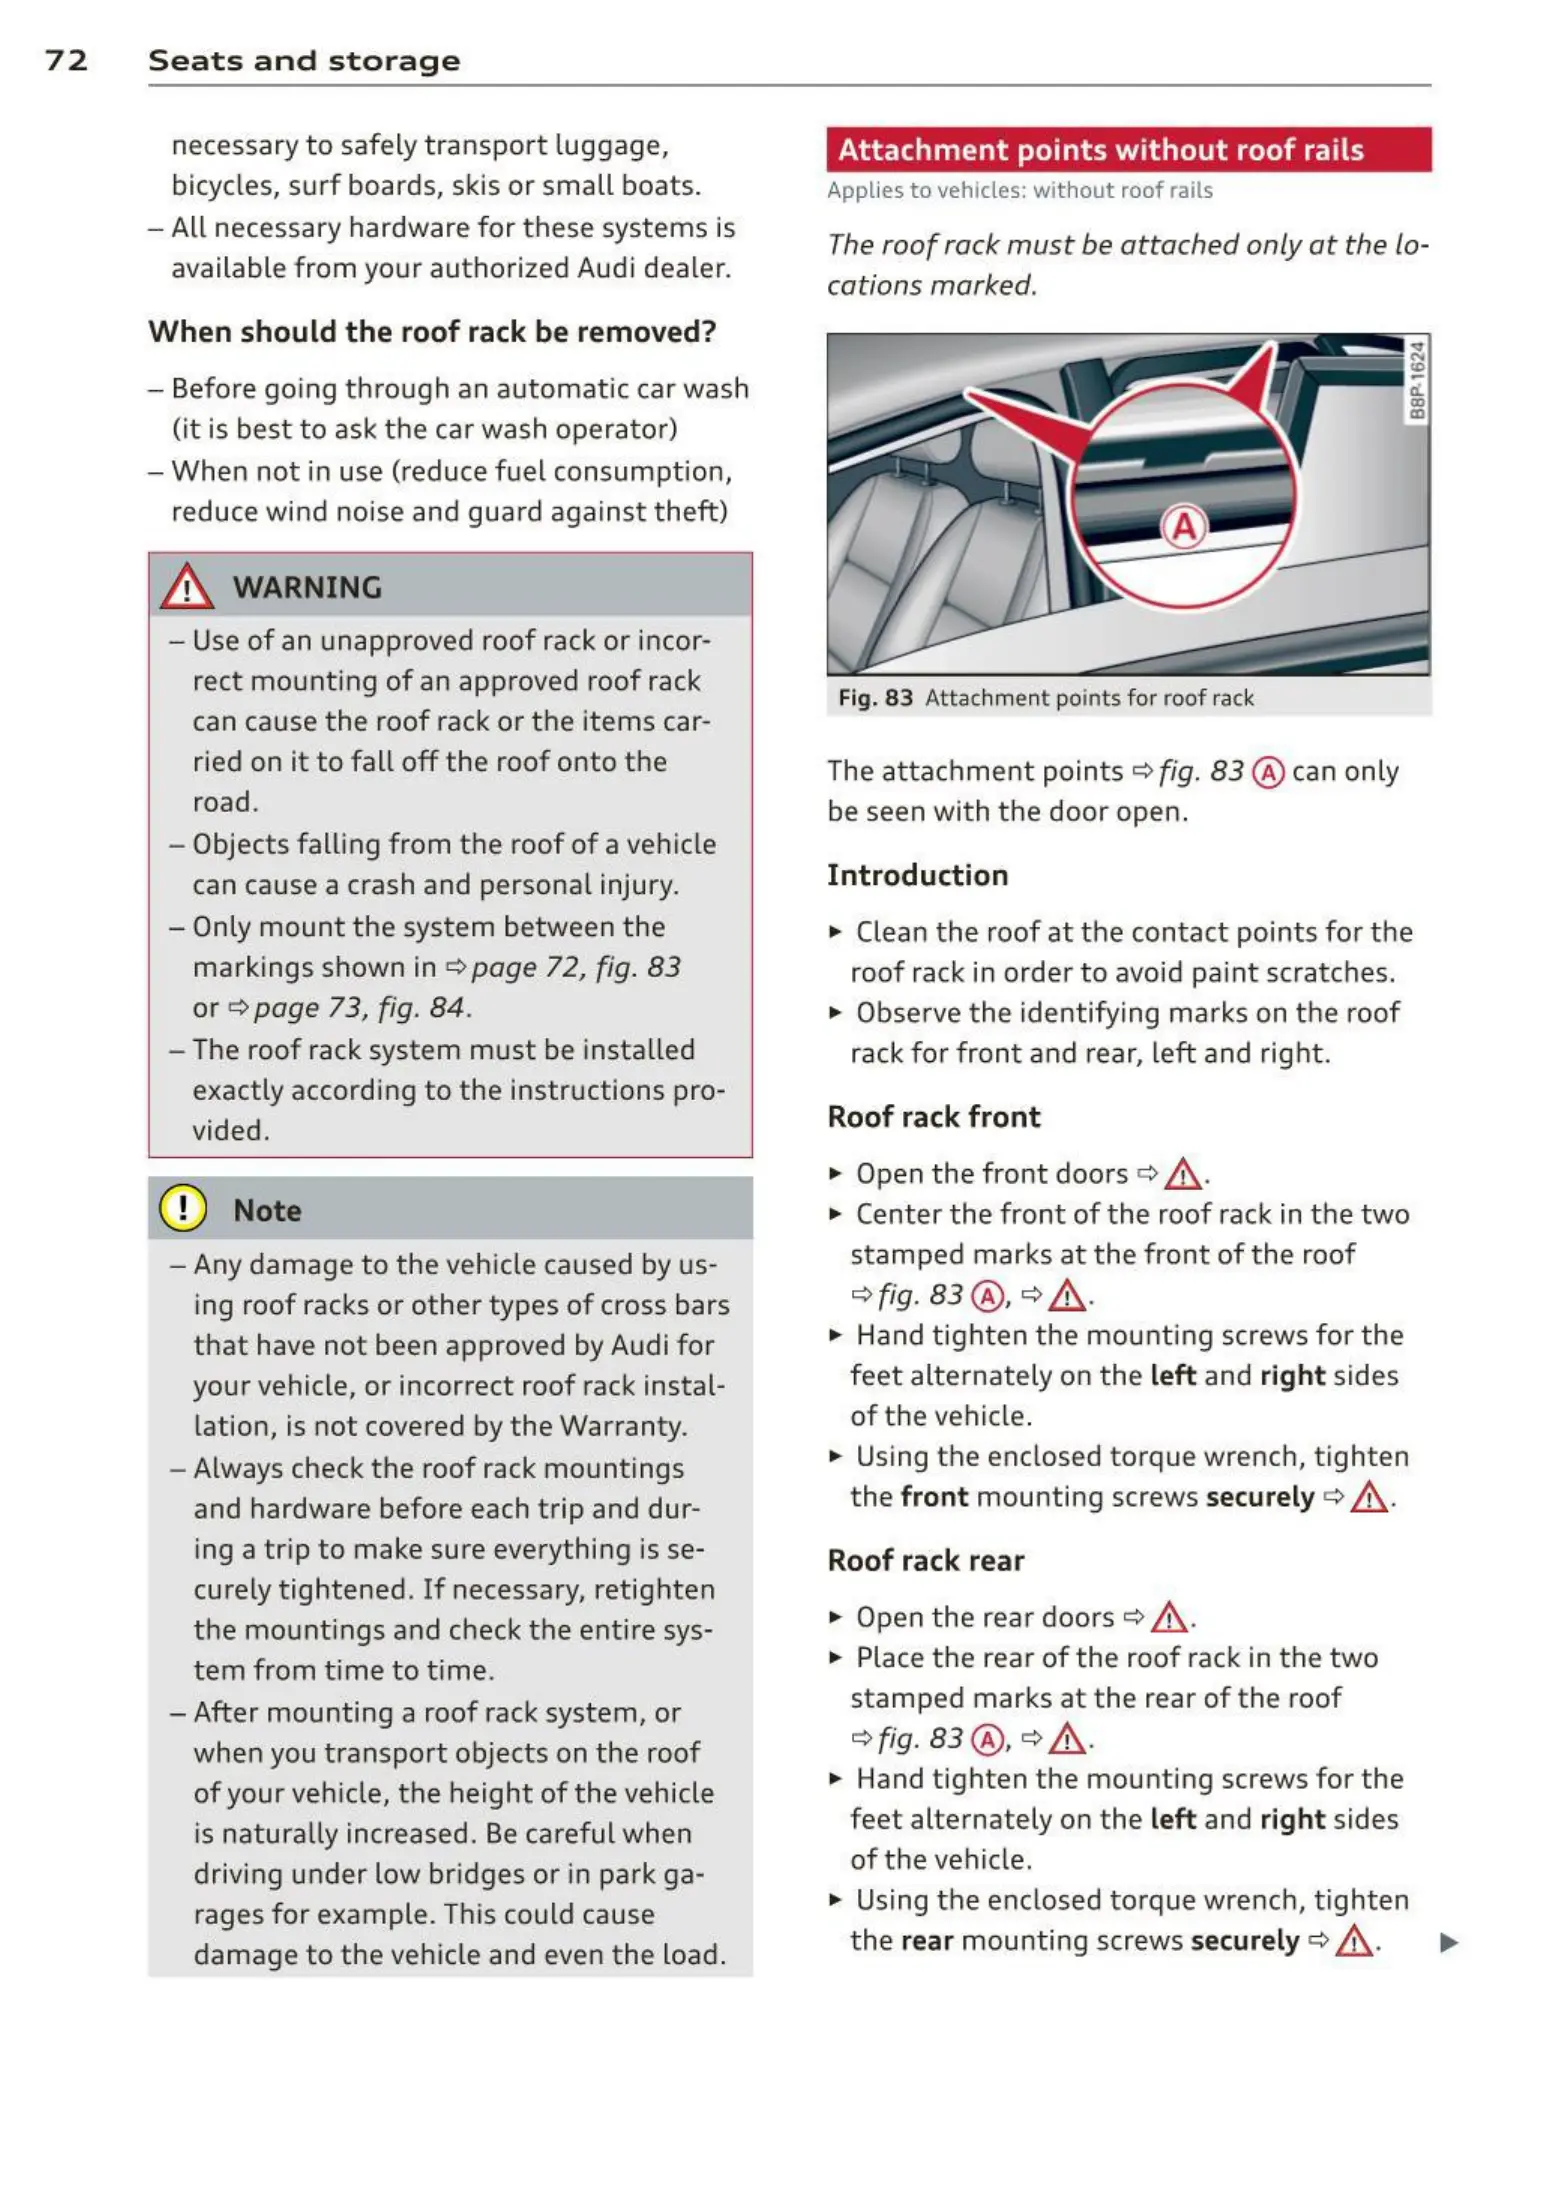
Attachment points without roof rails
Applies to vehicles: with out roof rails
The roof rack must be attached only at the lo-
cations marked .
Fig. 83 Attac hment points for roof rack
The at ta chme nt points r=> fig. 83 @ can only
be seen with the door open .
Introduction
.,. Clean the roof at the contact points for the
roof rack in order to avoid paint scratches.
.,. Obse rve t he identify ing marks on t he roof
rack for front and rear, left and right.
Roof rack front
.,. Open the front doo rs c:> &_.
.,. Center the front of the roof rack in t he two
stamped marks at the front of the roof
r=> fig. 83 @, r::!> & .
.,. Hand tighten the mount ing screws for the
feet alternately on the
left and right sides
of the vehicle .
.,. Using the enclosed torque wrench, tighten
the
front mounting screws securely c:> &_.
Roof rack rear
.,. Open the rea r doors r=> £ .
.,. Place the rear of the roof rack in the two
stamped marks at the rear of the roof
r=> fig. 83 @ , r=> £ .
.,. Hand tighten the mounting screws for the
feet alternately on the
left and right sides
of the vehicle.
.,. Using the enclosed to rque wre nch, tighten
the
rear mounting screws securely c:> &_. ..,.