Protected by copyright. Copying for private or commercial purposes, in part or in whole, is not
permitted unless authorised by AUDI AG. AUDI AG does not guarantee or accept any liability
with respect to the correctness of information in this document. Copyright by AUDI AG.
Connector -2-
Note
♦
All cable ties which have been released or cut through during
removal must be re-attached in the same position on installa‐
tion.
♦
Tighten all screw connections to the tightening torques speci‐
fied.
♦
When installing leadthrough in luggage compartment floor,
make sure that it engages and seals securely.
WARNING
Working on vehicles with high-voltage wiring:
• Do not support yourself or tools on high-voltage wiring or
associated components --> this can damage the insula‐
tion.
• High-voltage wiring must not be excessively bent or
kinked --> this can damage the insulation.
• The round high-voltage connectors are colour-coded with
an external coloured ring and are provided with mechan‐
ical coding or guide lugs. It is important to observe this
coding when joining up the round high-voltage connec‐
tors, otherwise the connectors can be damaged.
♦ Coding of high-voltage connectors on electric drive motor -
V141- ⇒ page 38
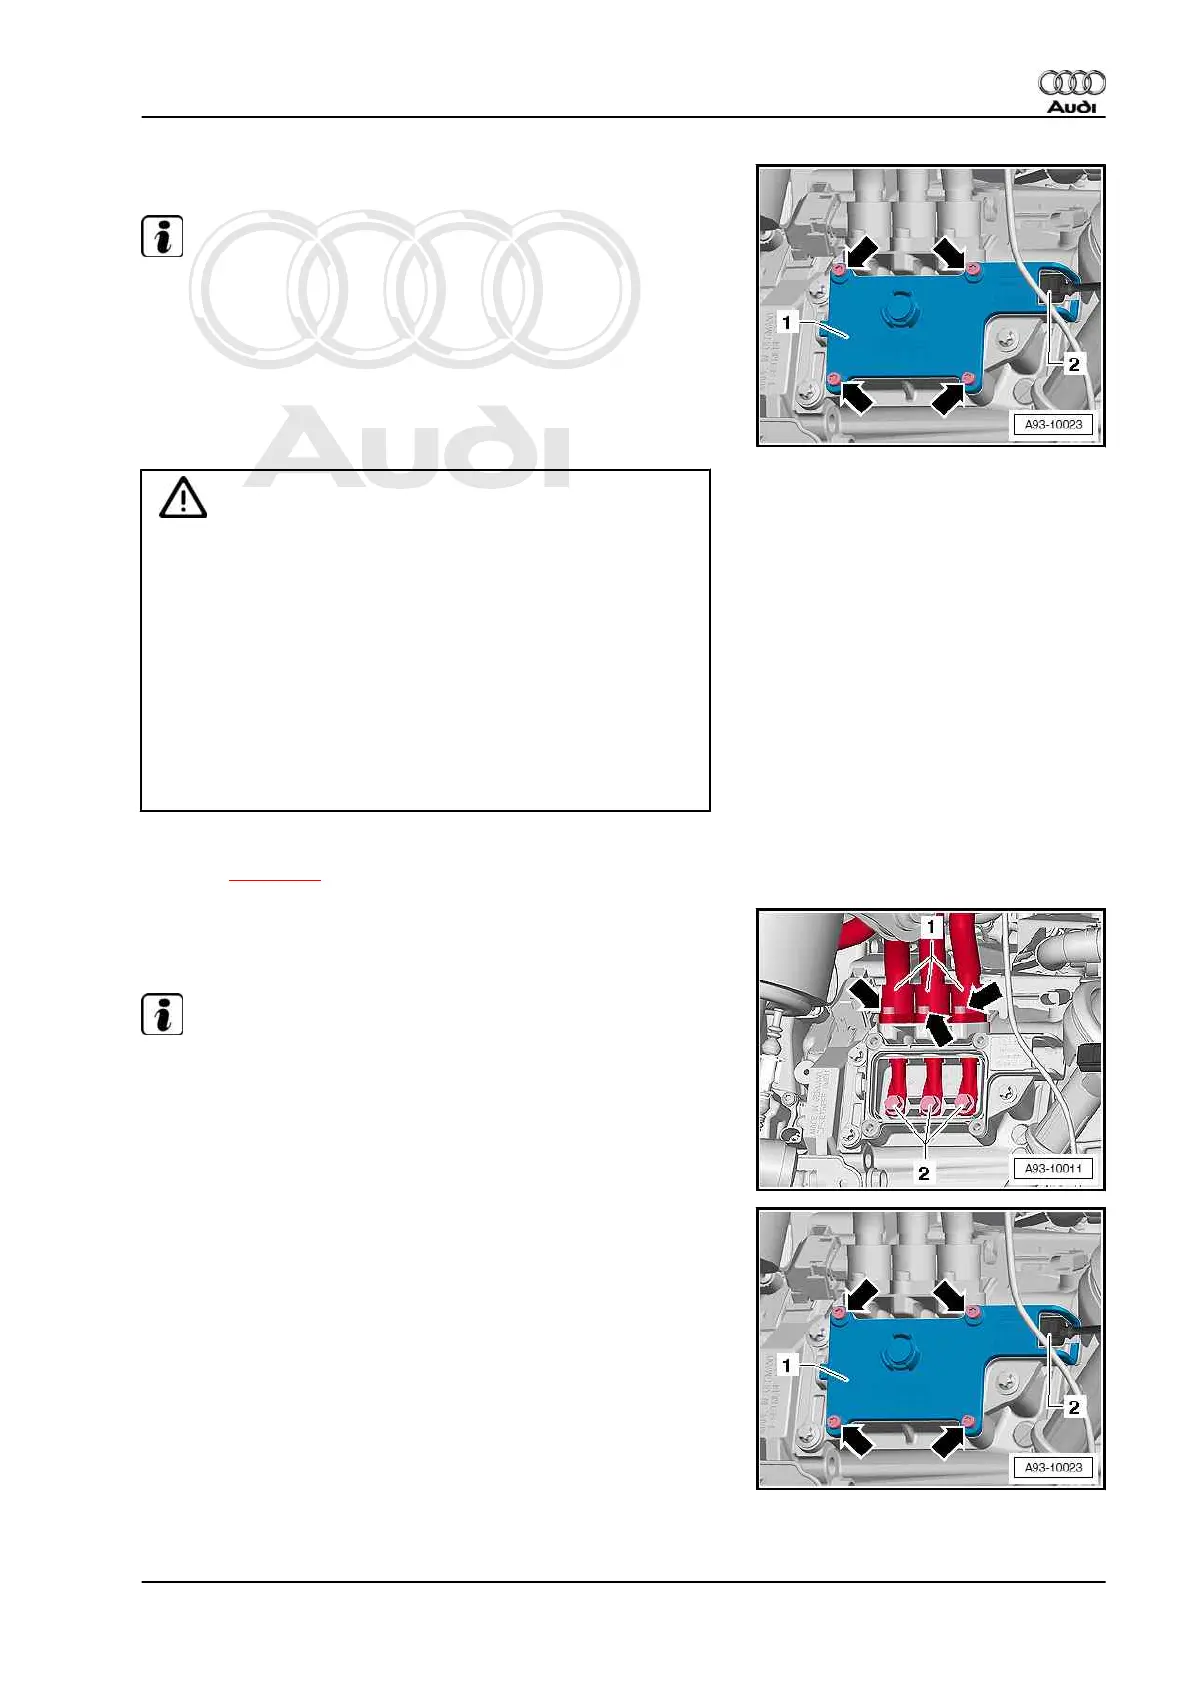
– Tighten bolts -arrows- on wiring retainers to 9 Nm.
– Tighten bolts -2- for high-voltage wiring to 20 Nm.
Note
The seal on the connection box cover must be renewed after
opening.
– After renewing seal on connection box cover, place cover on
connection box and tighten bolts -1- to 9 Nm.
Audi A6 2011 ➤ , Audi A6 Avant 2011 ➤
Electrical system, hybrid - Edition 03.2014
6. Components specific to high-voltage system 47