Use the supplied HDMI Out cable to connect this port to a display (standalone mode).
Applies to RXV81 as a standalone device (default). Video and sharing are presented on the
display. Meetings are controlled via the RC-RXV and/or RX-PAD.
USB type-C to connect to a Bring-Your-Own-Device (BYOD) computer running a Unified
Communication (UC) client for ad hoc or full peripheral mode.
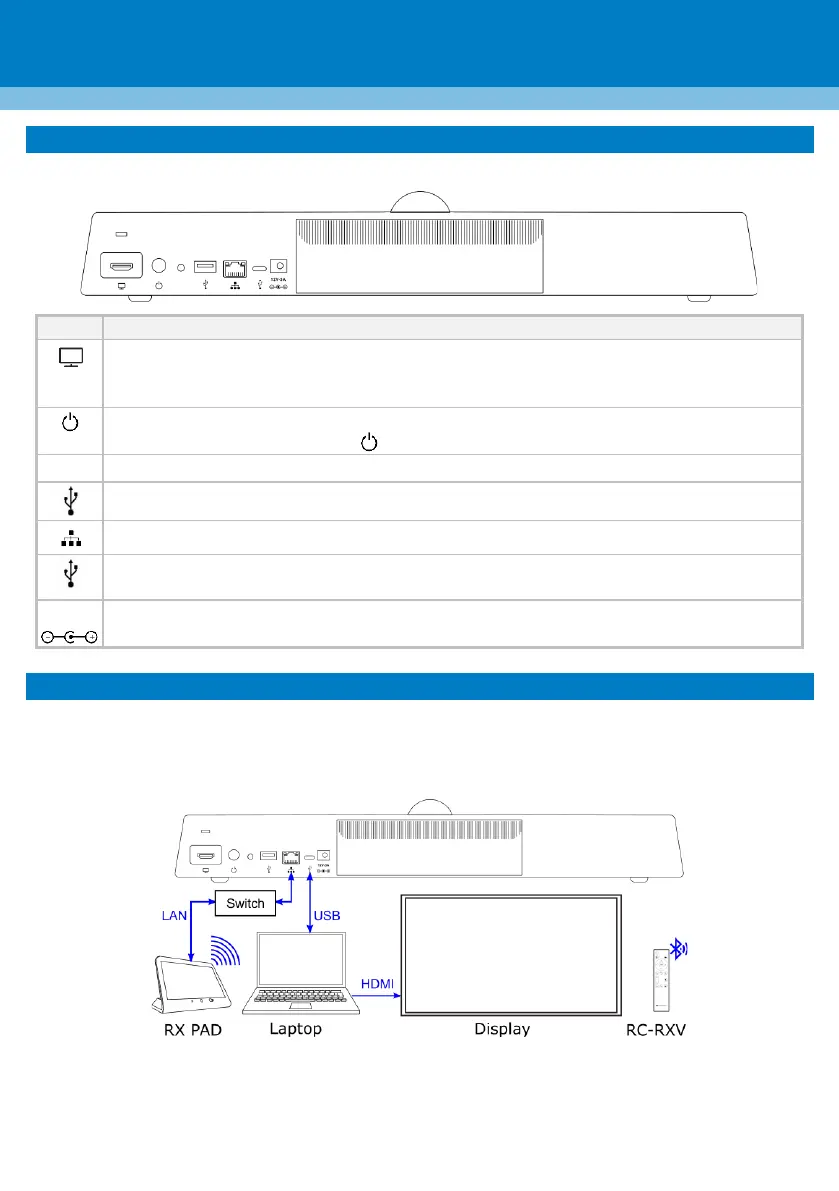
6. Connecting RXV81 as a USB Peripheral
You can connect RXV81 to a peripheral to Bring-Your-Own-Device (BYOD) computer running a UC client for
ad hoc or full peripheral mode. In peripheral mode, the BYOD displays the meeting video and content.
Meetings are controlled via the BYOD (join, accept, manage participants). Audio/video (camera ePTZ, mic
mute) can be controlled from the UC client, RC-RXV, and/or RX-PAD (camera on / off, mute, volume).
For RX-PAD Meeting Room Controller:
Make sure that the RX-PAD and RXV81 are connected to the same network.
For Wi-Fi connectivity, make sure that RX-PAD is powered by the supplied AC/DC power adaptor.

 Loading...