Thank you for purchasing an Audiovector Subwoofer.Your new
subwoofer has been designed to provide years of listening pleasure,
reliability and pride of ownership.
1. UNPACKING
Care must be taken at all times when handling the subwoofer due
to the weight and the construction of the product. To remove the
subwoofer from its carton, place some protective material on the floor
and having removed any loose items from the top of the packaging,
carefully invert the carton. Gradually pull the carton upwards to expose
the subwoofer.
2. CONNECTIONS
The QR Sub is active and therefore only needs to be connected to
the “sub-output” alternatively the “pre-output” – on the back of your
surround processor/amplifier/receiver.
Alternatively, the QR Sub can be connected directly to the speaker
output terminals of the amplifier via its Hi-Level input and the Speakon
connector*, or directly to the input terminals on your speakers.
When connecting it via its phono inputs, please use both inputs – left
& right. If your surround processor does not have stereo outputs,
use a Y-split. This way you are able to connect to both inputs and the
sound level will increase SPL 3 dB compared to performance when
only using one input.
Never connect or disconnect input or output leads with
the subwoofer switched on.
3. VOLUME FOR SURROUND SOUND
First adjust the volume control (either HI/LOW Level from speaker outputs
or 0.1 LFE Level from phono output) to the 12 o’clock position. This
way you are sure to have sufficient low frequency response for the rest
of the set-up. Later, please adjust the sub-level via the bass management
system in your surround processor.
4. FREQUENCY FOR STEREO
The frequency response control should be set to the frequency from
where you want the QR Sub to support your front speakers. I.e if the
frequency is set to 50 Hz, the QR Sub will only respond to frequencies
below 50 Hz.
5. VOLUME FOR STEREO
Adjust the chosen volume control (either HI/LOW Level from speaker
outputs or 0.1 LFE Level from phono output) to a level where you can
easily hear the subwoofer. Then perform the phase test below. After
this readjust the level.
6. PHASE
All rooms respond differently to sound equipment. Especially the low
frequency area is difficult as you need the subwoofer to play with –
and not against – your front speakers. The phase should be adjusted
with the help of a friend. With one person positioned away from the
subwoofer the other person operating the +/- of the phase control.
At the position where the subwoofer adds the loudest sound pressure
level, the phase control is in the right position.
7. POWER
Leave the subwoofer unplugged from the mains until
the installation procedure is completed.
The power on your subwoofer can be automatically turned on when
it senses a signal. Set your power switch to the AUTO position. This
is the easiest way to use your sub. If you want your subwoofer to be
turned on all the time, set the switch to ON. If you do not want your
subwoofer to be turned on, set the switch to off.
PS: To reset the software of the amp, pull the AC plug
for 30 seconds and power up again.
8. MAINTENANCE/SERVICE
If you want to clean your speakers, please use a damp soft piece of
cotton. Do not use solvents. In order to maintain your excellent sound
quality, please pull out the plugs from the speaker cable every 3 months
and clean them with a piece of soft cotton with a little alcohol
(or something alike).
9. WARRANTY
Audiovector subwoofers are subject to a 2 year warranty - transportation
cost is not included. Please note that unauthorized opening or repair of
your speakers, puts your warranty out of function. We wish you many
hours of enjoyment with your new Audiovector speakers.
Please direct all warranty and/or service issues to
AUDIOVECTOR
Orient Plads 1
DK-2150 Nordhavn, Denmark.
Tel +45 35396060
info@audiovector.com
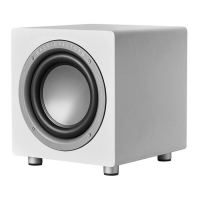
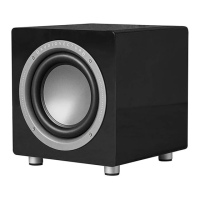
AUDIOVECTOR QR SUB
INSTRUCTION MANUAL
Yours sincerely
Mads Klifoth
CEO
www.audiovector.com
Handmade in Denmark since 1979