STEP 14
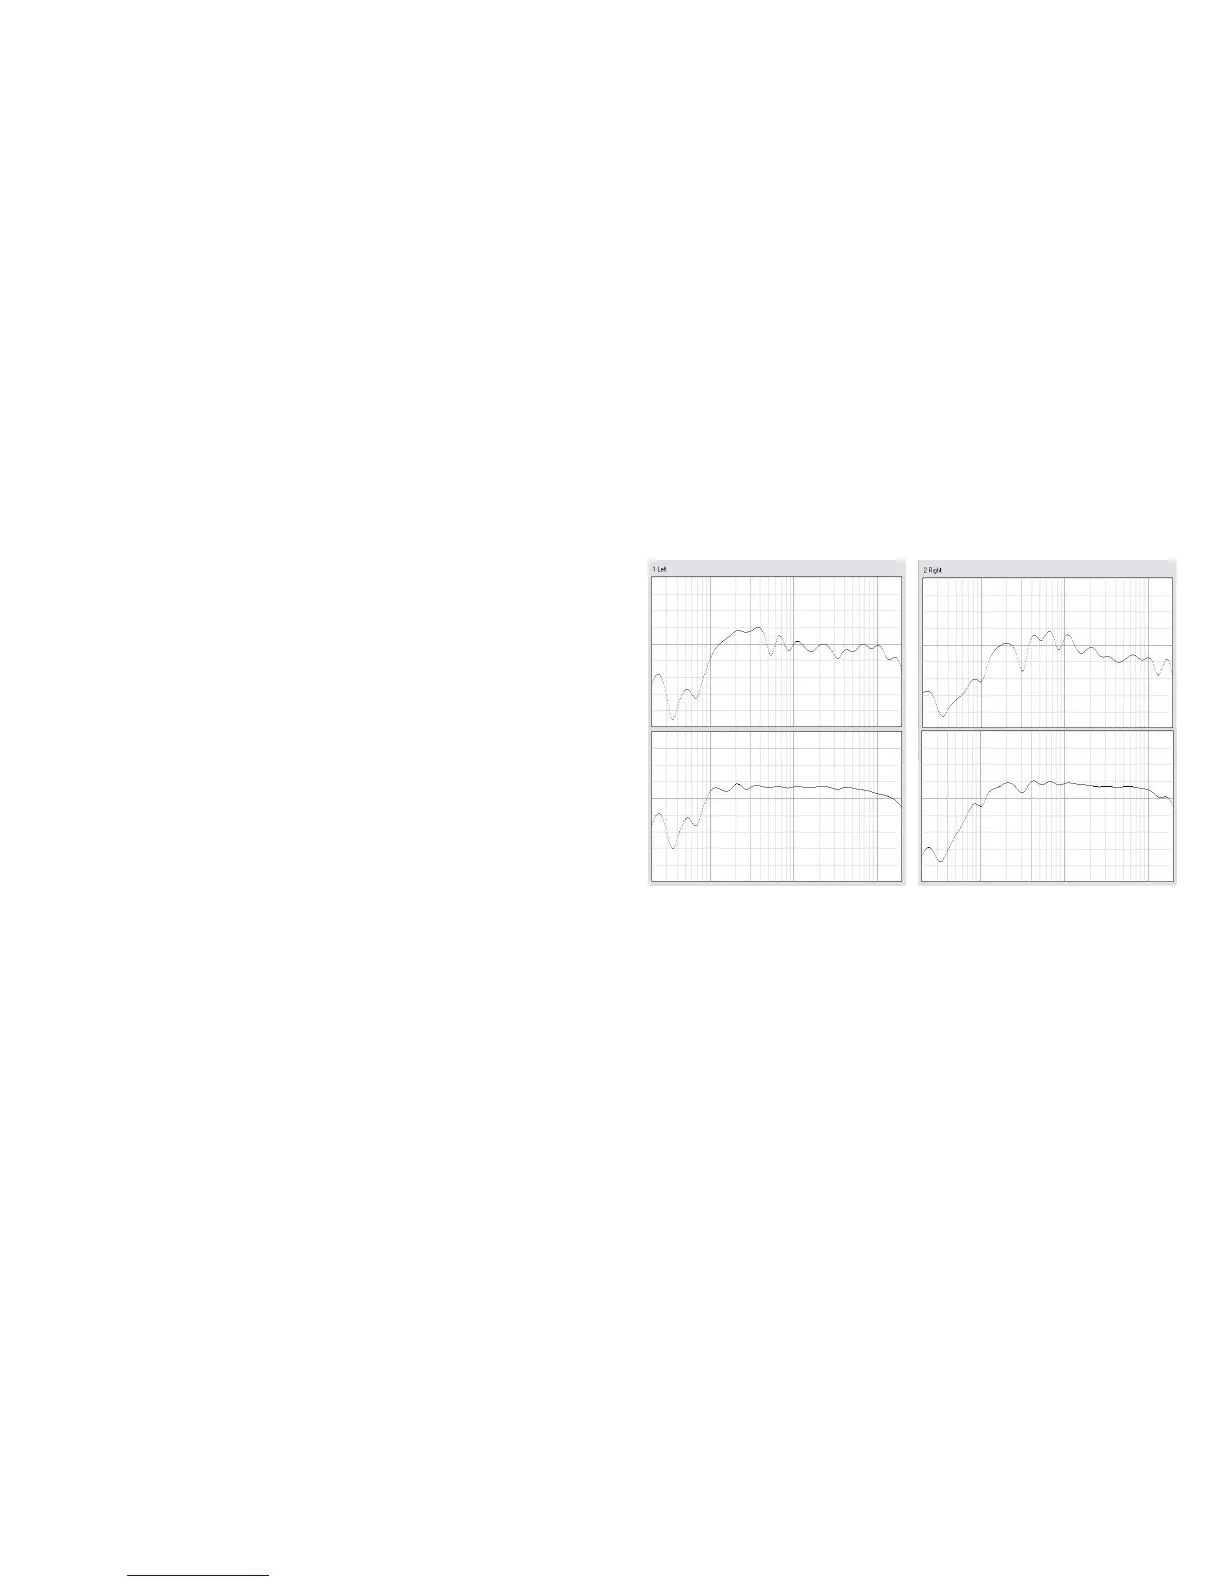
Click the View Results button to view a graphical display of
the frequency response correction for each channel (right).
STEP 15
You can change your filters by clicking the back arrow and
returning to the Measurements or Target Sound Options
screens. To permanently save them to the Sound Equalizer,
click the Save Permanently to SoundEQ button.
After saving you have two options:
1 Continue to the next zone
If there are more installation zones remaining, click the back
arrow button to return to the Select a Zone screen. Choose the
next zone to calibrate and repeat steps 5-15 until you’re done.
2 Finish MultEQ Pro
When you have no more zones left to calibrate, close the
MultEQ Pro application. The Sound Equalizer is now MultEQ
Pro calibrated.
Before MultEQ Pro
After MultEQ Pro
Before MultEQ Pro
After MultEQ Pro