Do you have a question about the August Doorbell Cam and is the answer not in the manual?
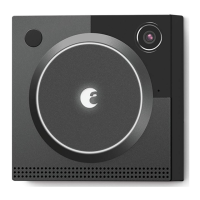
Lists all the components included in the August Doorbell Cam package for installation.
Details the tools and equipment required for the successful installation of the August Doorbell Cam.
Verify compatibility by identifying if your existing doorbell chime is a standard mechanical type.
Allocate 30 minutes for the Doorbell Cam's internal battery to charge after mounting.
Ensure optimal performance by positioning your Wi-Fi access point within 15-20 feet of the doorbell.
Be aware that certain surfaces like brick or stucco may affect Wi-Fi signal strength.
Consult the chart to select the correct drill bit based on the installation surface and type.
Confirm your existing wired doorbell system is functional before proceeding with installation.
Safely disconnect power by turning off the circuit breaker or fuse for the doorbell.
Carefully detach the current doorbell, disconnect wires, and clean the mounting surface.
Remove the spacer from the mounting plate if using a wedge for angle adjustment.
Align and attach the mounting plate to the wedge in the desired orientation (up, down, left, right).
Align the mounting plate/spacer and mark wall positions through the four screw holes.
Drill holes at the marked locations using the appropriate drill bit as per the checklist.
Gently tap anchors into drilled holes with a hammer if required for your installation surface.
Crimp existing doorbell wires to the mounting plate wires using the provided dolphin connectors.
Seal the wiring hole in the wall with putty to protect against moisture and debris.
Carefully tuck the connected wires into the designated slots on the back of the mounting plate/wedge.
Firmly attach the assembled mounting plate/wedge to the wall using the provided screws.
Align and attach the doorbell camera to the mounting plate, ensuring the security screw is correctly positioned.
Turn the circuit breaker or fuse back on to supply power to the doorbell system.
Verify the doorbell cam is working by checking for a pulsing green light and hearing the chime.
Ensure sufficient charge by leaving the doorbell cam connected to power for 30 minutes.
Remove the doorbell cam from the wall and place it near your Wi-Fi router for app setup.
Follow the on-screen instructions in the August app to configure your doorbell cam.
If the doorbell cam powers off during setup, re-mount it and wait for it to reconnect.
Use the hex wrench to tighten the security screw anti-clockwise for a secure mount.
| Brand | August |
|---|---|
| Model | Doorbell Cam |
| Category | Accessories |
| Language | English |