INSTALLATION GUIDE
IMPORTANT: Before operating or maintaining this unit, please read these instructions carefully paying
extra attention to the safety warnings and precautions. Use this unit correctly and with care. Failure to
do so may cause damage and/or personal injury and will invalidate the warranty.
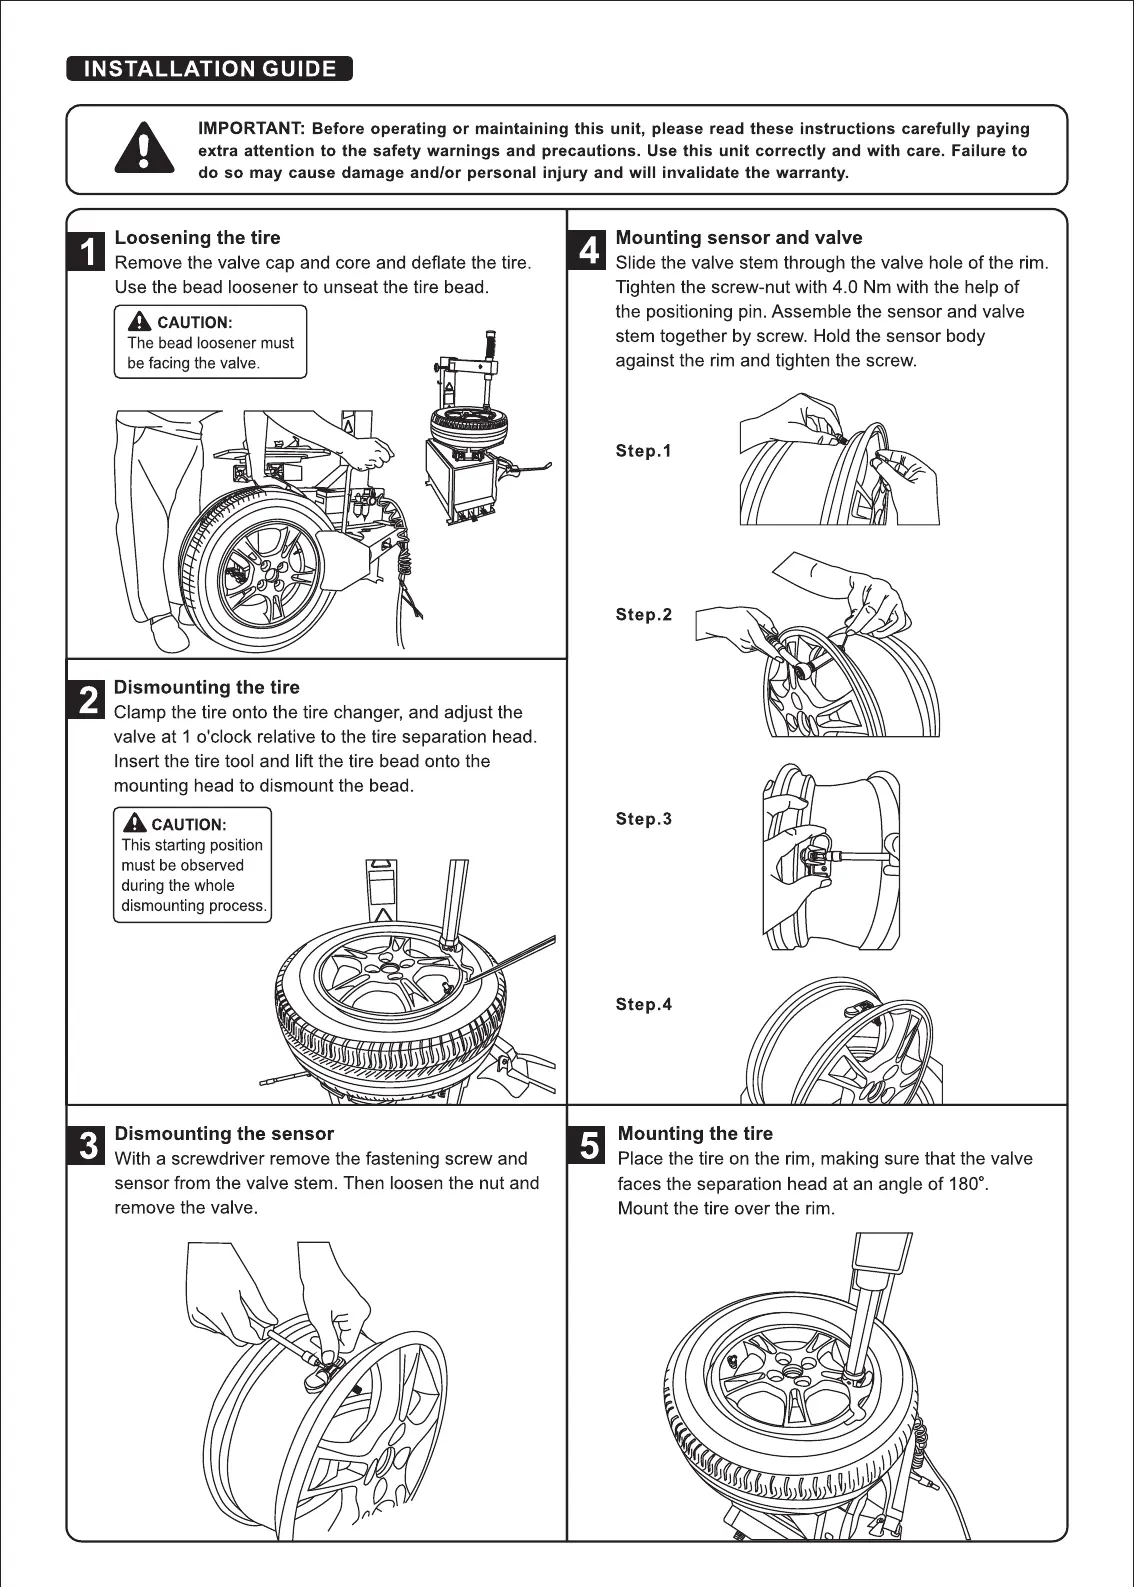
Loosening the tire
Remove the valve cap and core and deflate the tire.
Use the bead loosener to unseat the tire bead.
A CAUTION:
The bead loosener must
be facing the valve.
Dismounting the tire
Clamp the tire onto the tire changer, and adjust the
valve at I o'clock relative to the tire separation head.
Insert the tire tool and lift the tire bead onto the
mounting head to dismount the bead.
A CAUTION:
This starting position
must be observed
during the whole
dismounting process.
Dismounting the sensor
With a screwdriver remove the fastening screw and
sensor from the valve stem. Then loosen the nut and
remove the valve.
Mounting sensor and valve
Slide the valve stem through the valve hole of the rim.
Tighten the screw-nut with 4.0 Nm with the help of
the positioning pin. Assemble the sensor and valve
stem together by screw. Hold the sensor body
against the rim and tighten the screw.
Step. 1
Step.2
Step.3
Step.4
Mounting the tire
Place the tire on the rim, making sure that the valve
faces the separation head at an angle of 1800.
Mount the tire over the rim.
 Loading...