5
| (Step 1) Fingerprint Enrollment (up to 10x fingerprints)
• Insert ATKey.Pro into USB port
• Check Youtube video here for the detail:
https://youtu.be/lDrcZxWXAL4
• LED is BLUE ON, quick click side-button 3x
times (by nail) to go into enrollment mode:
• If there is no any fingerprint enrolled, LED
turns to WHITE
• If there are any enrolled fingerprints,
LED is GREEN flashing, please verify
enrolled fingerprint to start enrolling
new finger
• Put your specific finger on sensor, touch and
lift your finger (LED is WHITE flashing, from
slow to faster), repeat it more than 12 times
till LED shows GREEN (13
th
time), then your
fingerprint is enrolled
• If you want to quit from standalone
enrollment, click button once, LED will turn to
Blue, back to normal state.
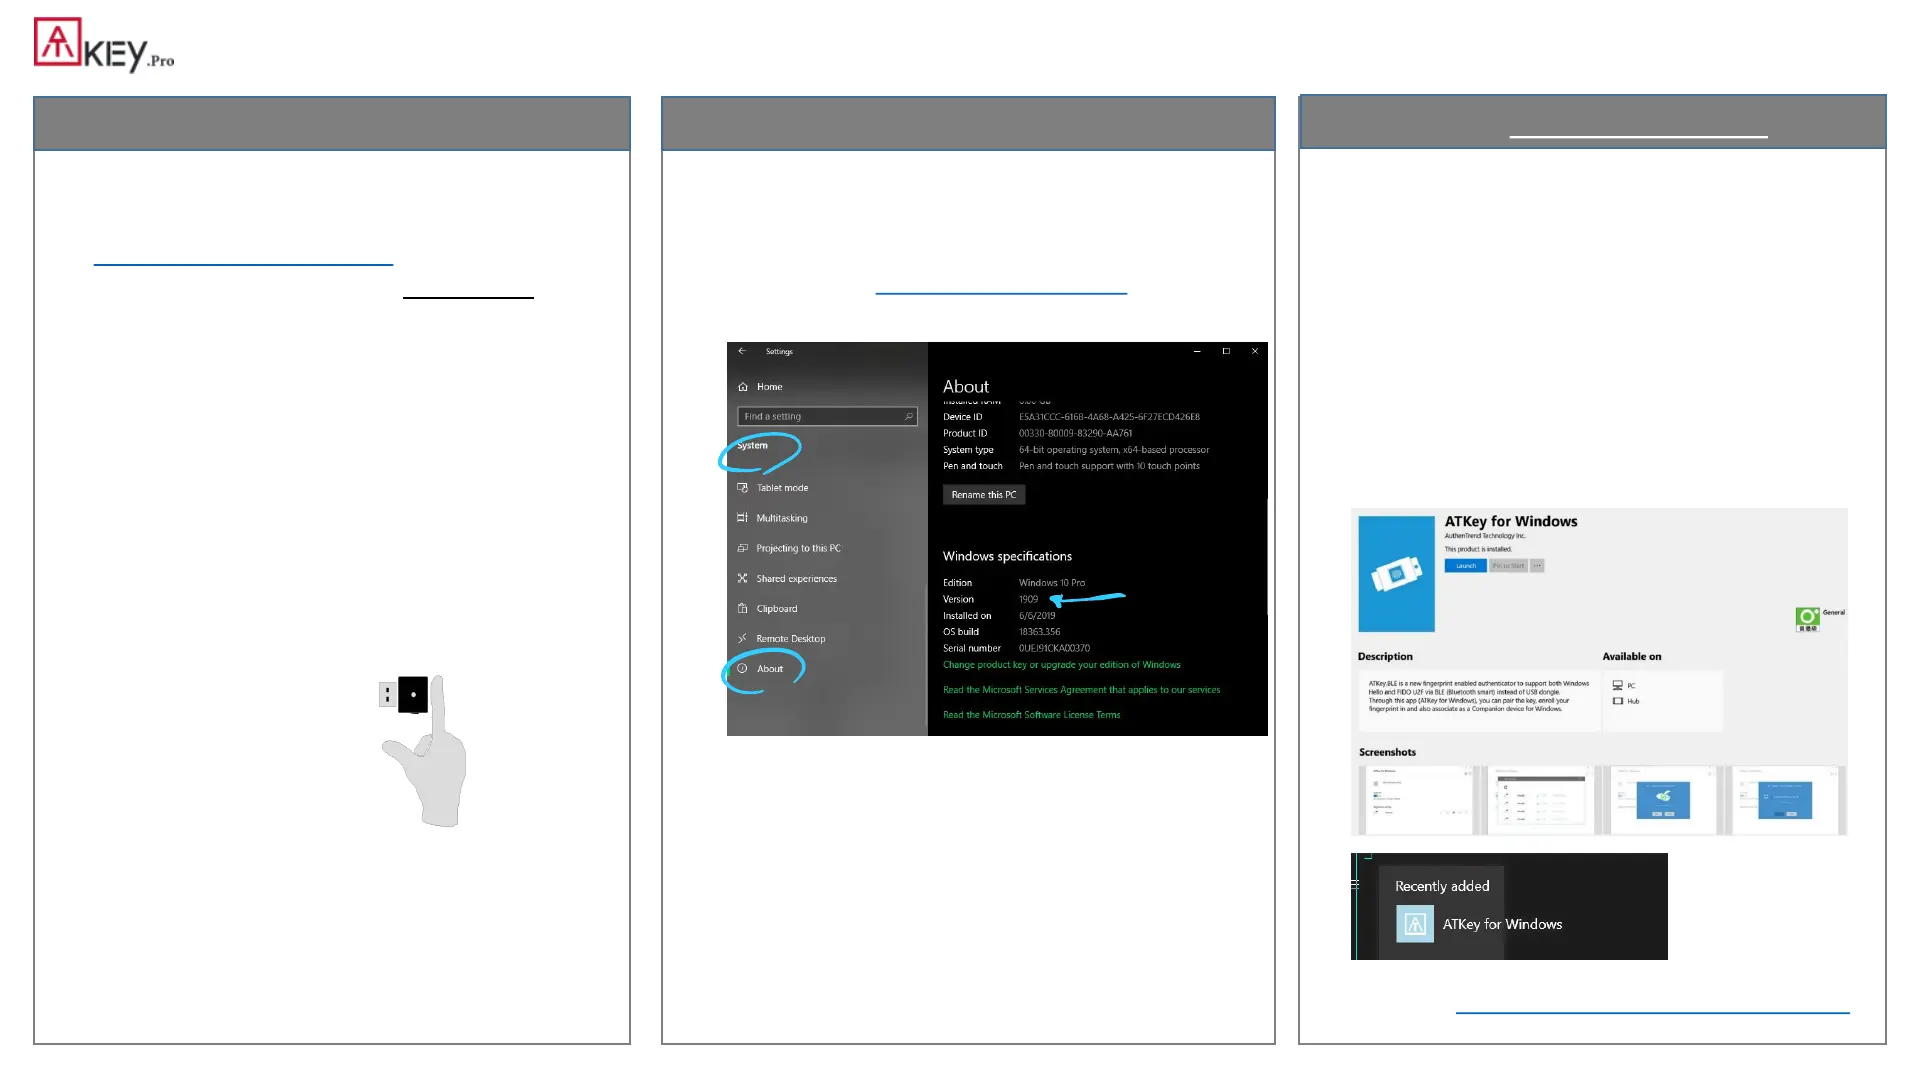
• If your OS is Windows 10 build 1903 or later
versions, you can manage ATKey as security key
• PIN code, add/delete fingerprints, reset
• jump to “Windows Settings” page for the detail
• Windows Settings => System => About
• Download “ATKey for Windows” app from
Windows Store to manage ATKey:
• Enroll fingerprint
• Add/delete fingerprint
• ATKey information
• Companion ATKey to Windows (Windows
Hello login)
• Firmware upgrade
• Search “ATKey” or “AuthenTrend” from
Windows Store to find the app, download
and install
• Jump to “ATKey for Windows” for the detail
Standalone enrollment Enroll from Windows Settings
Enroll from ATKey for Windows app