4
Installation of the control panel .
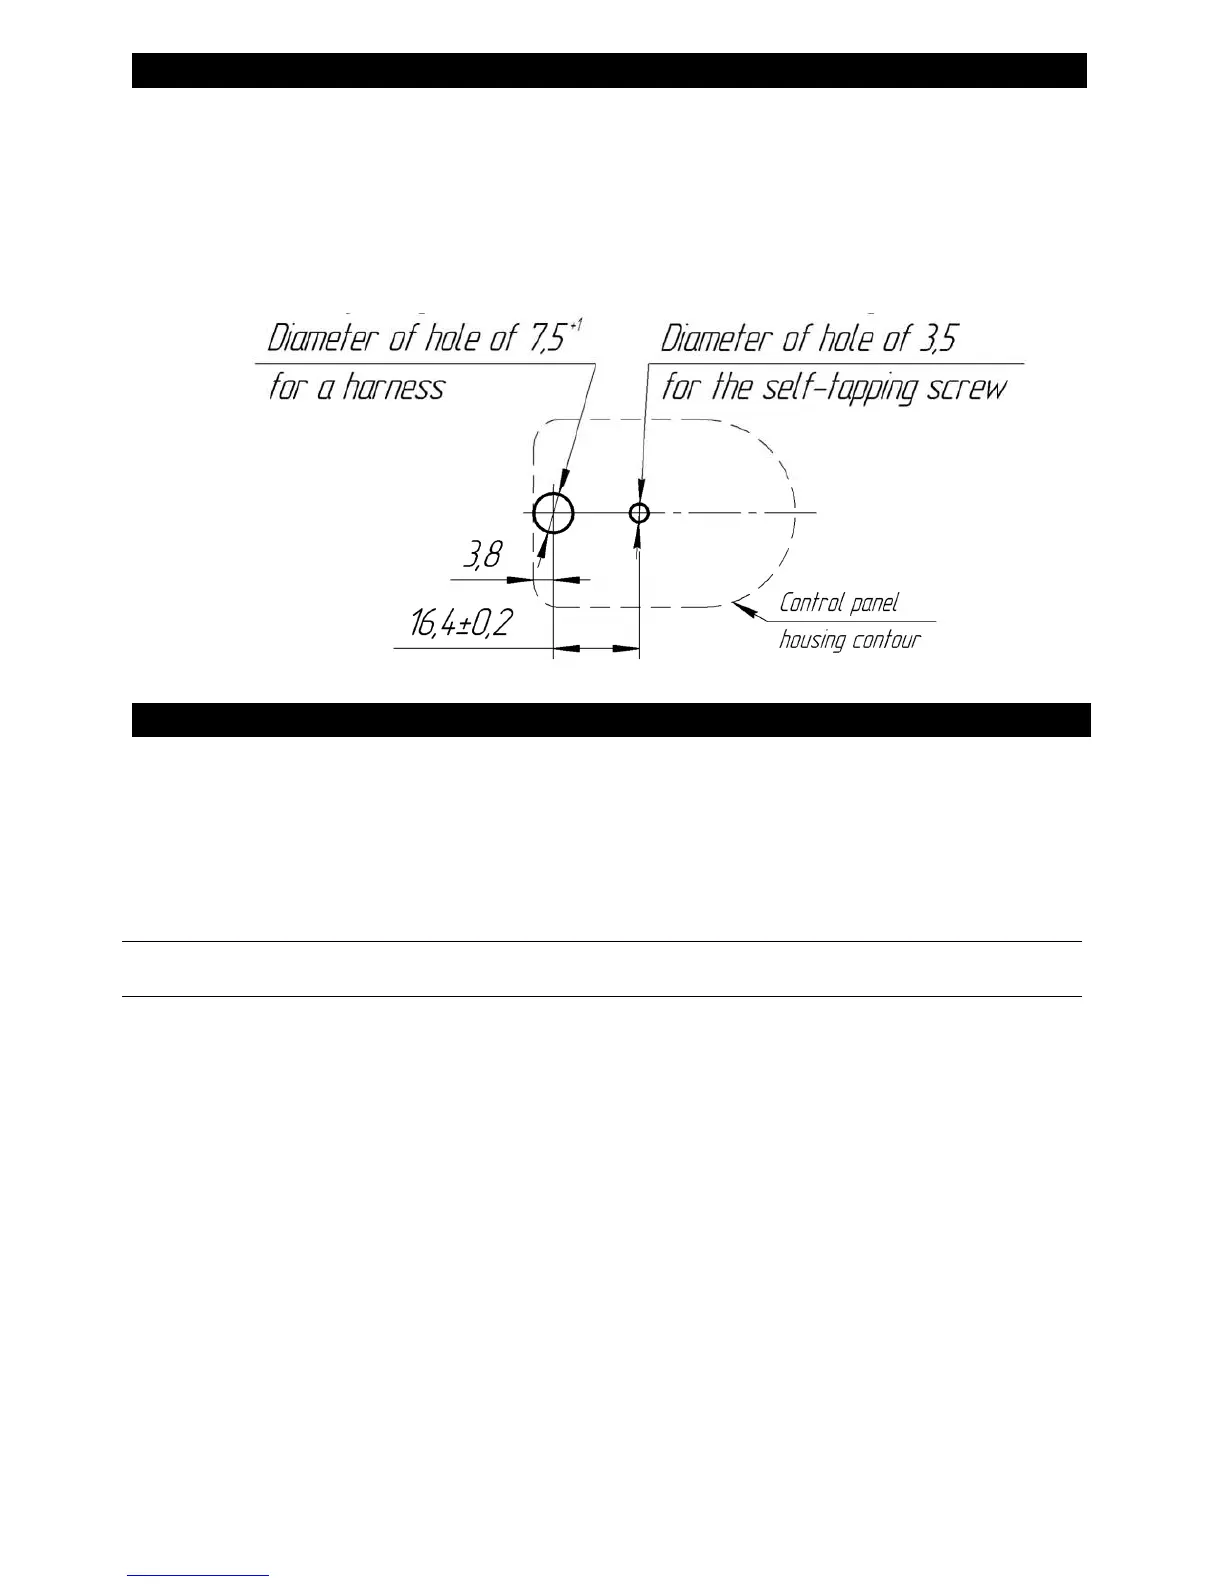
- Apply a marking (see. Fig.1) on a surface for installation of the control panel (a hole
for a harness and a hole for the self-tapping screw).
- Pull and dismantle the potentiometer knob. Before dismantling the potentiometer's
knob remember orientation of the knob relative to the mark on the control panel.
- Install the control panel on a surface and secure it with a self-tapping screw.
- To install the potentiometer handle in former situation (which you remembered
before), insert an edge of a plastic detail in the knob with a cuts into a potentiometer's shaft.
Fig.1
Operating modes .
“power”
(if the interior sensor
is not connected)
designed for quickest possible heating of the space;
the heater operates continuously at a set power.
“temperature”
(if the interior sensor
is connected)
designed to heat the space to the required temperature;
heat output decreases as the difference between the desired
temperature and the temperature in the space decreases.
“ventilation”*
designed for air circulation in the space
“Ventilation during
heating” function
(if the interior sensor
is connected)
after the required temperature is reached, the space heating
is stopped and space air circulation is performed;
controls the space temperature; if the temperature drops
below the set point, the heater will start in heating mode.
 Loading...