EasyManua.ls Logo

Avalon A6BLWTRCLRWHT - User Manual

Avalon A6BLWTRCLRWHT
11 pages
Print Icon
To Next Page IconTo Next Page
Loading...
2 0 1 7 - 3 - 3 1
YL1660S
105
145*210m m
1 6 1 6 3 0 0 0 A 1 2 4 2 1

Other manuals for Avalon A6BLWTRCLRWHT

Question and Answer IconNeed help?

Do you have a question about the Avalon A6BLWTRCLRWHT and is the answer not in the manual?

Summary

Water Dispenser Parts Identification

Safety Precautions

Critical Safety Warnings

User must read entire guide before operating to reduce risk of injury and property damage.

General Safety Guidelines

Exercise basic safety precautions including proper assembly, indoor use, and safe placement.

Getting Started

Locate and Assemble Dispenser

Place dispenser upright on a level surface, ensure proper ventilation, and assemble with accessories.

Install Water Bottle

Steps to install a water bottle, including probe assembly and securing the bottle.

Powering On and Activation

Plug in dispenser, allow time for initial water transfer, and activate heating/cooling switches.

Dispensing Water

Dispensing Cold Water

Instructions for dispensing cold water, noting initial cool-down time.

Dispensing Room Temperature Water

Steps to dispense water at room temperature using the normal water control.

Dispensing Hot Water

Procedure for dispensing hot water, including initial heating time and control usage.

Changing Water Bottles

Guidance on replacing an empty water bottle, including probe handling and bottle placement.

Troubleshooting Common Issues

Water Leaks and No Water Flow

Solutions for water leakage and issues with no water coming from the spout.

Temperature Problems

Diagnosing and resolving issues with cold or hot water not reaching the desired temperature.

Noisy Dispenser

Troubleshooting tips for a noisy water dispenser, often related to placement.

Cleaning and Maintenance

Cleaning Procedures

Step-by-step instructions for cleaning the water dispenser, including draining.

Sanitizing and Mineral Deposit Removal

Guidance on sanitizing the unit every three months and removing mineral deposits every six months.

Machine Installation

Optional Bracket Installation

Instructions for installing an optional bracket to prevent dispenser swaying or falling.

Overview

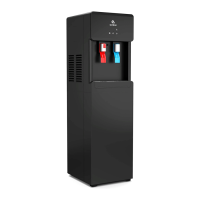
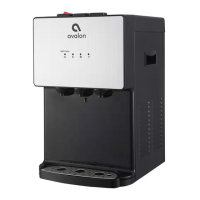
This document outlines the features, usage, and maintenance of the Avalon A6BLWTRCLRWHT Water Dispenser, a bottom-loading unit designed for convenient access to hot, cold, and room temperature water. The dispenser is intended for indoor household and similar applications, including kitchen areas in shops, offices, hotels, motels, and other residential or catering environments. It is crucial to read the entire guide before assembly, installation, or operation to prevent injury or property damage.

Function Description

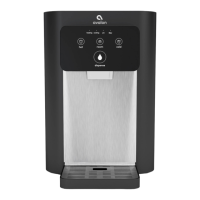
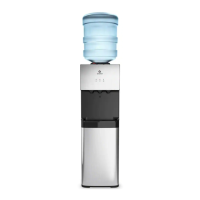
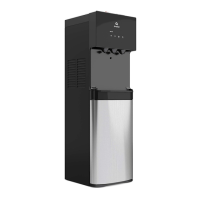
The Avalon A6BLWTRCLRWHT is a water dispenser that provides three temperature options: hot, cold, and room temperature water. It features a bottom-loading design, which eliminates the need to lift heavy water bottles onto the top of the unit, making bottle replacement easier and safer. The dispenser is equipped with a self-cleaning function, enhancing hygiene and reducing manual cleaning efforts.

The core function of the dispenser involves drawing water from a 3 or 5-gallon bottle located in the bottom cabinet. A probe assembly is inserted into the water bottle, and a pump then moves the water to internal tanks for heating or cooling. The unit's compressor works to chill water to its maximum cold temperature, while a heating element provides hot water. Room temperature water is also available directly from the bottle.

Safety is a key aspect of its design, particularly concerning hot water dispensing. The hot water tap includes a red button that needs to be slid away before depressing the control, acting as a child safety lock to prevent accidental dispensing of very hot water, which can reach approximately 185°F (85°C).

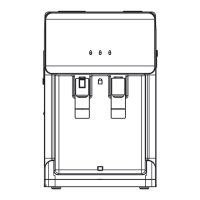
The dispenser also incorporates indicator lights to provide feedback on its status. A "Water Shortage Pilot Lamp" alerts the user when the water bottle is empty, signaling the need for replacement. A "Power/Ozone Pilot Lamp" indicates the unit's power status and the activation of the self-cleaning (ozone) function. Separate pilot lamps for heating and cooling indicate when these functions are active. An LED night light is also integrated for visibility in low-light conditions.

Usage Features

Operating the Avalon A6BLWTRCLRWHT is straightforward, but requires adherence to specific steps for optimal performance and safety.

Installation and Setup:

  1. Placement: The dispenser must be placed upright on a hard, flat, and level surface in a cool, shaded location. It requires at least 20cm of clearance from the wall at the back and 20cm on both sides to ensure proper airflow for the condenser and prevent overheating.
  2. Power Connection: The unit must be plugged into a properly grounded wall outlet. Extension cords are not recommended. It is important not to plug in the power cord until the water bottle is installed.
  3. Water Bottle Installation:
    • Open the cabinet door at the bottom of the dispenser.
    • Place the probe assembly on its hanger.
    • Remove the entire plastic cap from a fresh 3 or 5-gallon water bottle and clean the bottle's exterior.
    • Insert the probe into the bottle, sliding the collar down until it clicks into place, then push the head down until the tube reaches the bottom of the bottle.
    • Slide the bottle into the cabinet and close the door.
  4. Initial Fill: Once plugged in, the pump will begin to fill the hot and cold tanks, which can take up to 12 minutes. The pump running continuously during this period is normal.
  5. Activation of Heating and Cooling: The dispenser will not dispense hot or cold water until the respective switches are activated. These switches are located on the back of the machine. Push the top side of the power switches to activate heating and cooling. If hot or cold water is not desired, push the bottom side of the corresponding switch.

Dispensing Water:

  • Cold Water: Position a container below the cold water spout and depress the cold water control downward. Release once the desired fill level is reached. It may take up to an hour for the water to reach maximum cold temperature after initial setup.
  • Room Temperature Water: Position a container below the room temperature water spout and depress the control downward. Release once the desired fill level is reached.
  • Hot Water: For hot water, slide the red safety button away from you, then depress the hot water control downward. Release once the desired fill level is reached. Hot water will be available approximately 15-20 minutes after activation.

Changing Water Bottles:

The "Water Shortage Pilot Lamp" (flashing red light) indicates an empty bottle.

  1. Open the cabinet door and slide out the empty bottle.
  2. Remove the probe assembly from the empty bottle and place it on the probe hanger.
  3. Replace with a fresh bottle, following the installation steps above. Important: Do not dispense hot, cool, or cold water when the red light is flashing, as this could empty the tanks and cause the dispenser to overheat.

Self-Cleaning Function:

The self-cleaning cycle is activated by pressing the black switch on the back of the machine, holding it for 5 seconds, and then releasing it. This feature uses ozone to sanitize the internal water paths.

Maintenance Features

Regular maintenance is essential for the longevity and hygienic operation of the Avalon A6BLWTRCLRWHT water dispenser.

Cleaning:

  1. Safety First: Always ensure the power switch is in the "O" (off) position and the dispenser is unplugged before any cleaning operation to avoid accidents.
  2. Disassembly for Cleaning:
    • Twist out the two screws on the top cover.
    • Remove the top cover, cold tank cover, and separator.
  3. Internal Cleaning: Fill the cold tank with 2.2 liters of pure water to clean it.
  4. Draining: Place a large bucket beneath the drain outlet at the back of the dispenser. Remove the drain cover and allow the water to drain completely.
  5. Reassembly: Reposition the drain cover, separator, cold tank cover, and top cover, ensuring all pipes and wires are properly connected.
  6. Sanitizing: The machine should be sanitized with a disinfectant every three months. The self-cleaning function (ozone) can be used for this purpose.
  7. Mineral Deposit Removal: To remove mineral deposits, mix 4 liters of water with 200 grams of citric acid crystals. Pour this mixture into the machine, ensuring it can flow out of the hot water tap. Switch on the power and heat for about 10 minutes. After 30 minutes, drain the liquid and rinse the machine two or three times with clean water. This process should be done every six months. It is crucial not to disassemble the machine yourself for this process to avoid damage.

Troubleshooting:

The manual provides guidance for common issues:

  • Water Leaking: Unplug, remove, and replace the bottle.
  • No Water from Spout: Check if the bottle is empty and ensure push-button controls are fully depressed.
  • Cold Water Not Cold: Allow up to one hour for initial cooling. Verify the power cord connection, ensure adequate clearance around the dispenser (20cm on back and sides), and check if the green power switch is ON. If issues persist, contact an authorized service agent.
  • Hot Water Not Hot: Allow 15-20 minutes for initial heating. Verify the power cord connection and ensure the red power switch is ON.
  • Dispenser Noisy: Ensure the dispenser is positioned on a level surface.

Important Safety Precautions for Maintenance:

  • Cleaning should only be performed by someone with experience or an authorized service agent.
  • Exercise extreme caution when dealing with hot water, as it can cause severe burns.
  • Never turn the machine upside down or lean it more than 45 degrees.
  • If the machine is blocked by ice due to freezing temperatures, turn off the cooling switch for 4 hours before restarting.
  • Always wait at least 3 minutes after turning off the power switch before turning it back on.
  • Do not store explosive substances near the appliance.
  • If the supply cord is damaged, it must be replaced by a special cord assembly available from the manufacturer or its service agent.
  • Service should only be performed by a certified technician.
  • Do not damage the refrigerant circuit.

Optional Bracket Installation:

To prevent the machine from swaying or falling, an optional bracket is included. This involves loosening a screw on the bottom angle of the dispenser, fixing the bracket with the screw, making a hole on the floor, and then screwing the bracket tightly to the floor. This ensures the appliance is fixed in accordance with stability instructions.

By following these guidelines, users can ensure the safe, efficient, and long-lasting operation of their Avalon A6BLWTRCLRWHT water dispenser.

Avalon A6BLWTRCLRWHT Specifications

General IconGeneral
Hot/Cold Temp Output1.2L/min / 1.2L/min
Hot Water Capacity4 L/H ( ≥ 185°F)
Hot Tank Volume1.16 Liters
Cold Water Capacity2.5 L/H ( ≤ 47°F)
Cold Tank Volume3.6 Liters
Voltage/Frequency115 V 60Hz
Heating Watts / Cooling Watts420W / 100 W
Power Consumption520 W
Cooling MethodCompressor
Heating MethodInternal Element
Weight and Dimensions IconWeight and Dimensions
Product Size13”(L)x12”(W)x41”(H)
Packing Size15.5”(L)x14.2”(W)x46”(H)
Net Weight/Gross Weight36.15 lb /40.5 lb

Related product manuals