This document is a user manual for Avantco Commercial Refrigerators and Freezers, specifically covering Refrigerated Pizza Prep Units and Refrigerated Sandwich Prep Units.
Function Description:
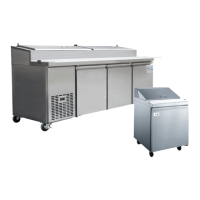
The Avantco Commercial Refrigerators and Freezers are designed for commercial use in food service establishments. The Refrigerated Pizza Prep Units (models 178PICL1, 178PICL2, 178PICL3) and Refrigerated Sandwich Prep Units (models 178SSPT27, 178SSPT36, 178SSPT48, 178SSPT60, 178SSPT71, 178SSPT27M, 178SSPT36M, 178SSPT48M, 178SSPT60M, 178SSPT71M) are specialized refrigeration units intended for preparing pizzas and sandwiches, respectively, while keeping ingredients chilled and accessible. These units feature a refrigerated top section for food pans and a refrigerated cabinet below for storage. The units are pre-programmed to maintain optimal temperatures for food safety, with refrigerators cycling between 33°F and 40°F, and freezers between -5°F and 2°F. They are equipped with digital controls for temperature adjustment and automatic defrost cycles.
Important Technical Specifications:
The manual provides detailed food pan layouts for various models, indicating the number and size of food pans they can accommodate.
-
Refrigerated Pizza Prep Units (PICL Series):
- 178PICL1: Accommodates (6) 1/3 size pans. Dimensions for the pan area are approximately 42.3" in length and 13.25" in width.
- 178PICL2: Accommodates (9) 1/3 size pans. Dimensions for the pan area are approximately 63.3" in length.
- 178PICL3: Accommodates (12) 1/3 size pans. Dimensions for the pan area are approximately 84.5" in length.
- Food pan divider bars for PICL models:
- 178PICB15331: 13" x 9/16" (2 for PICL1, PICL2, PICL3)
- 178PICB25331: 13" x 1" (5 for PICL1, 8 for PICL2, 11 for PICL3)
-
Refrigerated Sandwich Prep Units (SSPT Series):
- 178SSPT27: Accommodates (6) 1/6 size and (2) 1/9 size pans. Pan area is approximately 24.25" long and 14.5" wide.
- 178SSPT36: Accommodates (10) 1/6 size pans. Pan area is approximately 33" long and 14.5" wide.
- 178SSPT48: Accommodates (12) 1/6 size and (6) 1/3 size pans. Pan area is approximately 42.5" long and 13.375" wide.
- 178SSPT60: Accommodates (16) 1/6 size and (8) 1/3 size pans. Pan area is approximately 56.25" long and 13.375" wide.
- 178SSPT71: Accommodates (18) 1/6 size and (9) 1/3 size pans. Pan area is approximately 66" long and 13.375" wide.
- Food pan divider bars for SSPT models:
- 178PTB15354: 13 15/16" X 9/16" (2 for SS-PT-27, SS-PT-36)
- 178PTB15327: 12 7/8" x 9/16" (2 for SS-PT-48, SS-PT-60, SS-PT-71)
- 178PTB25354: 13 15/16" x 1" (3 for SS-PT-27, 4 for SS-PT-36)
- 178PTB25327: 12 7/8" x 1" (5 for SS-PT-48, 7 for SS-PT-60, SS-PT-71)
- 178PTB90354: 12 7/8" x 3/16" (1 for SS-PT-71)
-
Refrigerated Sandwich Prep Units (SSPT-M Series):
- 178SSPT27M: Accommodates (9) 1/6 size and (3) 1/9 size pans. Pan area is approximately 24.25" long and 21.5" wide.
- 178SSPT36M: Accommodates (15) 1/6 size pans. Pan area is approximately 33" long and 21.5" wide.
- 178SSPT48M: Accommodates (18) 1/6 size pans. Pan area is approximately 42.25" long and 21.5" wide.
- 178SSPT60M: Accommodates (24) 1/6 size pans. Pan area is approximately 56.25" long and 21.5" wide.
- 178SSPT71M: Accommodates (30) 1/6 size pans. Pan area is approximately 66" long and 21.5" wide.
- Food pan divider bars for SSPT-M models:
- 178PTB15532: 20 15/16" X 9/16" (2 for SS-PT-27M, SS-PT-36M)
- 178PTB25532: 20 15/16" x 1" (3 for SS-PT-27M, 4 for SS-PT-36M, 6 for SS-PT-48M, 8 for SS-PT-60M, 11 for SS-PT-71M)
- 178PTB90532: 20 15/16" x 3/16" (1 for SS-PT-48M)
- 178PTB10853: 20 15/16" x 4 1/4" (1 for SS-PT-60M)
The units feature Refrigerant LED (compressor on), Fan LED (fan on), and Defrost LED (defrost cycle running) indicators. They are designed for indoor, well-ventilated use, requiring a minimum 4-inch clearance at the back for optimal performance. Electrical requirements include a grounded and properly-sized dedicated electrical outlet with appropriate overcurrent protection.
Usage Features:
- Installation Guidelines: Units should stand still for a minimum of 24 hours after transport on their side before plugging in. Proper ventilation is crucial, with a 4-inch clearance at the back. All accessories (shelves, shelf clips, casters) must be installed before operation. The unit should be placed on strong, leveled surfaces in an indoor, well-ventilated area, away from high humidity, dust, and heat/moisture-generating equipment. Operating in areas over 80°F (or 90°F with the lid open) can lead to malfunction and void the warranty.
- Temperature Controls: The units come factory-set to optimal temperatures (33-40°F for refrigerators, -5-2°F for freezers). Users can adjust the minimum temperature using digital controls by holding "SET" for 1 second, using arrow buttons to change the value, and pressing "SET" again to save. It's important to account for a potential +7°F fluctuation above the set minimum temperature due to compressor cycling.
- Loading Product: Shelves must be securely fastened and level. To ensure proper airflow, a 2-4 inch space should be maintained between the back wall and stored product, preventing blockage of evaporator fans.
- Defrost Cycle: Units are pre-programmed for automatic defrost. A manual defrost cycle can be initiated on refrigerators by pressing the defrost button (snowflake symbol and down arrow) for approximately 3 seconds; repeating the action stops the cycle. Freezer coils are defrosted electrically.
- Loading Food Pans: Pizza and sandwich prep units are designed to function with all pans in place, even if some are empty. For maximum freshness, pans should be filled with an amount of food that can be used within a specific usage period. The insulated lid cover should be closed during non-use.
- Safety Precautions: Emphasizes unplugging the cord before maintenance or cleaning, avoiding wet hands when plugging/unplugging, and ensuring proper grounding. Users are warned against overloading outlets, using extension cords, putting hands under the unit while moving, and attempting unauthorized repairs. Flammable/explosive materials should not be stored inside.
Maintenance Features:
- Condenser Coil Cleaning: For efficient operation, the condenser surface should be kept free of dust, dirt, and lint. It is recommended to clean the condenser coil and fins at least once per month using a commercial condenser coil cleaner. Fins should be brushed from top to bottom, not side to side, and any bent fins straightened with a fin comb.
- Fan Blades and Motor Cleaning: Fan blades and motor should be cleaned with a soft cloth. If washing the fan blades, the fan motor must be covered to prevent moisture damage.
- Interior Cleaning: The cabinet interior should be cleaned with warm water and mild soap. Abrasive cleaners, steel wool, caustic soap, or bleach should not be used as they can damage the stainless steel surface.
- Door Gasket Maintenance: Door gaskets should be washed regularly (preferably weekly). They can be removed from the door frame, soaked in warm water and soap for 30 minutes, dried with a soft cloth, and then replaced. After replacement, ensure proper sealing.
- Shelf and Pilaster Cleaning: Shelves and pilasters should be periodically removed and cleaned with mild soap and warm water. To remove pilasters, first remove shelves and shelf brackets, then lift the pilaster up and out.
Troubleshooting:
The manual includes a troubleshooting guide for common issues:
- Compressor Not Running: Check for blown fuses/tripped circuit breakers, unplugged power cord, thermostat set too high, or if the unit is in a defrost cycle.
- Condensing Units Run For Long Periods of Time: Could be due to excessive warm product, prolonged door opening, improperly sealing door gaskets, dirty condenser coil, or iced-over evaporator coil.
- Cabinet Temperature is too Warm: Possible causes include thermostat set too warm, blocked airflow, excessive warm product, blown fuse/tripped circuit breaker, dirty condenser coil, or iced-over evaporator coil.
Units are backed by a 1-year parts and labor warranty and a 5-year warranty on the compressor. For warranty inquiries, users need to provide the model number, cabinet serial number (found on the front or inside the door jamb), and the bold number on the service plate (on the front of the unit). The warranty is not applicable to products sold or used outside the United States. Avantco assumes no liability for residential users installing units in non-commercial applications.