EasyManua.ls Logo

Avanti AV-HVLP-5S - User Manual

Avanti AV-HVLP-5S
24 pages
Print Icon
To Next Page IconTo Next Page
Loading...
!"#"$%&'(%)*+#"$*%,$-%.$$/-00)))1.,(+&(2(*"3.$14&5
65,"7%&'(%$*4.8"4,7%#'//&($%,$-%/(&9'4$#'//&($:.,(+&(2(*"3.$14&5
Owner’s Manual & Safety Instructions
Save This Manual Keep this manual for the safety warnings and precautions, assembly,
operating, inspection, maintenance and cleaning procedures. Write the product’s serial number in the
back of the manual near the assembly diagram (or month and year of purchase if product has no number).
Keep this manual and the receipt in a safe and dry place for future reference. 20l
When unpacking, make sure that the product is intact
and undamaged. If any parts are missing or broken,
please call 1-888-866-5797 as soon as possible.
Copyright
©
2020 by Harbor Freight Tools
®
. All rights reserved.
No portion of this manual or any artwork contained herein may be reproduced in
any shape or form without the express written consent of Harbor Freight Tools.
Diagrams within this manual may not be drawn proportionally. Due to continuing
improvements, actual product may differ slightly from the product described herein.
Tools required for assembly an d se rv ic e may n ot b e in cl uded.
Read this material before using this product.
Failure to do so can result in serious injury.
SAVE THIS MANUAL.
NOTICE
;<6=>%?@@6A?=B6<C
;7*,8%$.*%D/(,E%F'8%
?@@6A?=B6<C%,2$*(%6!6GC%
'#*%,89%).*8%"$%)"77%+*%"97*%
2&(%5&(*%$.,8%HI%5"8'$*#1
A*7,E*9%&(%"8,9*J',$*%
47*,8"83%)"77%/*(5,8*8$7E%
47&3%$.*%D/(,E%F'81
Question and Answer IconNeed help?

Do you have a question about the Avanti AV-HVLP-5S and is the answer not in the manual?

Summary

Owners Manual and Safety Instructions

Manual Usage and Storage

Keep this manual for safety, assembly, operating, inspection, maintenance and cleaning procedures.

Product Identification

Record the product's serial number or purchase date for reference.

Safety Information and Symbols

Warning Symbols and Definitions

Explains safety alert symbols and their meanings for hazard identification.

Personal Safety Precautions

Provides essential safety guidelines for operating the tool safely and preventing injury.

Tool Usage and Specific Safety

Safety Equipment and Usage

Details required safety equipment like gloves, respirators, and eye protection.

Tool Use, Care, and Service

Instructions on proper tool handling, adjustments, storage, and service by qualified personnel.

Specific Safety Instructions

Crucial safety directives regarding electric shock, explosion, spray hazards, and chemical use.

General Operational Safety

Electrical Safety and Handling

Precautions against electric shock, proper storage, and handling of the tool.

Operational Safety Measures

Safety measures for accessories, labels, unattended use, and pacemaker considerations.

Common Sense in Operation

Emphasizes understanding warnings and using common sense for safe operation.

Symbol Reference Guide

Symbol Definitions

Explains the meaning of various symbols used in the manual for safety and operation.

Electrical Grounding Requirements

Grounding Instructions

Explains the importance of grounding for reducing electric shock risk.

Three Prong Plug Connection

Details proper connection of grounded tools with three-prong plugs to outlets.

Specifications and Accessories

Extension Cord Guidelines

Recommendations for selecting and using extension cords based on gauge and length.

Product Specifications

Lists electrical ratings, cup capacity, and tip sizes for the sprayers.

Nozzle Chart

Details nozzle sizes and their corresponding material thickness compatibility.

Setup and Component Identification

Before Use Setup Procedures

Read safety information before setting up or using the product.

Components and Controls Overview

Identifies the main parts and controls of the spray gun and turbine unit.

Assembly Instructions

Connecting the Air Hose Assembly

Instructions for threading the air hose onto the spray hose outlet.

Attaching the Spray Gun to Hose

Steps to connect the spray gun coupler to the air hose coupler.

Accessory Storage Compartment

Information on using the compartment to store nozzle-needle sets and wrench.

Operating Instructions and Setup

Pre-Operation Safety Checks

Inspect tool before use for damage, loose or missing parts.

Initial Use Preparation

Clean spray gun thoroughly before first use and prepare the work area.

Work Area Setup

Designate a clean, well-lit work area and mask nearby objects.

Pre-Cleaning and Waste Management

Pre-Cleaning Process

Steps for preparing the spray gun for use, including solvent flushing.

Solvent, Paint, and Safety

Guidelines on safe solvent and paint types, and avoiding immersion of the gun body.

Waste Disposal Procedures

Proper methods for disposing of cleaning waste according to manufacturer and local standards.

Spray Gun Setup and Adjustment

Paint Preparation and Filling

Instructions for thinning paint and filling the spray gun cup.

Fan Pattern Adjustment

How to adjust the spray pattern (cone, horizontal, vertical) for different models.

Fluid and Air Control Adjustment

Fluid;Air Adjustment Steps

Steps to adjust fluid and air control knobs for desired spray consistency.

Spraying Techniques and Tips

Proper Spraying Techniques

Guidance on gun angle, distance, speed, and avoiding wrist pivoting.

Preventing Paint Build Up

Tips for applying thin coats, overlapping, and trigger control to prevent build-up.

Pattern Adjustment for 58149

Specific instructions for adjusting the fan pattern size for model 58149.

After Use Maintenance

Post-Cleaning Procedures

Detailed steps for cleaning the spray gun parts after use.

Disassembly and Part Cleaning

Instructions for disassembling, cleaning, and inspecting individual spray gun parts.

Waste Disposal After Cleaning

Procedures for proper disposal of cleaning waste according to standards.

User Maintenance Procedures

General Maintenance and Safety

Procedures for qualified technicians and warnings about damaged equipment.

Pre-Use Inspection Checklist

Items to check before each use for safe operation, including cords, hardware, and parts.

Lubrication and Storage

Guidance on lubrication (none recommended) and proper storage of the tool.

Auto Shutoff Functionality

Explanation of the motor's thermal overload protection and how to reset it.

Component Maintenance and Replacement

Air Filter Maintenance

Instructions for removing, cleaning, and installing air filters.

Replacing the Air Tube

Steps for removing and installing a new air tube, noting orientation and lubricant use.

Spray Pattern Troubleshooting

Spray Pattern Diagnosis

Identifies common spray pattern problems, their causes, and likely solutions.

General Troubleshooting Guide

Troubleshooting Common Issues

Lists common issues like sputtering, no spray, and overspray with possible causes and solutions.

Parts Identification

Spray Gun Parts List

Comprehensive list of individual parts for the spray gun with descriptions and quantities.

Spray Gun Assembly Visualization

Spray Gun Assembly Diagram

Visual representation of the spray gun parts and their assembly order.

Sprayer Component Identification

Sprayer Parts List

List of parts for the main sprayer unit, including motors, housing, and accessories.

Serial Number Recording

Space provided to record the product's serial number or purchase date.

Sprayer Assembly Visualization

Sprayer Assembly Diagram

Visual guide illustrating the assembly of the main sprayer unit components.

Warranty Information

Limited 90 Day Warranty

Outlines the terms, conditions, and limitations of the product's 90-day warranty.

Overview

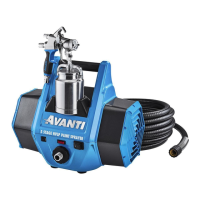
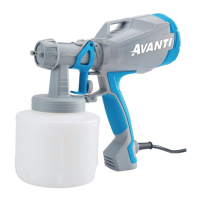
The Avanti 3 & 5 Stage HVLP Turbine Paint Sprayers are designed for applying various coatings, offering features for both professional and household use. This manual provides comprehensive instructions for safe operation, setup, maintenance, and troubleshooting.

Function Description:

These HVLP (High Volume Low Pressure) turbine paint sprayers are designed to atomize paint using a high volume of air at low pressure, resulting in a finer finish, reduced overspray, and more efficient material transfer compared to conventional spray guns. The "3 & 5 Stage" designation refers to the number of turbine stages, which typically correlates with the power and air volume produced, allowing for spraying a wider range of materials, from thin stains to thicker latex paints. The device is intended for applying water-based or oil-based paints and for cleaning with water or mineral spirits. It is crucial to clean the spray gun body and cup immediately after every use and when it will be idle for more than 30 minutes, as delayed or inadequate cleaning will permanently clog the spray gun. The turbine assembly should be kept in a well-ventilated area, at least 20 feet (6.1m) from the spraying area. The product is not a toy and should be kept out of reach of children.

Important Technical Specifications:

  • Electrical Rating:
    • 58479 (3 Stage): 120VAC/60Hz/11A
    • 58149 (5 Stage): 120VAC/60Hz/13A
  • Cup Capacity: 32 fl. oz.
  • Tip Size:
    • 58479 (3 Stage): 1.3mm
    • 58149 (5 Stage): 1.3mm & 1.8mm
  • Nozzle Chart (Material Thickness):
    • 0.8 mm: Thin
    • 1.3 mm: Medium
    • 1.8 mm: Thick
    • 2.2 mm: Thick
  • Extension Cord Requirements (120/240 Volt): The manual provides a detailed table for recommended minimum wire gauge based on nameplate amperes and cord length (25', 50', 75', 100', 150'). For example, for 0-2.0 amperes, an 18-gauge cord is recommended for lengths up to 100', and a 16-gauge for 150'. For 16.1-20.0 amperes, a 12-gauge cord is needed for 25' and 10'. These recommendations are based on limiting line voltage drop to five volts at 150% of the rated amperes.
  • Grounding: The product is designed for use on a nominal 120-V circuit and has a three-prong grounding plug. It must be connected to a properly grounded outlet.

Usage Features:

  • Setup and Assembly: The manual details how to thread the air hose onto the sprayer's outlet and attach the spray gun to the air hose using the coupler. The 58149 model includes an additional whip hose.
  • Accessory Storage: A compartment on the back of the sprayer is provided to store two nozzle-needle sets and a nozzle wrench.
  • Paint Preparation and Filling: Proper paint mixture and thinning according to the manufacturer's directions are essential. Paint should be strained through a paint strainer or cheesecloth and the cup filled 3/4 full.
  • Fluid/Air Adjustment: The Air Control Knob (clockwise until it stops for fully open) and Fluid Control Knob (counterclockwise until two threads are showing) are used to adjust the spray consistency. Adjustments should be made slowly on scrap material.
  • Fan Pattern Adjustment:
    • For 58149, the Lock Ring is loose, and the Air Cap is turned clockwise to select the desired fan pattern while keeping the Fluid Nozzle flush with the Air Cap.
    • For 58479, the Lock Ring is loosened by hand until the Air Cap moves freely, then the Air Cap is turned clockwise to select the desired fan pattern, and the Lock Ring is tightened.
    • Patterns include Cone, Horizontal, and Vertical.
  • Spraying Techniques:
    • Maintain the spray gun within 45° up or down from the workpiece.
    • Keep the cup full to prevent sputtering.
    • Move the arm, not just the wrist, pointing the gun directly towards the surface, maintaining an even, steady distance (6" to 8") and speed.
    • Avoid pivoting the wrist or waving the gun like a fan.
    • Apply two thin coats rather than one thick coat, overlapping 1/3 to 1/2 on the second coat.
    • Start moving the spray gun before fully depressing the trigger and release the trigger while still moving the spray gun and after passing the workpiece to avoid paint buildup.
    • Check the Fluid Nozzle regularly for dried paint to prevent clogs.
  • Safety Features:
    • Thermal Overload Switch: The motor has thermal overload protection. If the unit overheats, allow approximately 30 minutes for it to cool, then press the Thermal Overload Switch.
    • Air Filter Light (58149 only): If this light comes on, check the air filters.
    • Explosion Risk: Do not spray flammable liquids or liquids with a flash point less than 38°C (100°F). Work away from ignition sources and keep a class ABC fire extinguisher nearby.
    • Electric Shock Risk: Connect to a GFCI-protected outlet only. Do not expose to rain.
    • Injection Risk: Do not point the spray gun at people or animals. Seek medical attention immediately in case of skin injection.
    • Hazardous Materials: Do not spray pesticides, acids, corrosive materials, fertilizers, or toxic chemicals.
    • Personal Protective Equipment: Wear protective paint spraying gloves, a NIOSH-approved respirator, ANSI-approved safety goggles, non-skid safety shoes, and a hard hat as applicable.

Maintenance Features:

  • Pre-Cleaning: Before first use, the spray gun should be thoroughly cleaned using mineral spirits or water to remove testing and corrosion prevention material. The process involves filling the cup with solvent, spraying into a waste container, and then disassembling and drying the components.
  • Post-Cleaning (After Every Use):
    • Use solvent recommended by the paint manufacturer.
    • Remove paint from the cup and dispose of it properly.
    • Add solvent to the cup, shake, and spray into a waste container until clean solvent comes out.
    • Disassemble the spray gun: remove the Lock Ring, Air Cap, Air Valve, Spring (58149 only), Fluid Needle, Fluid Nozzle (using the included wrench), Fluid Control Knob, and Fluid Needle Spring.
    • Inspect parts and soak them in solvent. Use the included brush and nozzle cleaning tool to remove paint. Do not bend the Fluid Needle.
    • Wipe down the spray gun body with a clean cloth and solvent.
    • Ensure all parts are dry and free of residual paint before reassembly.
    • Crucially, do not use any kind of lubricant, as it will mix with paint and cause poor results.
  • Air Filter Maintenance:
    • Remove Air Inlet Covers by turning counterclockwise.
    • Remove and inspect Sponge Pre-Filters, Sponge Filters, and Paper Filters.
    • Clean Sponge Filters by washing in warm water and mild detergent, rinsing, squeezing out excess water, and allowing to dry completely.
    • Clean Paper Filters by blowing dust out with pressurized air (no more than 15 PSI) in a well-ventilated area, wearing safety goggles, a dust mask/respirator, and heavy-duty work gloves.
    • Replace filters if they cannot be cleaned sufficiently.
    • Install filters and replace Air Inlet Covers by turning clockwise.
  • Air Tube Replacement:
    • Remove the Air Tube from the spray gun and cup lid.
    • Orient the new Air Tube so the tapered end of the Check Valve faces down.
    • Push the ends of the new Air Tube over the fittings on the spray gun and cup lid. A small amount of water can be used as a lubricant.
  • Troubleshooting: The manual includes a comprehensive troubleshooting chart for common spray pattern issues (heavy center, light center, heavy top/bottom, pattern on right/left only, jerky/fluttering spray) and other problems (sputtering spray, will not spray, overspray, air filter light on). It lists possible causes and likely solutions for each issue.
  • Storage: Store the sprayer in a dry, secure area out of reach of children.
  • Waste Disposal: Dispose of waste according to solvent manufacturer's directions and local hazardous waste standards.

Avanti AV-HVLP-5S Specifications

General IconGeneral
BrandAvanti
ModelAV-HVLP-5S
CategoryPaint Sprayer
LanguageEnglish

Related product manuals