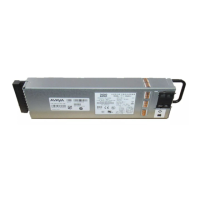
• EC7205C0F-E6 — 800W AC POWER SUPPLY FRONT2BACK COOLING (UK PC)
• EC7205D0B-E6 — 800W AC POWER SUPPLY BACK2FRONT COOLING (JP PC)
• EC7205D0F-E6 — 800W AC POWER SUPPLY FRONT2BACK COOLING (JP PC)
• EC7205E0B-E6 — 800W AC POWER SUPPLY BACK2FRONT COOLING (NA PC)
• EC7205E0F-E6 — 800W AC POWER SUPPLY FRONT2BACK COOLING (NA PC)
• EC7205F0B-E6 — 800W AC POWER SUPPLY BACK2FRONT COOLING (ANZ PC)
• EC7205F0F-E6 — 800W AC POWER SUPPLY FRONT2BACK COOLING (ANZ PC)
Before you begin
Remove the power cord before installing or removing the power supply.
Note:
The design of the latch mechanism that secures the power supply enforces this safety practice.
Procedure
1. If there is a power supply cover, remove it and save for possible future use. To remove the
cover, push the tab on the spring latch to the left and pull on the extraction handle.
Important:
If you only have one power supply installed, the other slot must be covered to ensure
proper ventilation. If a power supply fails, replace it as soon as you can but leave it in
place until you do. Leaving a power supply slot unpopulated impairs the ability of the
fans to cool the chassis.
Installing a power supply
November 2016 Installing the Avaya VSP 7200 Series 23
Comments on this document? infodev@avaya.com
 Loading...


