The AVerVision300AF+ is a versatile document camera designed to enhance presentations in various settings, including business, academic, medical, and scientific communities. It is capable of displaying documents, negatives, transparencies, and 3D objects onto a TV, LCD, or DLP projector, making presentations seamless and engaging.
Function Description
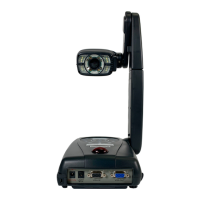
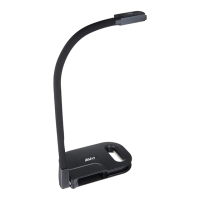
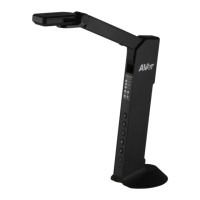
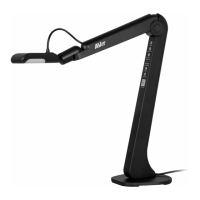
The core function of the AVerVision300AF+ is to capture and project images of physical objects. It features a camera head that can be rotated 135 degrees from left to right, allowing for flexible positioning. The mechanical arm is designed to project an image to its full height, accommodating full A4 paper landscape viewing. The device supports various output options, including VGA, S-Video, Composite Video, and DVI, ensuring compatibility with a wide range of display devices such as monitors, projectors, and TVs.
The AVerVision300AF+ can also function as a USB camera, allowing users to connect it to a computer for video recording and still image capture. Additionally, it has a built-in memory that can store captured images, which can then be downloaded to a PC via a USB connection. This feature is particularly useful for archiving presentations or incorporating images into digital documents.
For specialized applications, the document camera can be connected to a microscope, enabling users to examine microscopic objects on a large screen without eye strain. An optional light box can be used to view x-rays, transparencies, and negative slides, further expanding the device's utility.
Usage Features
The AVerVision300AF+ offers multiple ways to control its functions: an infrared remote control and a touch button control panel located on the top of the unit.
Remote Control: The remote control provides comprehensive access to the device's features.
- POWER: Turns the unit on/off.
- CAMERA MODE: Displays images from the document camera.
- PC MODE: Displays video signals from the VGA IN port, allowing for seamless switching between document camera and computer presentations.
- PLAYBACK MODE: Displays captured images from the built-in memory in either a 16-thumbnail mode or full-screen mode.
- EFFECTS: Changes the live image to black and white, negative, or color (camera mode only).
- TIMER: Displays, starts, and hides an on-screen countdown timer, which can be set for up to 120 minutes. This is a useful reminder feature for managing presentation time.
- REVERSE: Rotates the image by 180 degrees (camera mode only).
- NIGHT VIEW: Turns on/off Night View, which is useful for presentations in low-light conditions. The display image appears at a low frame rate in this mode.
- PAGE UP/DOWN: Navigates through sets of 16-thumbnail images in Playback mode.
- FREEZE: Toggles to pause or resume the display image (camera mode only).
- AUTO FOCUS: Adjusts the focus automatically.
- FOCUS (Manual): Allows for manual adjustment of the focus.
- ZOOM +/-: Digitally zooms in and out of pictures in Playback mode.
- ZOOM RESET: Returns to normal view (1x zoom).
- DELETE: Removes selected pictures from the built-in memory in Playback mode.
- Navigation Buttons (Up/Down/Left/Right/ENTER): Used for panning images when zoomed in, making selections in menus, and viewing selected images in thumbnail mode.
- MENU: Pulls up and exits the OSD (On-Screen Display) main menu and sub-menus.
- CAPTURE: Captures a still image and saves it to the built-in memory at 1024 x 768 resolution.
- MIRROR: Flips the image in Camera mode.
Touch Button Control Panel: This panel offers quick access to commonly used functions directly on the unit. It includes buttons for Camera Mode, PC Mode, Playback Mode, Capture/Delete, Effect, Freeze, Auto Focus, Zoom, and Menu, mirroring many of the remote control's capabilities for convenience.
OSD Navigation Tree: The OSD provides a structured way to access and adjust various settings, including brightness, contrast, zoom type (linear or fast), timer settings, image modes (text, graphics, high frame), effects (color, B/W, negative, mirror, reverse), default settings, exposure (auto, manual, flicker, night view), white balance (auto, manual, red, blue, measure), resolution (1024x768, 800x600, 640x480), language, format, and USB select (PC Camera or Image Download).
LED Lamp w/ Laser Positioning Pointer: A unique feature is the four laser positioning pointers that define the viewing area, helping users correctly position objects at the center. There are three light and laser positioning pointer settings: White LED and Document Positioning Pointer, Document Positioning Pointer, and White LED Only, with an option to turn off all lights.
Anti-glare Sheet: An anti-glare sheet is provided to eliminate glare when displaying shiny or glossy objects like magazines or pictures, improving image clarity.
Connectivity: The device supports active pass-thru connectivity for VGA signals, meaning the video signal from the VGA input port is continuously streamed to the VGA output port even when the AVerVision300AF+ is turned off. This allows for uninterrupted display of PC presentations.
RS-232C Connection: The AVerVision300AF+ can be controlled remotely using a PC via an RS-232C connection, offering advanced integration into control systems.
Maintenance Features
The manual provides troubleshooting tips for common issues:
- No picture on the presentation screen: Users are advised to check all cable connections, the on/off switch of the display device, display output device settings, and ensure the document camera source is set to PC Mode if presenting from a computer.
- Distorted or blurry image: Solutions include resetting settings to default, adjusting brightness and contrast, and using the Auto Focus button.
- No computer signal on presentation screen: Users should check cable connections, power on the PC after connecting to the AVerVision300AF+, and adjust display settings on the PC/Notebook to extend the desktop or clone the display.
- Image download issues: Instructions are provided on how to set the USB SELECT to "IMG DOWNLOAD" in the menu before connecting the USB cable to transfer captured images to a computer. The device automatically resets to camera mode after image download and USB cable disconnection.
The AVerVision300AF+ is designed for ease of use and versatility, making it a valuable tool for dynamic and interactive presentations.