This document is an operator's manual for the Avid Power 12V Cordless Drill/Driver, models ACD306-N and ACD306-P. It provides important safety instructions, precautions for the battery charger and drill, product specifications, component descriptions, operating procedures, adjustment guidelines, and maintenance information.
Function Description
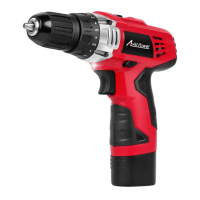
The Avid Power 12V Cordless Drill/Driver is a versatile electric tool designed for drilling and driving applications. It operates on a 12V battery pack, offering cordless convenience. The tool features a keyless chuck for easy bit changes, adjustable torque settings for various tasks, and a variable speed trigger for precise control. It is equipped with two gear ranges (low and high) to provide different levels of torque and speed, making it suitable for both heavy-duty work and lighter drilling tasks. A built-in work light illuminates the work area, and a forward/reverse switch allows for changing the rotational direction and also serves as a lock-off button.
Important Technical Specifications
- Model: ACD306
- Voltage: 12V
- Charge Time: 3 - 5 Hours
- Battery Capacity: 1.3Ah
- Keyless Chuck: 3/8'' (10mm)
- Adjustable Torque Setting: 15+1
- No Load Speed: 0-350RPM / 0-1250 RPM
- Weight: 3.1 pounds
- Product Dimensions: 9.2 x 8.9 x 2.9 inches
Usage Features
The drill/driver is designed for ease of use and versatility.
- Battery Installation/Removal: The battery pack is released by pressing tabs on both sides and pulling downward. To insert, align and slide the battery pack into the tool until it locks. It is crucial not to force the battery if the release tabs are cracked or damaged, as it could fall out during operation.
- Battery Charging: Before initial use, the battery should be charged for at least 6 hours. Subsequent normal charging time is 3-5 hours. Charging should occur at room temperature (between 32°F and 104°F). The charger has a green light for power indication and a red light for charge indication, which turns off when fully charged. Short charging periods should be avoided, and the battery pack should only be charged when completely empty. When charging multiple battery packs, a 15-minute interval between charges is recommended.
- Bit Installation: There are two methods for installing driver/drill bits.
- Method 1 (Manual Chuck Rotation): Rotate the keyless chuck anticlockwise by hand to open the jaws, insert the bit as far as it will go, then rotate the chuck clockwise by hand to tighten.
- Method 2 (Trigger-Assisted Chuck Operation): Move the forward/reverse button to the right for reverse rotation. Hold the keyless chuck with one hand and squeeze the trigger with the other to open the jaws. Carefully center the bit, then move the forward/reverse button to the left for forward rotation. Hold the keyless chuck and slowly squeeze the trigger until it locks in place.
- Reversing Switch: This switch controls the rotational direction (clockwise or anticlockwise) and acts as a lock-off button. It is advisable to change the direction only when the tool is at a standstill to prevent damage to the gearing. Forward rotation is selected by releasing the trigger and depressing the forward/reverse control button on the right side. Reverse rotation is selected by depressing the button on the left side. A click sound may be heard when starting the tool after changing direction, which is normal.
- Gear Shifting: The tool has two gear ranges:
- Low Gear: Provides high torque and slower drilling speeds, ideal for heavy-duty work or driving screws.
- High Gear: Offers faster speeds for quick drilling or driving applications.
- It is critical never to change speeds while the tool is running, as this can cause serious damage. If difficulty is encountered when shifting gears, turn the chuck by hand until the gears engage.
- Torque Adjustment Collar: The torque can be adjusted from 0-15 using the collar, which also features a drill bit symbol. Higher numbers correspond to higher torque and larger fasteners. A trial screw should be driven into the material to determine the appropriate torque level for a specific application.
- Trigger Switch: Squeezing the trigger turns the tool on, and releasing it turns it off. The chuck stops immediately upon release. This is a variable speed switch; squeezing it further increases the speed. Lower speeds are recommended for starting holes without a center punch, drilling in metals or plastics, or driving screws. For maximum tool life, variable speed should only be used for starting holes or fasteners.
- Built-in Work Light: The tool includes a light to illuminate the work area.
- Rubberized Grip: Provides a comfortable and secure hold during operation.
Maintenance Features
Proper maintenance ensures the longevity and safe operation of the drill/driver.
- Battery Removal: Always remove the battery before performing any maintenance or work on the machine.
- Cleaning: Use a dry or moist (but not wet) towel for cleaning. Avoid strong or flammable cleaners like gas, paint thinner, or turpentine, as these can damage plastic parts.
- Ventilation: Keep air ventilation holes free of dust to prevent overheating and ensure proper cooling.
- Housing and Handle: Keep the tool housing and handle clean and free of oil and grease by using mild soap and a damp cloth.
- Overloading: Avoid overloading the drill. If it becomes hot and loses efficiency, run it free of load for a minute or two to allow it to cool down.
- Cord Inspection: Regularly inspect the charger cord and have it replaced by an authorized repair facility if damaged.
- Lubrication: The tool is factory-lubricated, and additional lubrication should not be necessary under normal use.
- Repairs: Any repairs, modifications, or maintenance involving disassembly of the grinder should only be performed by an authorized repair center. Any damage to the tool should also be corrected by an authorized repair center.