EasyManua.ls Logo

AVIRE Memco Panachrome+ User Manual

Default Icon
51 pages
To Next Page IconTo Next Page
Page #1 background imageLoading...
Page #1 background image
2. Installation
1. Secure the Panachrome
+
Controller in a suitable position on top of car to avoid damage.
2. Connect the Controller with the correct supply voltage and Inputs (see Fig 3 below)
3. Once the detectors are installed (see detector installation guide) it is important to ensure that the detector cables &
travelling cables (015 455) are secured to the door correctly, and that the travelling cables are routed to the Controller
correctly.
4. Connect the Transmit (TX) and Receive (RX) leads into the Controller sockets (see Fig 4). Note: either socket can be
used as the intelligent software will recognise which detector is plugged in.
5. On completion, carefully open and shut the doors by hand to check the travelling cable (015 455) has a smooth free
movement and is not liable to snag on anything during normal operation, otherwise there is a risk of cables being
damaged by the lift doors or caught when the lift moves.
6. With correct operation the display will show the following for a short time:
Note: the number following TX/RX is the number of PCBs in each detector.
If dierent, then please check all connections.
7. The Green and Red Indicators will be operated by software but, if required, external signalling can be used (see Table 1
and Fig 5).
Note: Before installing make sure the units are compatible to ensure reliable and trouble-free
operation:
The Panachrome
+
Controller G3851 is designed to operate with both Panachrome
+
2D Detectors [G2510 & G2540] and
Panachrome
+
3D detectors [G3510 & G3540] - check you have the correct items.
Memco Panachrome
+
Universal Controller
Installation Guide
Ref No. G851 855ML GB Version 1
Panachrome
+
TX
5 RX 5
1. Connections
Covers
To access the connections on the Controller it is necessary to remove the end covers protecting the terminals.
The Right Hand Cover conceals the terminals for connecting the external speaker and detector sockets. The Left Hand
Cover is for the power, relays and external door signals (see Figs 1 and 2).
Question and Answer IconNeed help?

Do you have a question about the AVIRE Memco Panachrome+ and is the answer not in the manual?

AVIRE Memco Panachrome+ Specifications

General IconGeneral
CategorySecurity Sensors
Detection Height2000 mm
Operating Temperature-20°C to +55°C
Ingress Protection RatingIP65
Weight0.5 kg
TypeInfrared
TechnologyInfrared
Supply Voltage12-24V DC
ComplianceEN 81-20
MaterialAluminum

Summary

Connections and Installation

Covers and Terminals

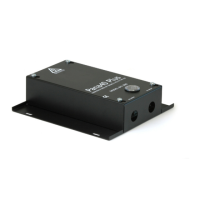
Details accessing controller terminals by removing end covers for connections.

Installation and Wiring

Power, Relays, and Door Signals

Explains power supply, relay functions, and external door signal connections via terminals.

Terminal Function Table

Provides a detailed table of terminal functions, power requirements, and signal comments for installation.

Detectors, Speaker, and Hub

External Signals Wiring

Menu Navigation Basics

Profile Selection and Tones

Explains profile selection for width and the audio tones used for menu navigation.

Menu Navigation Settings

Language, Quick Config, and Visible Diodes

Covers language selection, product configuration, and visible diode behavior settings.

Input Signals and Timing

Details configuration of external input signals (open/close) and diode timing parameters.

2D and 3D Detection Settings

2D Beam and Timeout Configuration

Settings for parallel beams, diagonal beams, 2D timeout, and beam timeout period.

3D Detection Modes and Sensitivity

Configuration of 3D detection enabling, modes, sensitivity, and timeout count.

Relay and Audio Configuration

Second Relay Options

Defines how the second relay functions, including mirroring the main relay or EN81-20 compliance.

Audio Feedback Settings

Controls beeper activation, speech output, and speaker selection.

Advanced Menu Options

Door Block and Cycle Settings

Configures door blocking announcements, voice intervals, and door cycle counting/posting.

Advanced Configuration Parameters

Covers diode configuration, profile selection, and display settings.

Firmware and Hub Communication

Firmware Versions and Screen Timeout

Displays firmware versions and configures screen timeout behavior.

Hub Connectivity and Shaft Settings

Manages GSM connection, DCP communication, and shaft/node numbering.

Detailed Mode Explanations

Visible Diodes Modes

Explains external input methods for visible diode response and nudging control.

3D Detection Modes

Details various 3D detection modes, their activation triggers, and timeouts.

Related product manuals